How to show save panel in AppKit
Issue #405
Enable Read/Write for User Selected File under Sandbox to avoid bridge absent error
1 | func save() { |
To save multiple files, use NSOpenPanel
1 | let panel = NSOpenPanel() |
Issue #405
Enable Read/Write for User Selected File under Sandbox to avoid bridge absent error
1 | func save() { |
To save multiple files, use NSOpenPanel
1 | let panel = NSOpenPanel() |
Issue #404
1 | let animation = CAKeyframeAnimation(keyPath: "position.y") |
Issue #403
The application sends this message to your delegate when the application’s last window is closed. It sends this message regardless of whether there are still panels open. (A panel in this case is defined as being an instance of NSPanel or one of its subclasses.)
If your implementation returns NO, control returns to the main event loop and the application is not terminated. If you return YES, your delegate’s applicationShouldTerminate: method is subsequently invoked to confirm that the application should be terminated.
1 | func applicationShouldTerminateAfterLastWindowClosed(_ sender: NSApplication) -> Bool { |
Issue #401
Find identity
1 | security find-identity |
Sign with entitlements and identity. For macOS, use 3rd Party Mac Developer Application
1 | codesign -f -s "3rd Party Mac Developer Application: Khoa Pham (123DK123F2)" --entitlements "MyApp.entitlements" "tool/mytool" |
To enable harden runtime
1 | codesign --verbose --force --deep -o runtime --sign |
Issue #339
For simple cases, we don’t need to. Let’s use urlCache
The URL cache for providing cached responses to requests within the session.
The URL Loading System caches responses both in memory and on disk, improving performance and reducing network traffic.
The URLCache class is used for caching responses from network resources. Your app can directly access the shared cache instance by using the shared property of URLCache. Or, you can create your own caches for different purposes, setting distinct caches on your URLSessionConfiguration objects.
Issue #336
Use NSPopUpButton
var pullsDown: Bool
A Boolean value indicating whether the button displays a pull-down or pop-up menu.
func addItem(withTitle: String)
Adds an item with the specified title to the end of the menu.
Should disable pullsDown if we want to set title automatically and not scale button for title
Issue #334
NSSecureCoding has been around since iOS 6 and has had some API changes in iOS 12
A protocol that enables encoding and decoding in a manner that is robust against object substitution attacks.
https://developer.apple.com/documentation/foundation/nscoder/2292924-decodeobject
If the coder responds true to requiresSecureCoding, then the coder calls failWithError(_:) in either of the following cases:
The class indicated by cls doesn’t implement NSSecureCoding.
The unarchived class doesn’t match cls, nor do any of its superclasses.
If the coder doesn’t require secure coding, it ignores the cls parameter and does not check the decoded object.
The class must subclass from NSObject and conform to NSSecureCoding
1 | class Note: NSObject, NSSecureCoding { |
First, we need to serialize to Data, then use EasyStash for easy persistency
1 | do { |
Then we can use unarchiveTopLevelObjectWithData to unarchive array
1 | do { |
Note that for UUID, NSCoding seems to convert to UUID instead of String
1 | let id = aDecoder.decodeObject( |
Issue #332
From moveItem(at:to:)
Moves an item from one location to another in the collection view.
After rearranging items in your data source object, use this method to synchronize those changes with the collection view. Calling this method lets the collection view know that it must update its internal data structures and possibly update its visual appearance. You can move the item to a different section or to a new location in the same section. The collection view updates the layout as needed to account for the move, animating cells into position in response.
When inserting or deleting multiple sections and items, you can animate all of your changes at once using the performBatchUpdates(_:completionHandler:) method.
1 | notes.swapAt(index, 0) |
There may be unknown reasons or bug that make other cells stay in incorrect state. The fix is to reload the rest cells
1 | let set = Set((1..<notes.count).map({ $0.toIndexPath() })) |
Issue #331
From NSSegmentedControl
The features of a segmented control include the following:
A segment can have an image, text (label), menu, tooltip, and tag.
A segmented control can contain images or text, but not both.
1 | let languageMenu = NSMenu(title: "") |
Issue #330
When adding NSTextView in xib, we see it is embedded under NSClipView. But if we try to use NSClipView to replicate what’s in the xib, it does not scroll.
To make it work, we can follow Putting an NSTextView Object in an NSScrollView and How to make scrollable vertical NSStackView to make our ScrollableInput
For easy Auto Layout, we use Anchors for UIScrollView.
Things worth mentioned for vertical scrolling
1 | textContainer.heightTracksTextView = false |
1 | class ScrollableInput: NSView { |
NSTextView.scrollableTextView()Updated at 2020-12-31 05:43:41
Issue #328
Sometimes we want to validate forms with many fields, for example name, phone, email, and with different rules. If validation fails, we show error message.
We can make simple Validator and Rule
1 | class Validator { |
Then we can use very expressively
1 | let validator = Validator() |
Then a few tests to make sure it works
1 | class ValidatorTests: XCTestCase { |
To check if all rules are ok, we can use reduce
1 | func check(text: String, with rules: [Rule]) -> Bool { |
Or more concisely, use allSatisfy
1 |
|
Issue #323
Use proxy animator()
1 | let indexPath = IndexPath(item: index, section: 0) |
Issue #322
1 | lazy var gr = NSClickGestureRecognizer(target: self, action: #selector(onPress(_:))) |
Issue #321
1 | class ClickedCollectionView: NSCollectionView { |
For NSCollectionView with more than 1 sections
1 | let frame = layoutAttributesForItem(at: IndexPath(item: index, section: 0))?.frame ?? .zero |
Omnia supports clicked indexPath for multi section NSCollectionView
1 | collectionViewHandler.addMenuItem(title: "Add to Favorite", action: { item in |
Issue #320

NSTextAttachmentCellProtocolRich Text and Graphics1 | scrollView.drawsBackground = false |
Issue #319
ATSApplicationFontsPath (String - macOS) identifies the location of a font file or directory of fonts in the bundle’s Resources directory. If present, macOS activates the fonts at the specified path for use by the bundled app. The fonts are activated only for the bundled app and not for the system as a whole. The path itself should be specified as a relative directory of the bundle’s Resources directory. For example, if a directory of fonts was at the path /Applications/MyApp.app/Contents/Resources/Stuff/MyFonts/, you should specify the string Stuff/MyFonts/ for the value of this key.
1 | <key>ATSApplicationFontsPath</key> |
1 | NSFont(name: "FiraCode-Bold", size: 14) |
Issue #312
1 | class ClosableWindow: NSWindow { |
The reason is that window is released upon closed if it is not owned by NSWindowController, or we can use releasedWhenClosed
The value of this property is YES if the window is automatically released after being closed; NO if it’s simply removed from the screen.
The default for NSWindow is YES; the default for NSPanel is NO. Release when closed, however, is ignored for windows owned by window controllers. Another strategy for releasing an NSWindow object is to have its delegate autorelease it on receiving a windowShouldClose: message.
Updated at 2020-12-14 05:18:30
Issue #297
1 | let button = NSButton() |
To make it have native rounded rect
1 | button.imageScaling = .scaleProportionallyDown |
1 | import AppKit |
Issue #274
Original post https://hackernoon.com/20-recommended-utility-apps-for-macos-in-2018-ea494b4db72b
Depending on the need, we have different apps on the mac. As someone who worked mostly with development, below are my indispensable apps. They are like suits to Tony Stark. Since I love open source apps, they have higher priority in the list.
iTerm2 is a replacement for Terminal and the successor to iTerm. It works on Macs with macOS 10.10 or newer. iTerm2 brings the terminal into the modern age with features you never knew you always wanted.
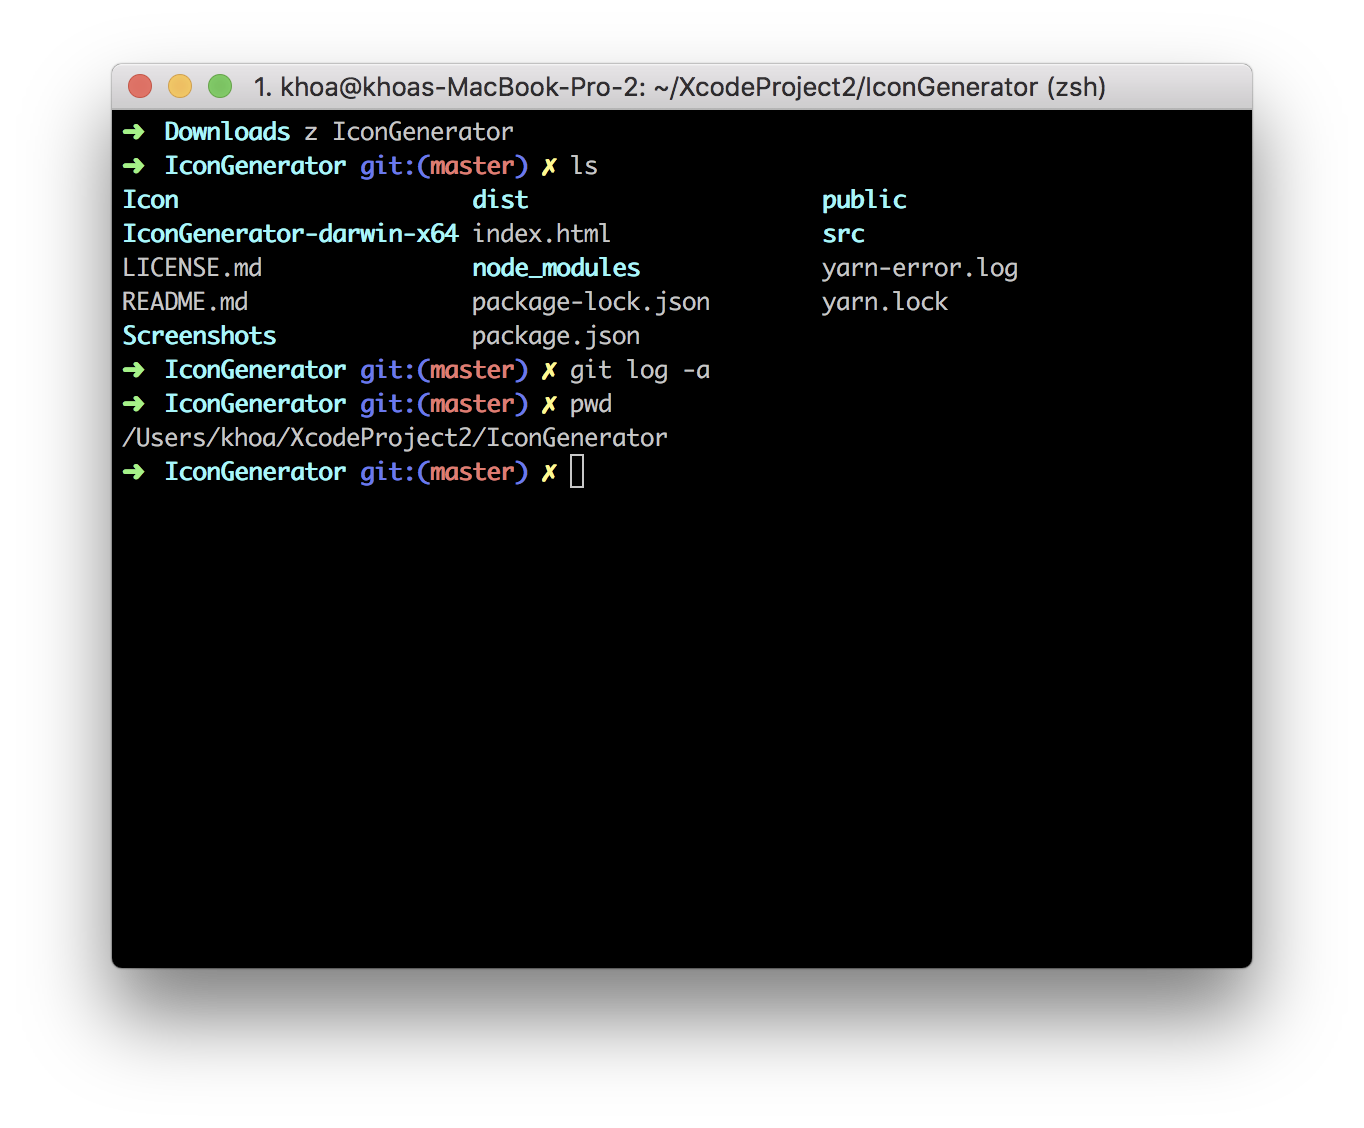
iTerm2 has good integration with tmux and supports Split Panes
Term2 allows you to divide a tab into many rectangular “panes”, each of which is a different terminal session. The shortcuts cmd-d and cmd-shift-d divide an existing session vertically or horizontally, respectively. You can navigate among split panes with cmd-opt-arrow or cmd-[ and cmd-]. You can “maximize” the current pane — hiding all others in that tab — with cmd-shift-enter. Pressing the shortcut again restores the hidden panes.
There’s the_silver_searcher with ag command to quickly search for files
A delightful community-driven (with 1,200+ contributors) framework for managing your zsh configuration. Includes 200+ optional plugins (rails, git, OSX, hub, capistrano, brew, ant, php, python, etc), over 140 themes to spice up your morning, and an auto-update tool so that makes it easy to keep up with the latest updates from the community.
I use z shell with oh-my-zsh plugins. I also use zsh-autocompletions to have autocompletion like fish shell and z to track and quickly navigate to the most used directories.
Spectacle allows you to organize your windows without using a mouse.
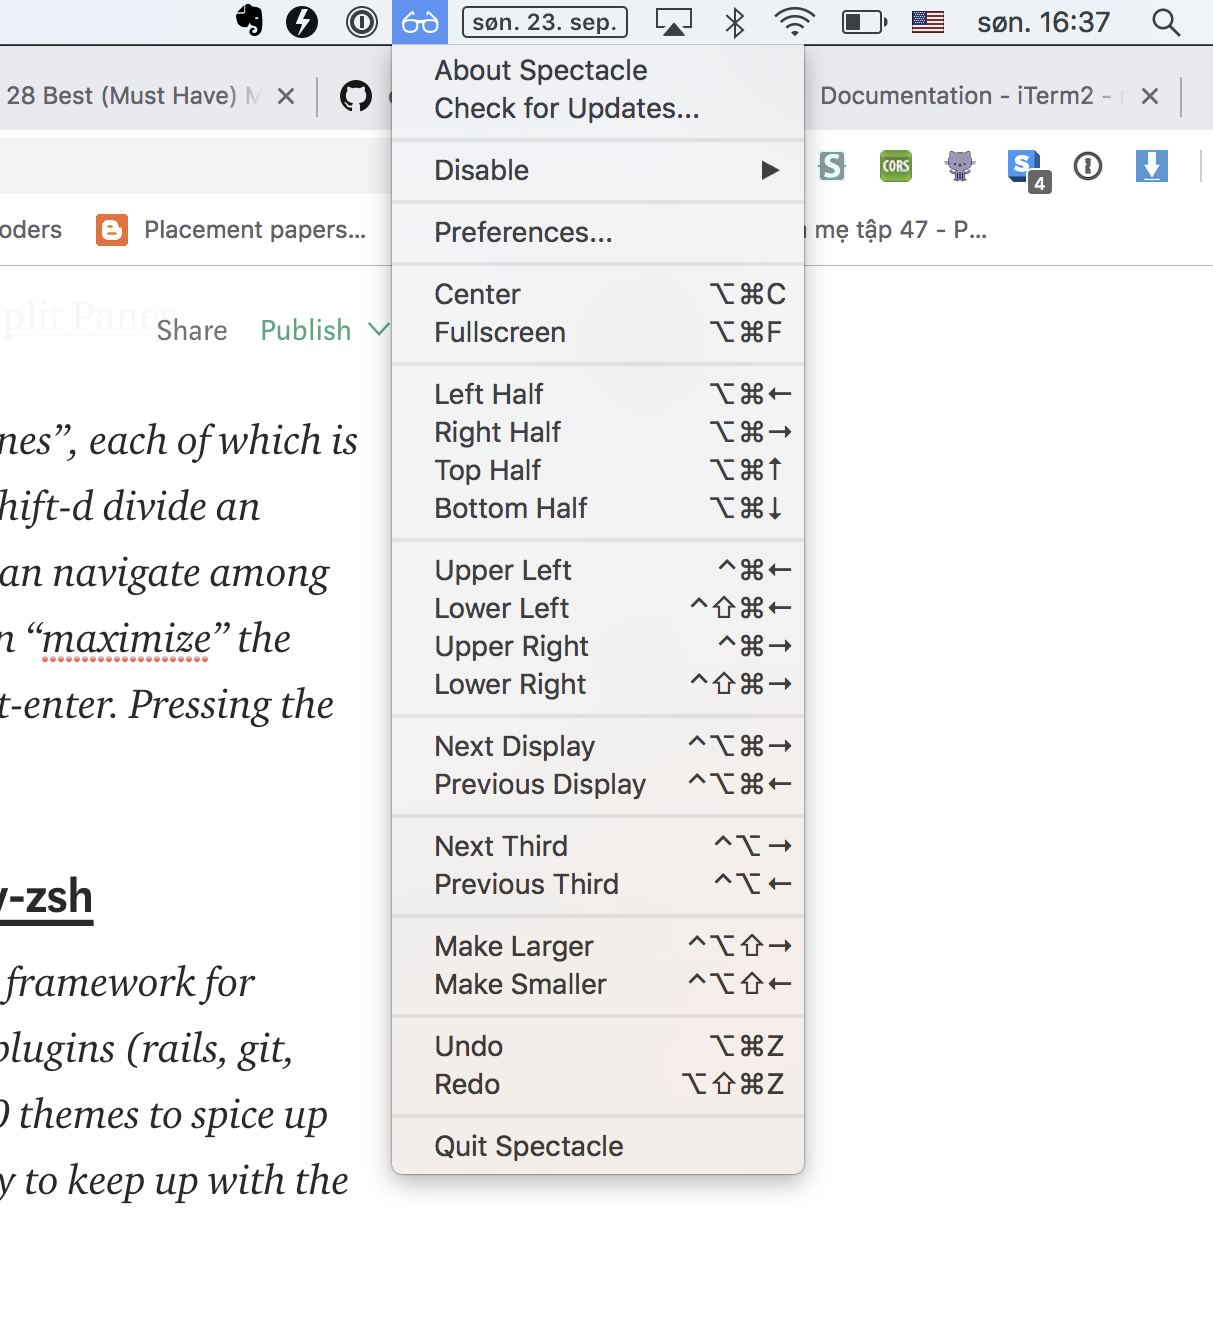
With spectable, I can organise windows easily with just Cmd+Option+F or Cmd+Option+Left
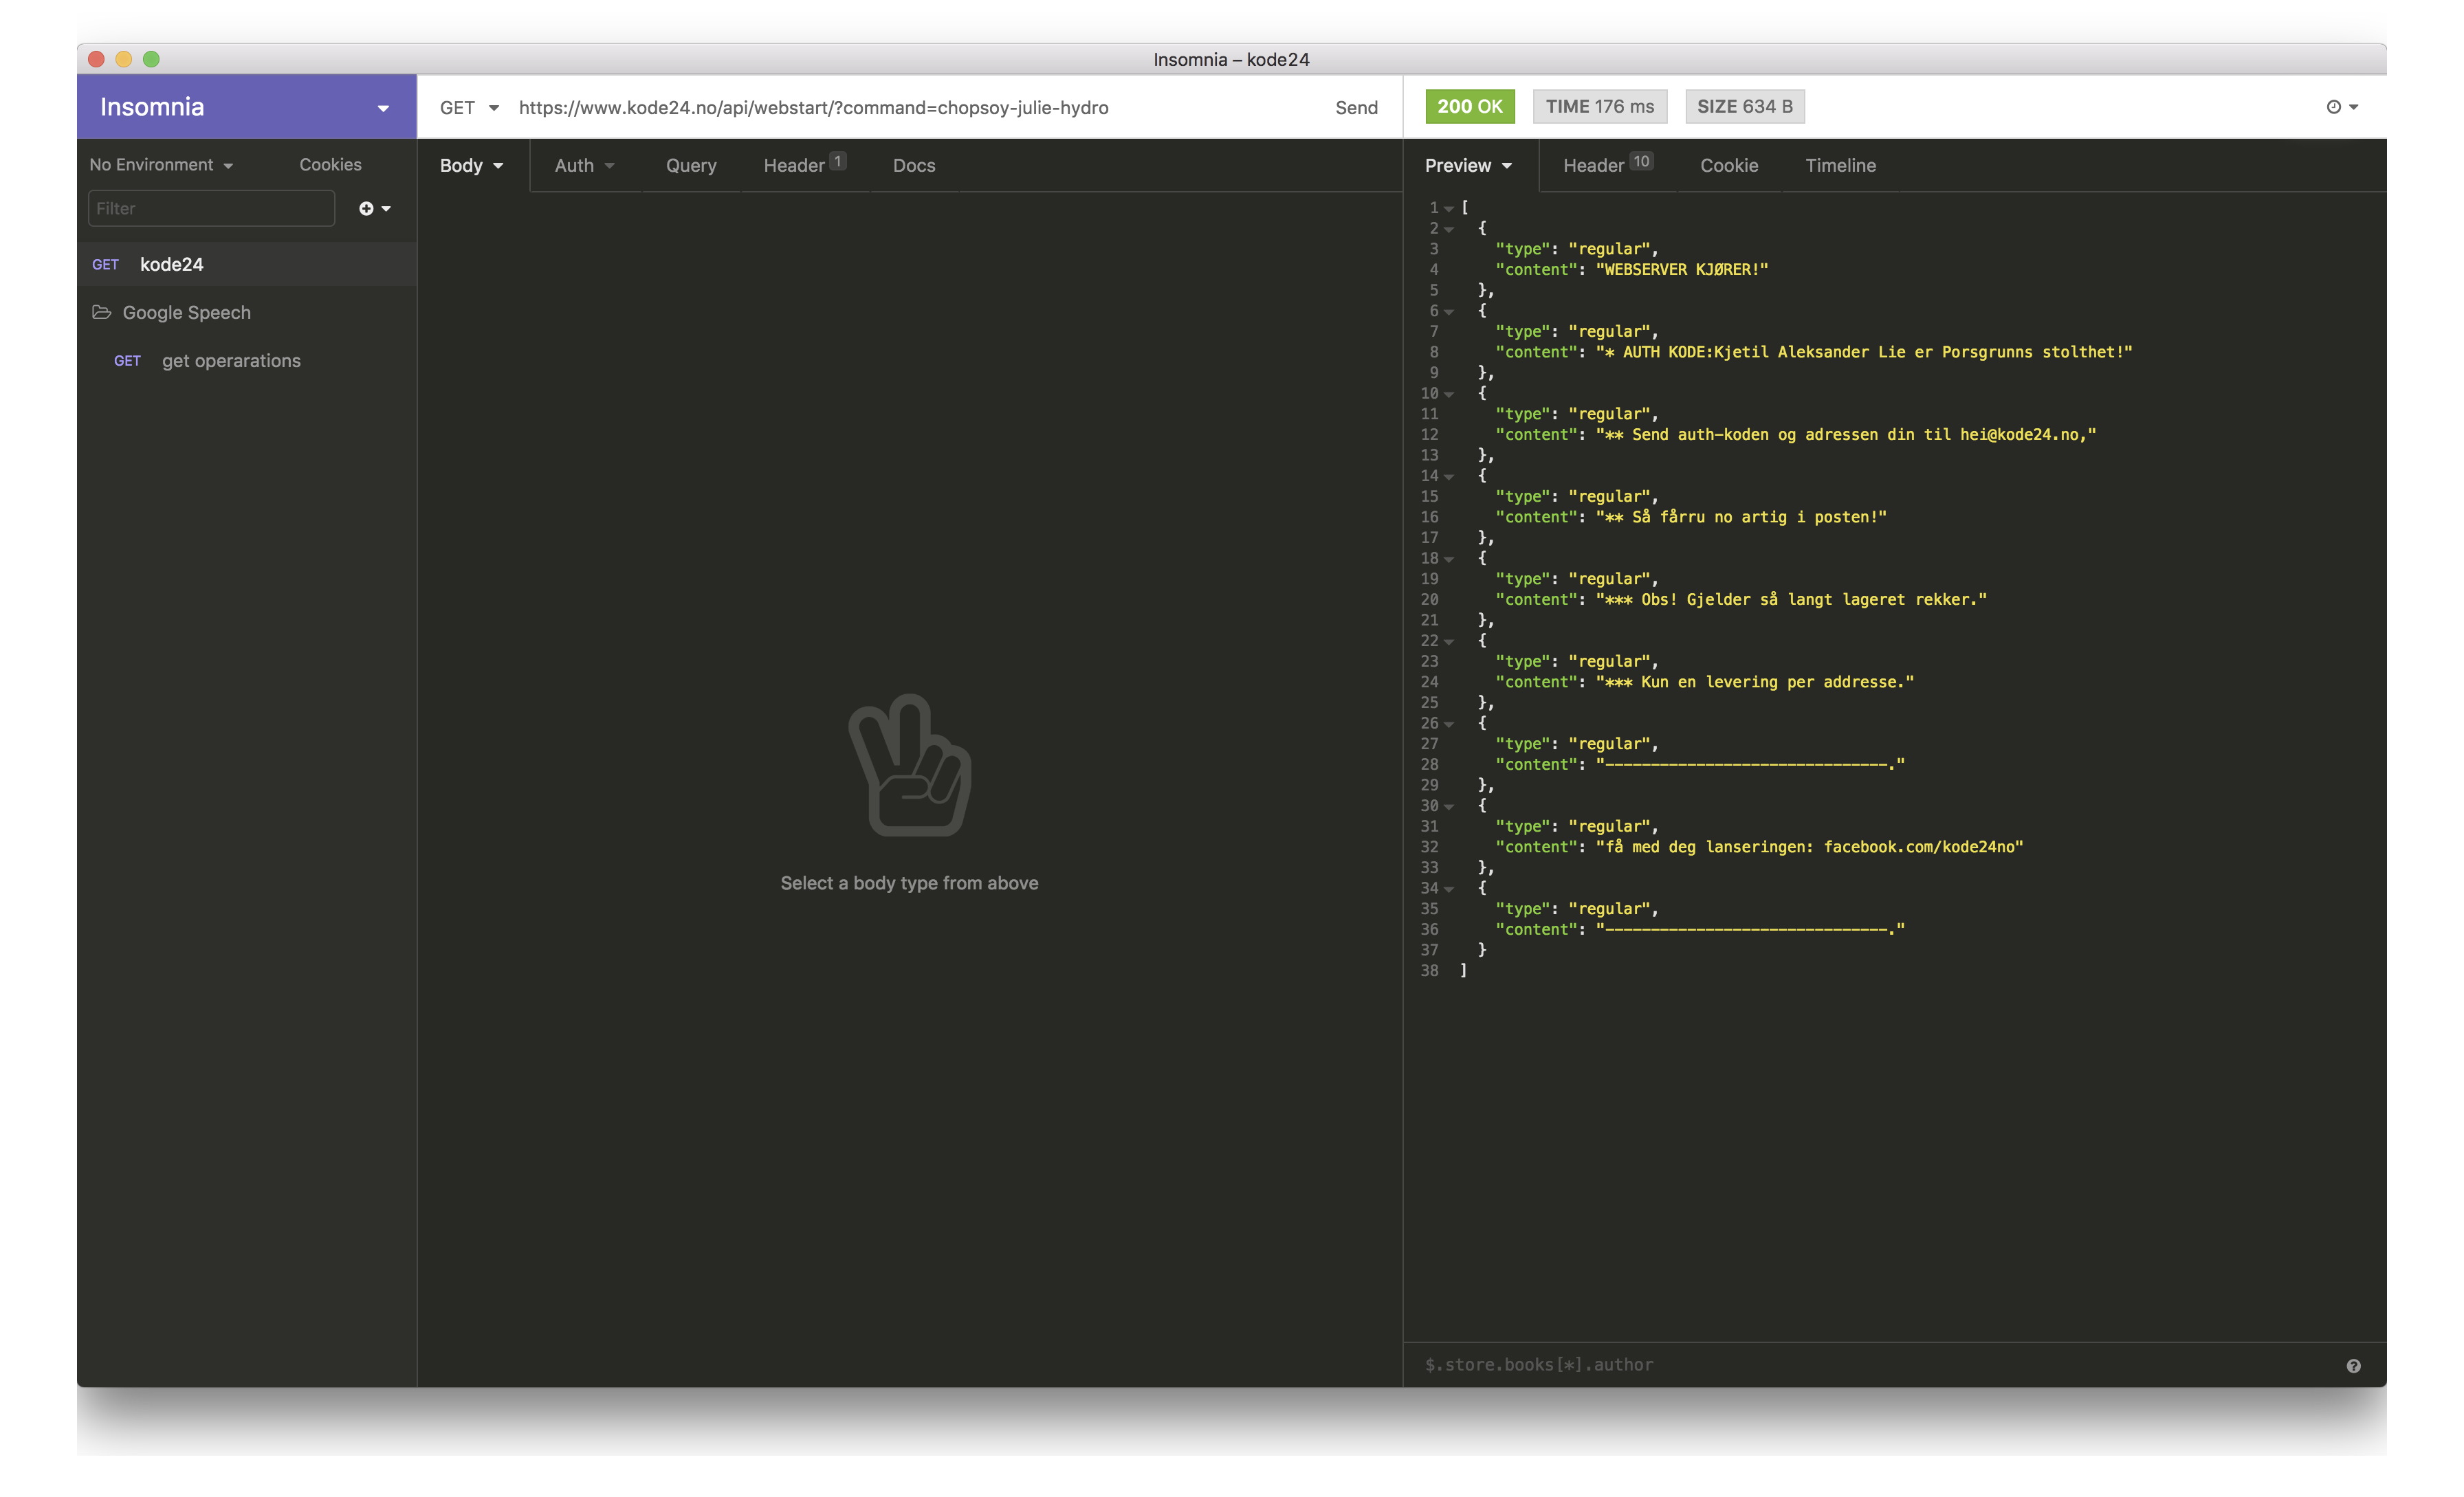
Insomnia is a cross-platform REST client, built on top of Electron.
Regardless if you like electron.js apps or not. This is a great tool for testing REST requets
VS Code is a new type of tool that combines the simplicity of a code editor with what developers need for their core edit-build-debug cycle. Code provides comprehensive editing and debugging support, an extensibility model, and lightweight integration with existing tools.
This seems to be the most popular for front end development, and many other things. There’s bunch of extensions that make the experience to a new level.
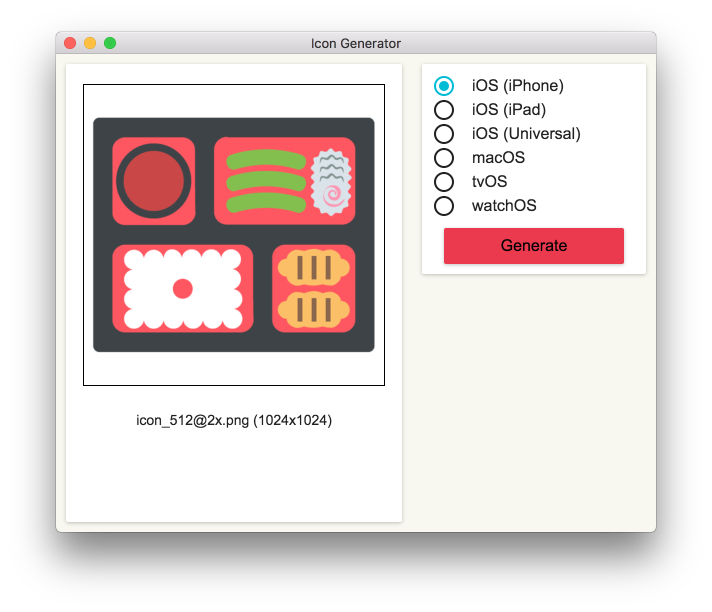
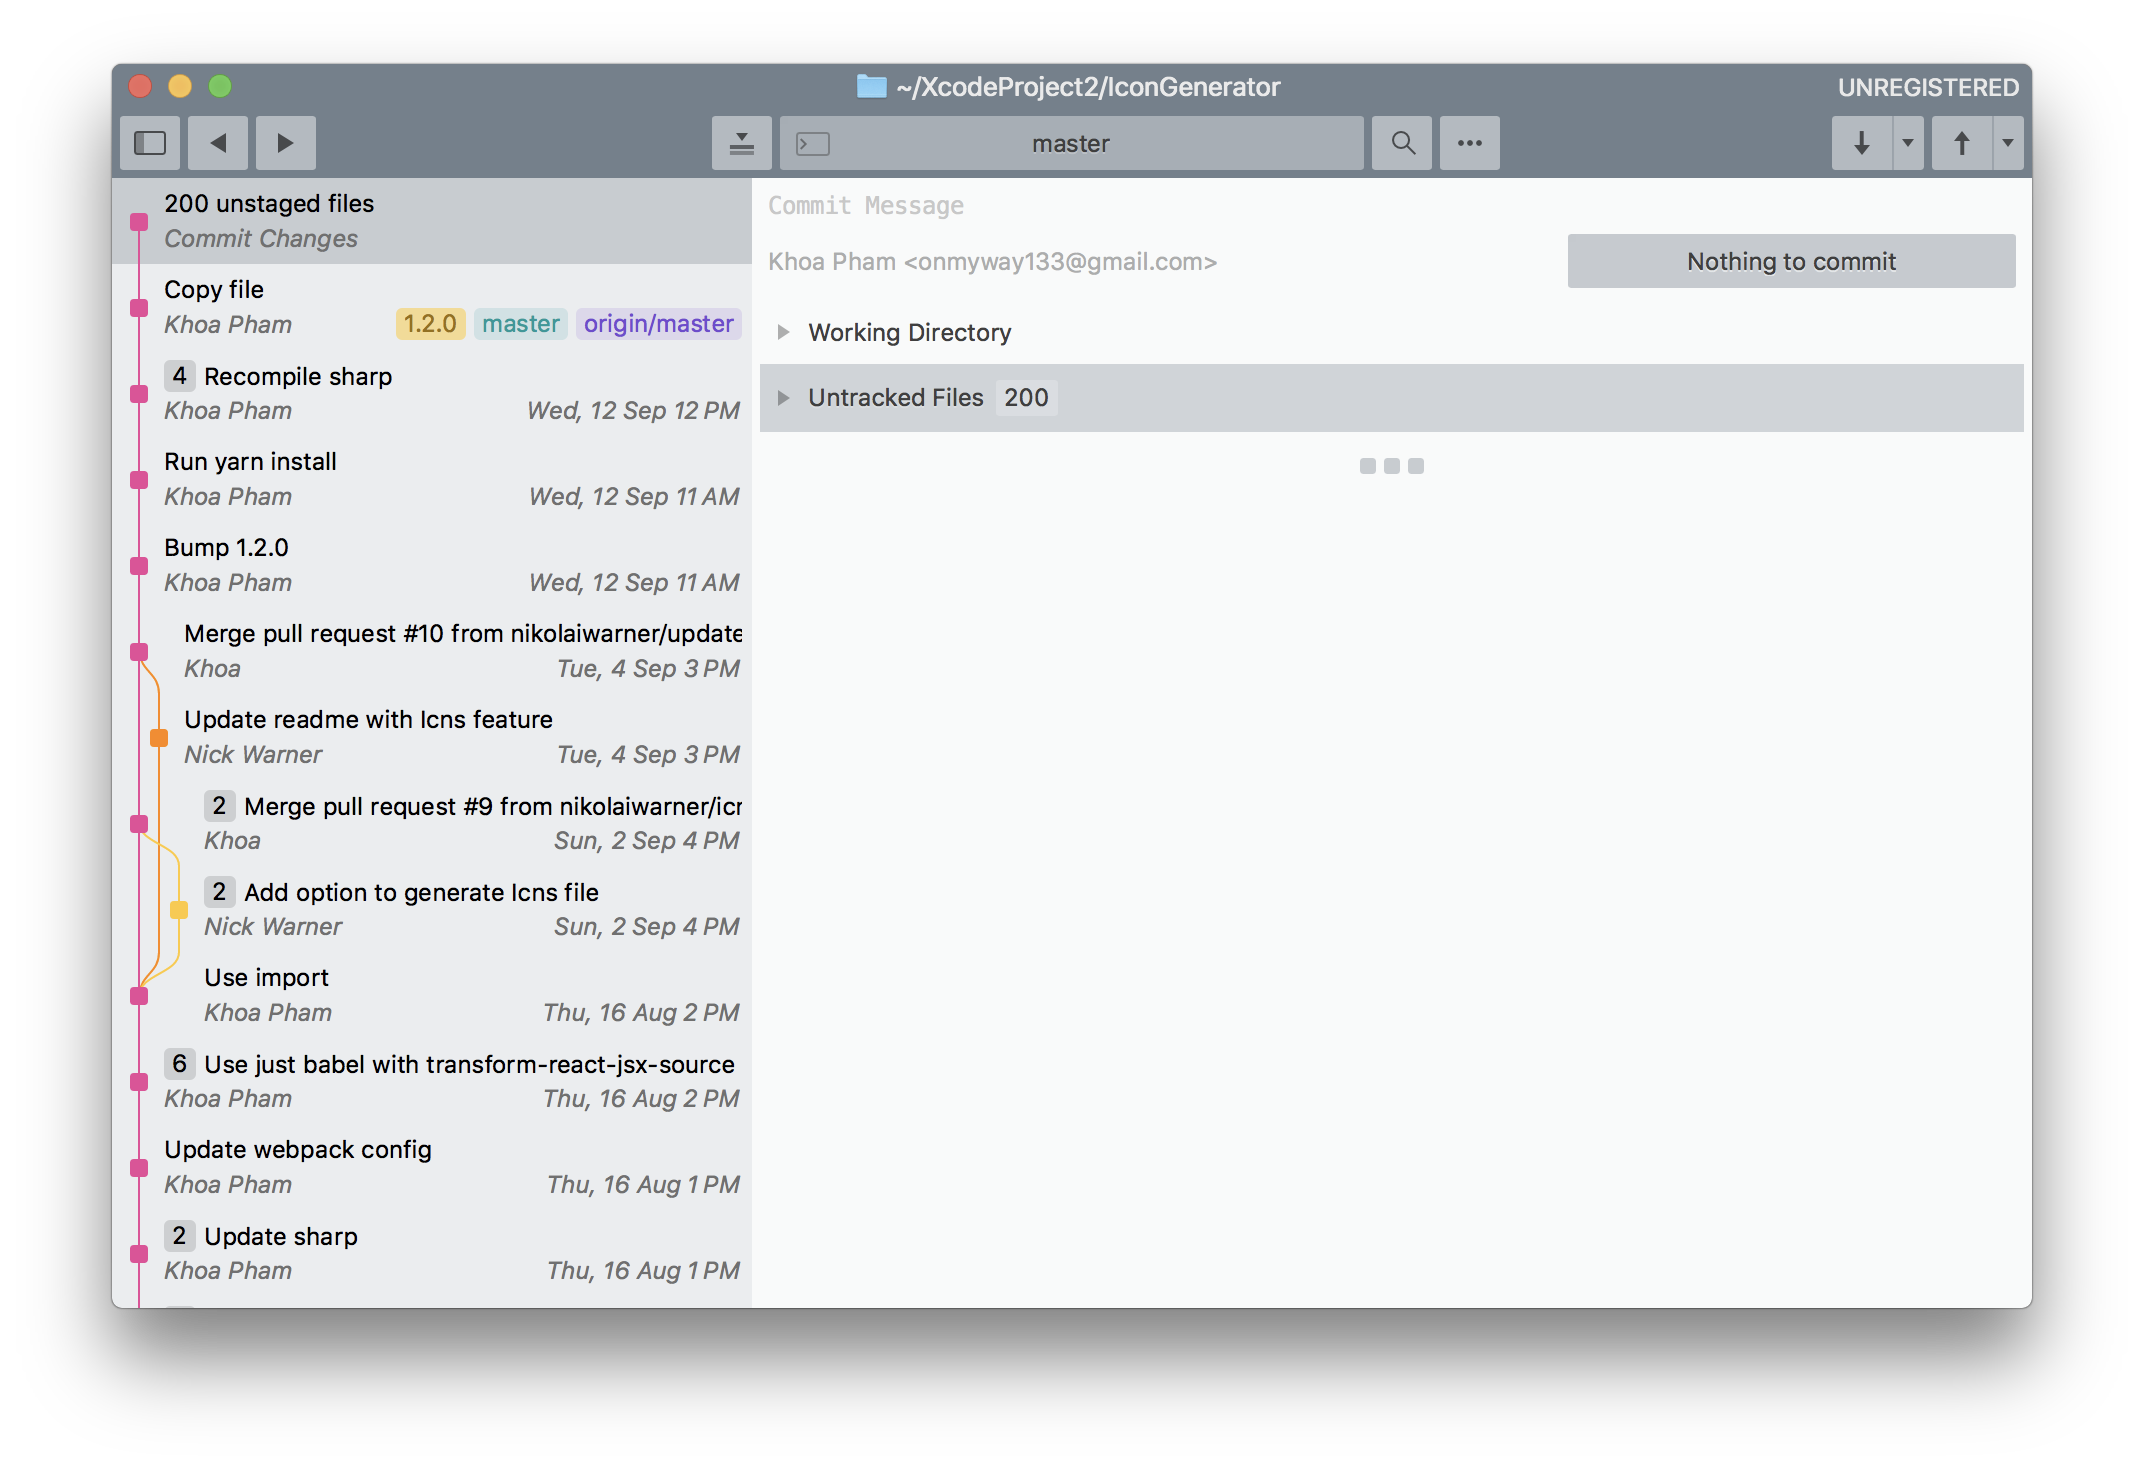
Built by me. When developing iOS, Android and macOS applications, I need a quick way to generate icons in different sizes. You can simply drag the generated asset into Xcode and that’s it.
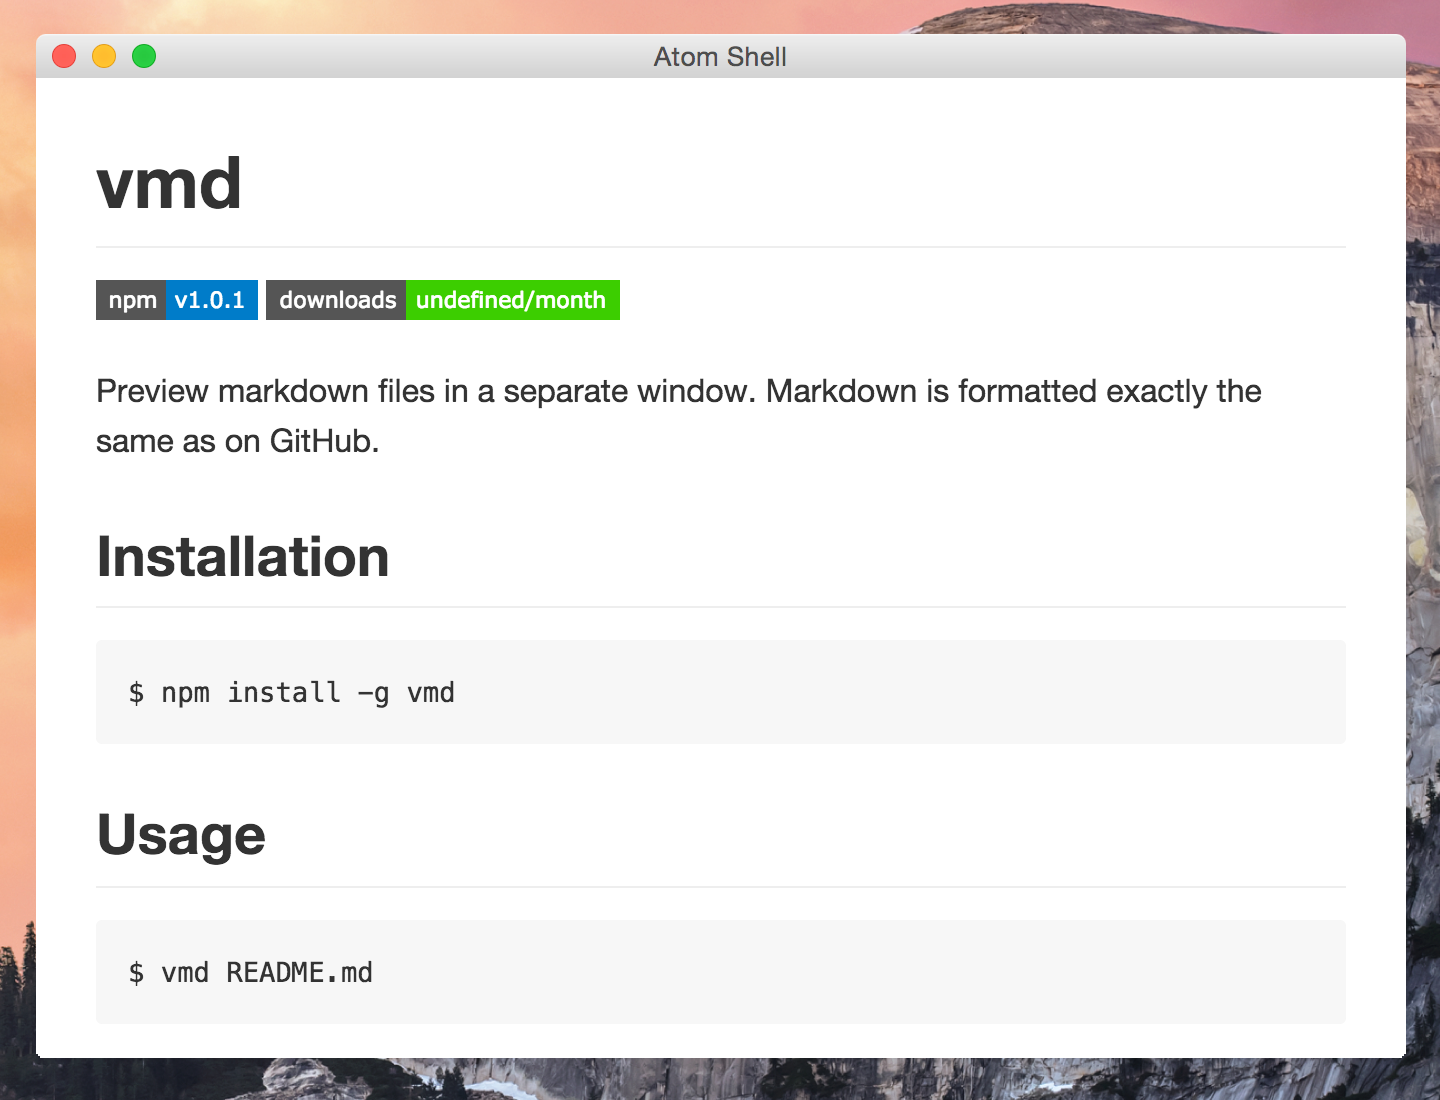
Preview markdown files in a separate window. Markdown is formatted exactly the same as on GitHub.
A mininal but complete colorpicker desktop app
I used to use Sip but I often get the problem of losing focus.
I built this as a native macOS app to capture screen and save to gif file. It works like Licecap but open source. There’s also an open source tool called kap that is slick.

Itsycal is a tiny calendar for your Mac’s menu bar.
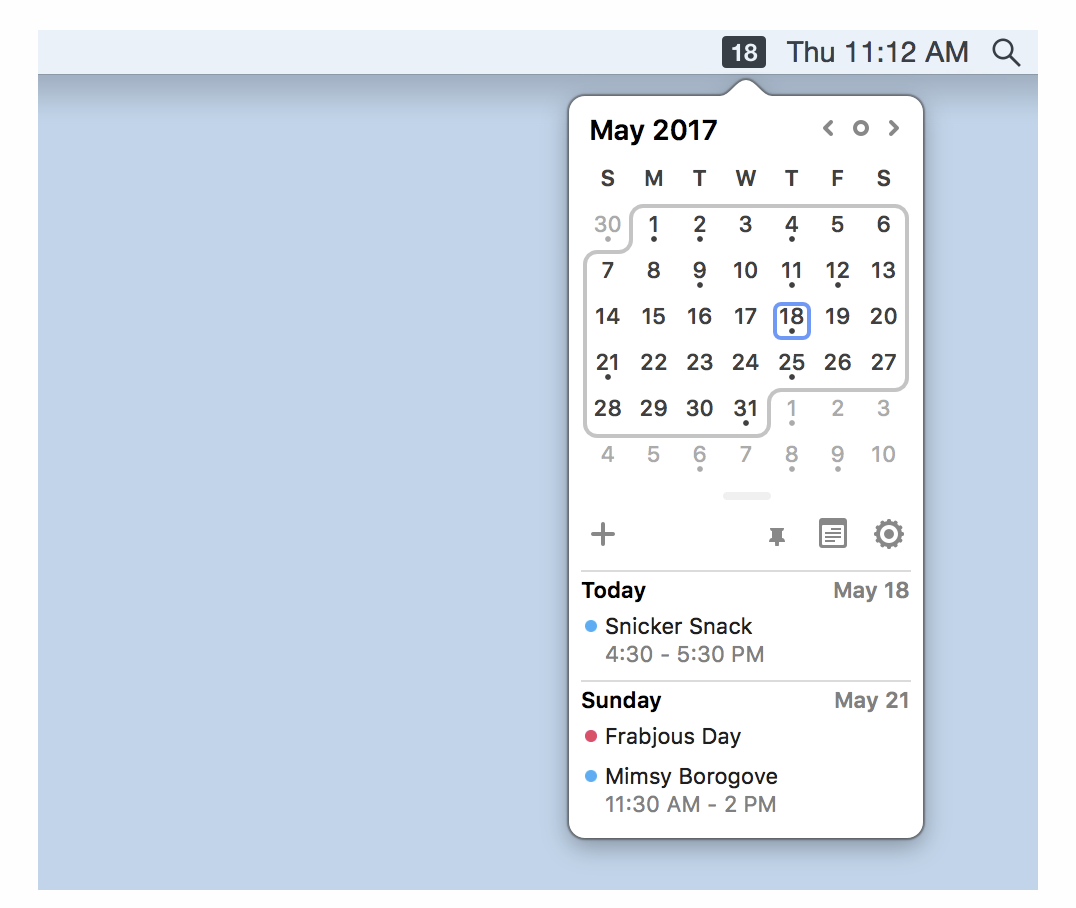
The app is minimal and works very well. It can shows calendar for integrated accounts in the mac.
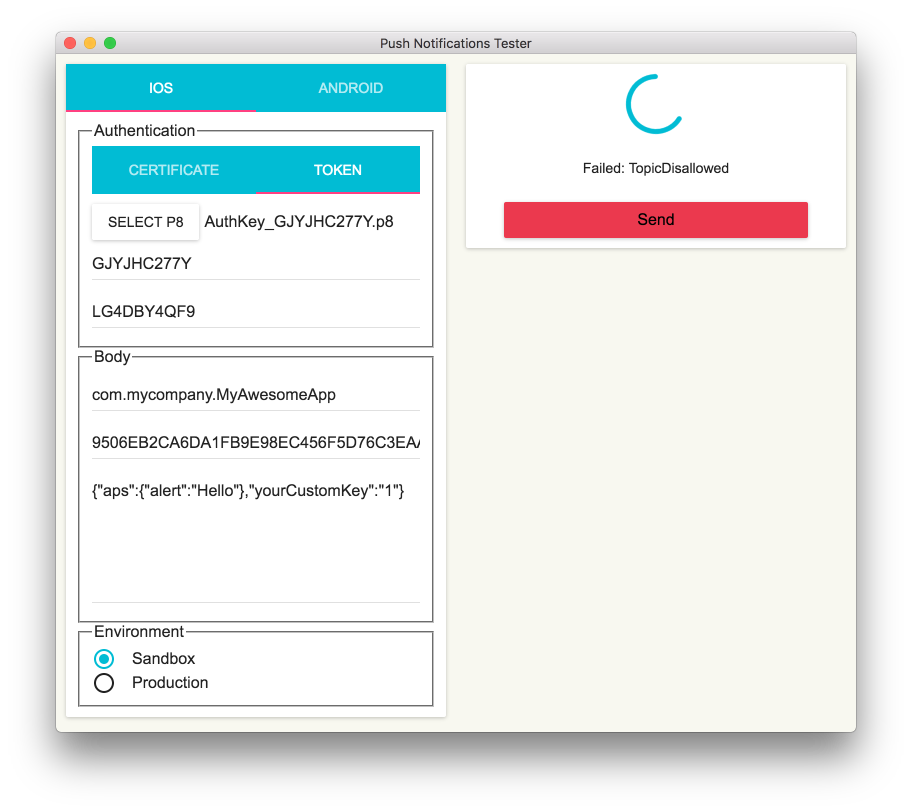
I often need to test push notification to iOS and Android apps. And I want to support both certificate and key p8 authentication for Apple Push Notification service, so I built this tool.
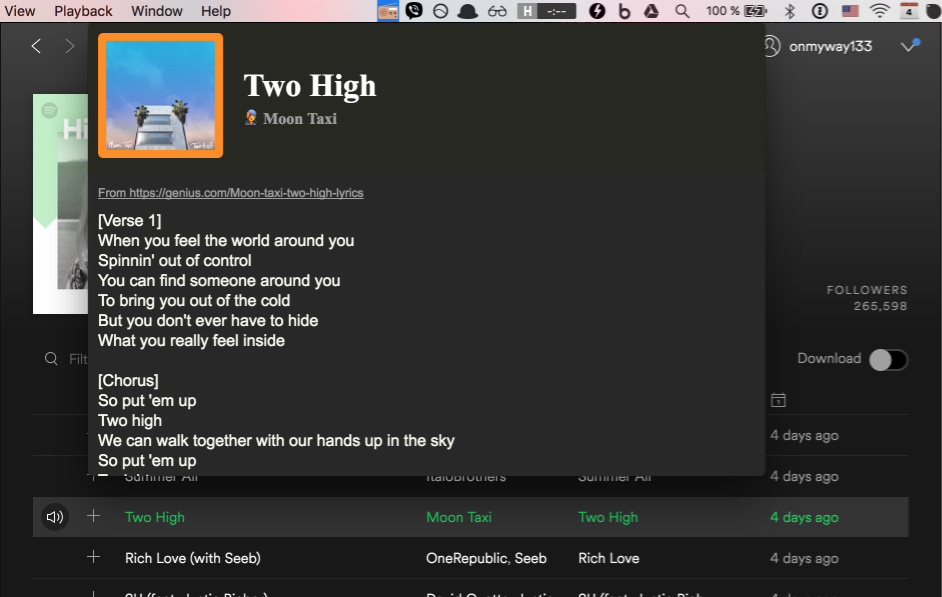
A menu bar app to show the lyric of the playing Spotify song
When I listen to some songs in Spotify, I want to see the lyrics too. The lyrics is fetched from https://genius.com/ and displayed in a wonderful UI.
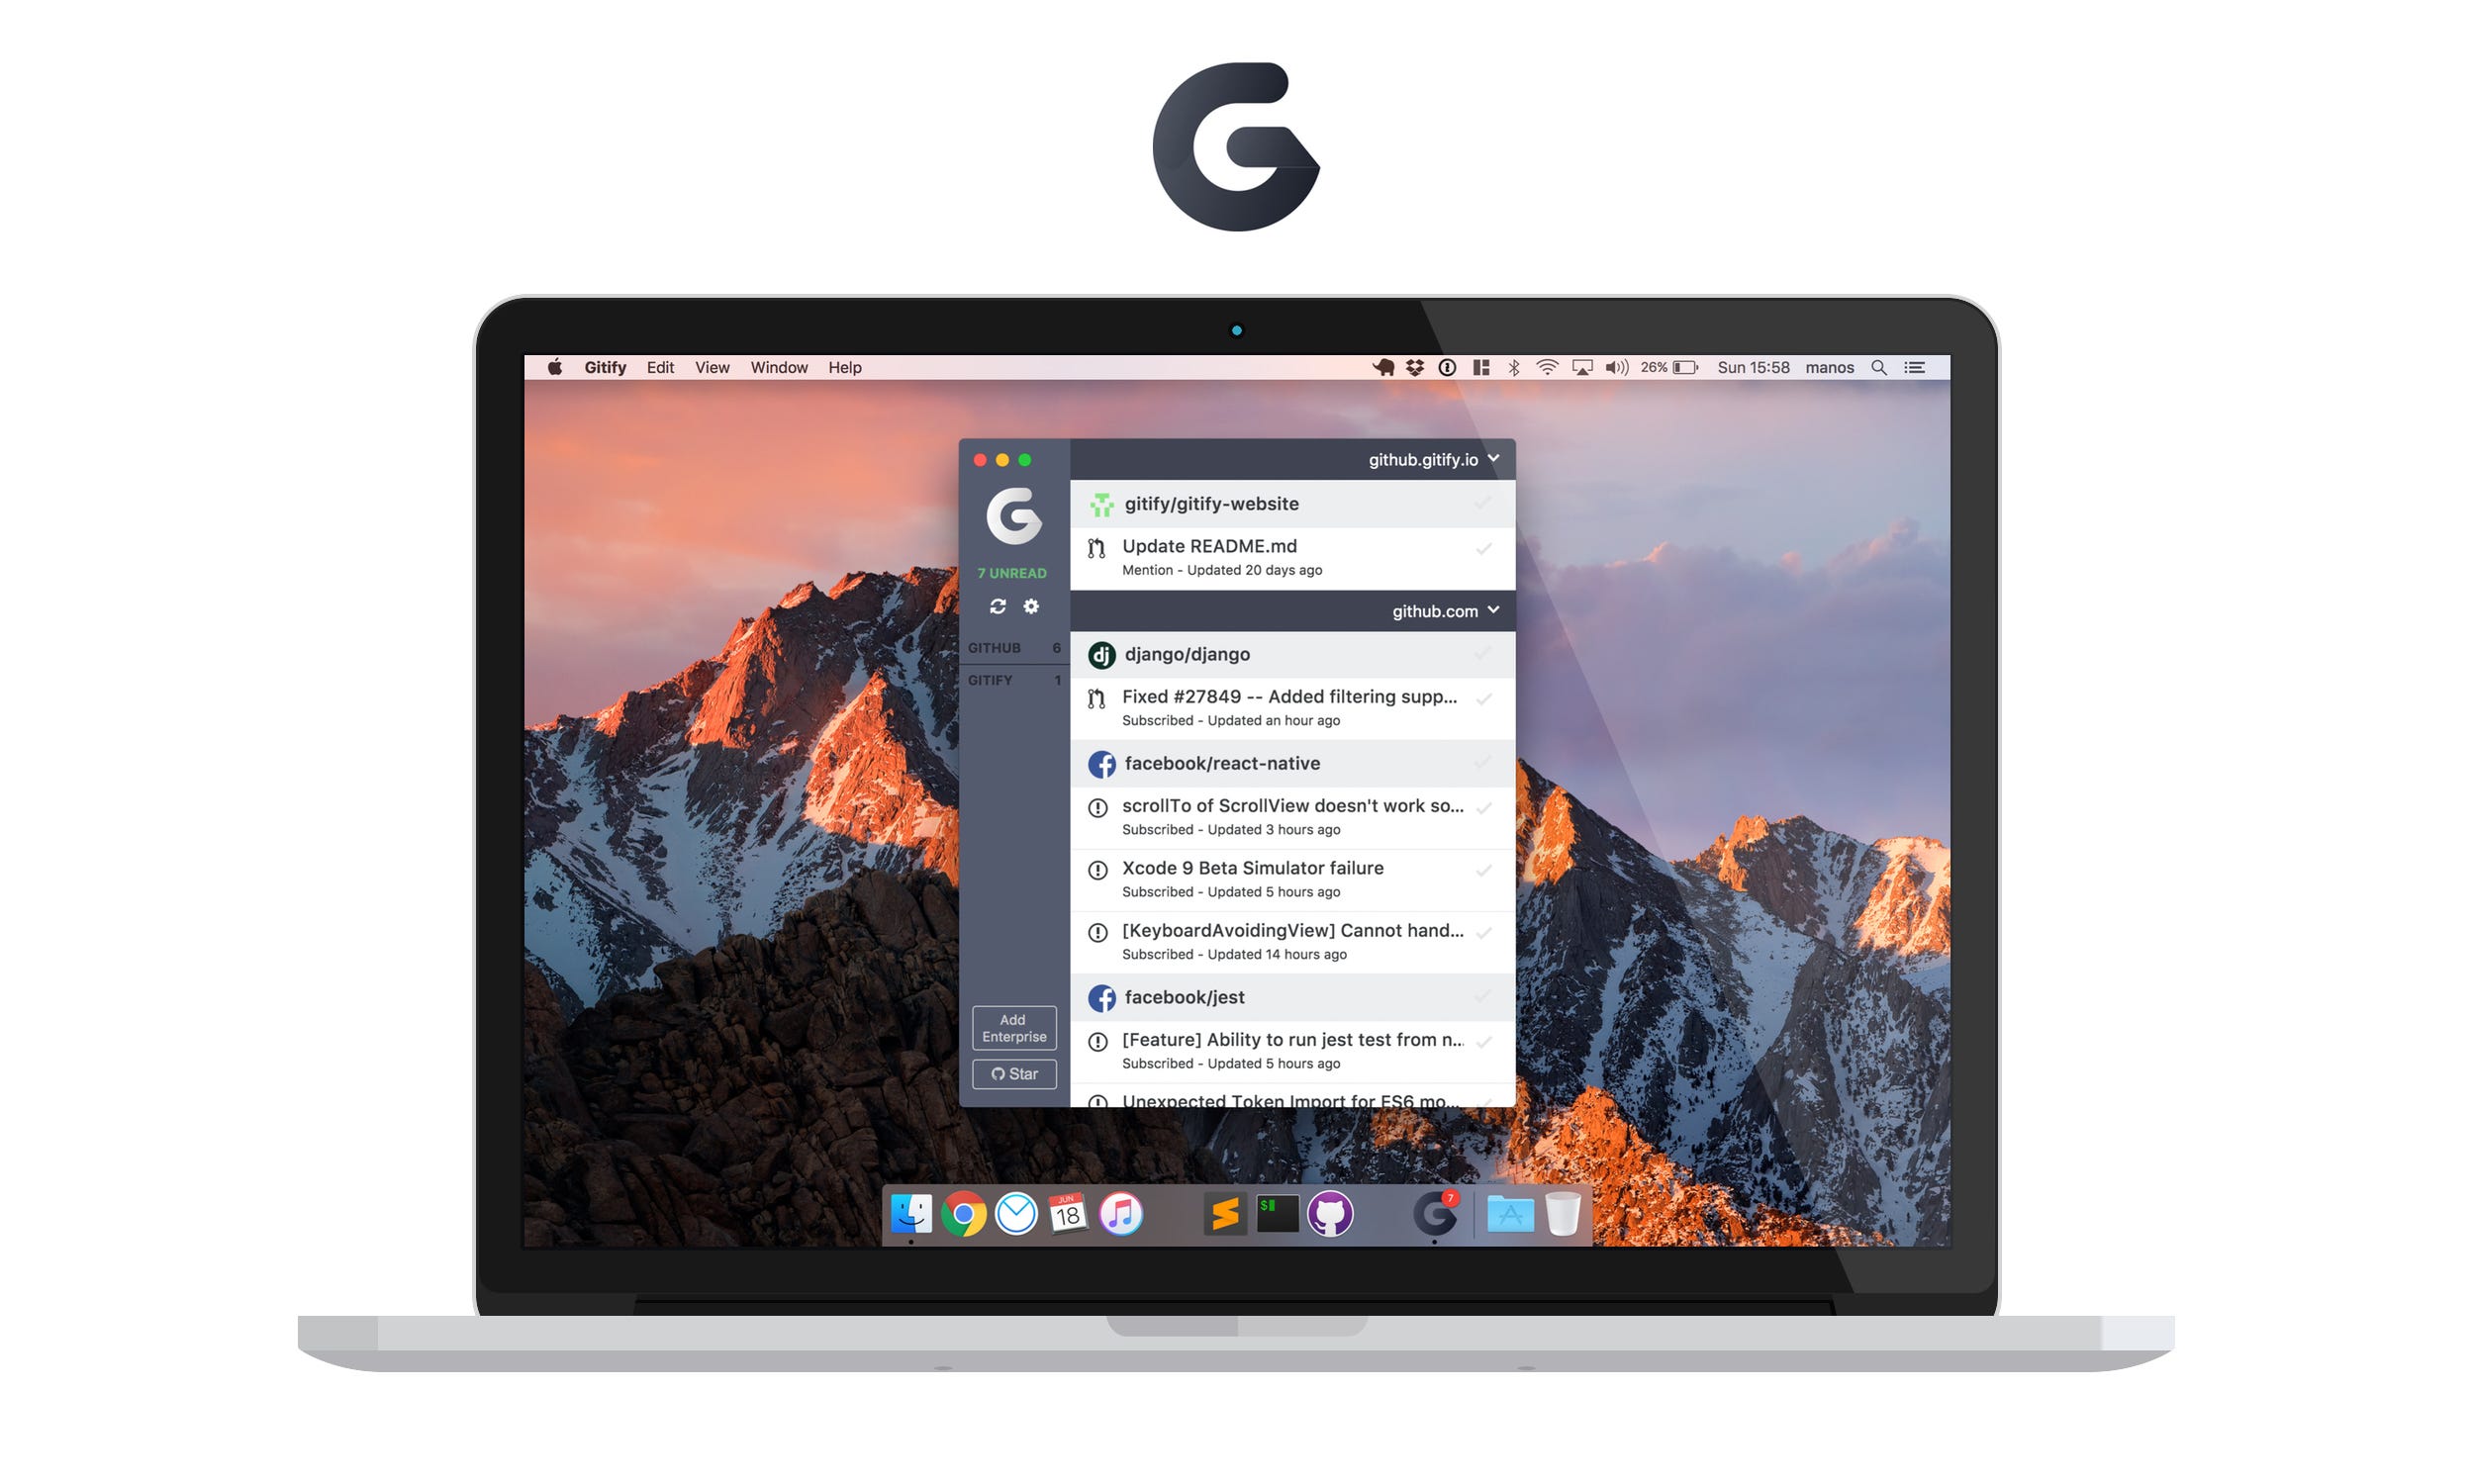
GitHub Notifications on your desktop.
I use this to get real time notification for issues and pull requests for projects on GitHub. I hope there is support for Bitbucket soon.
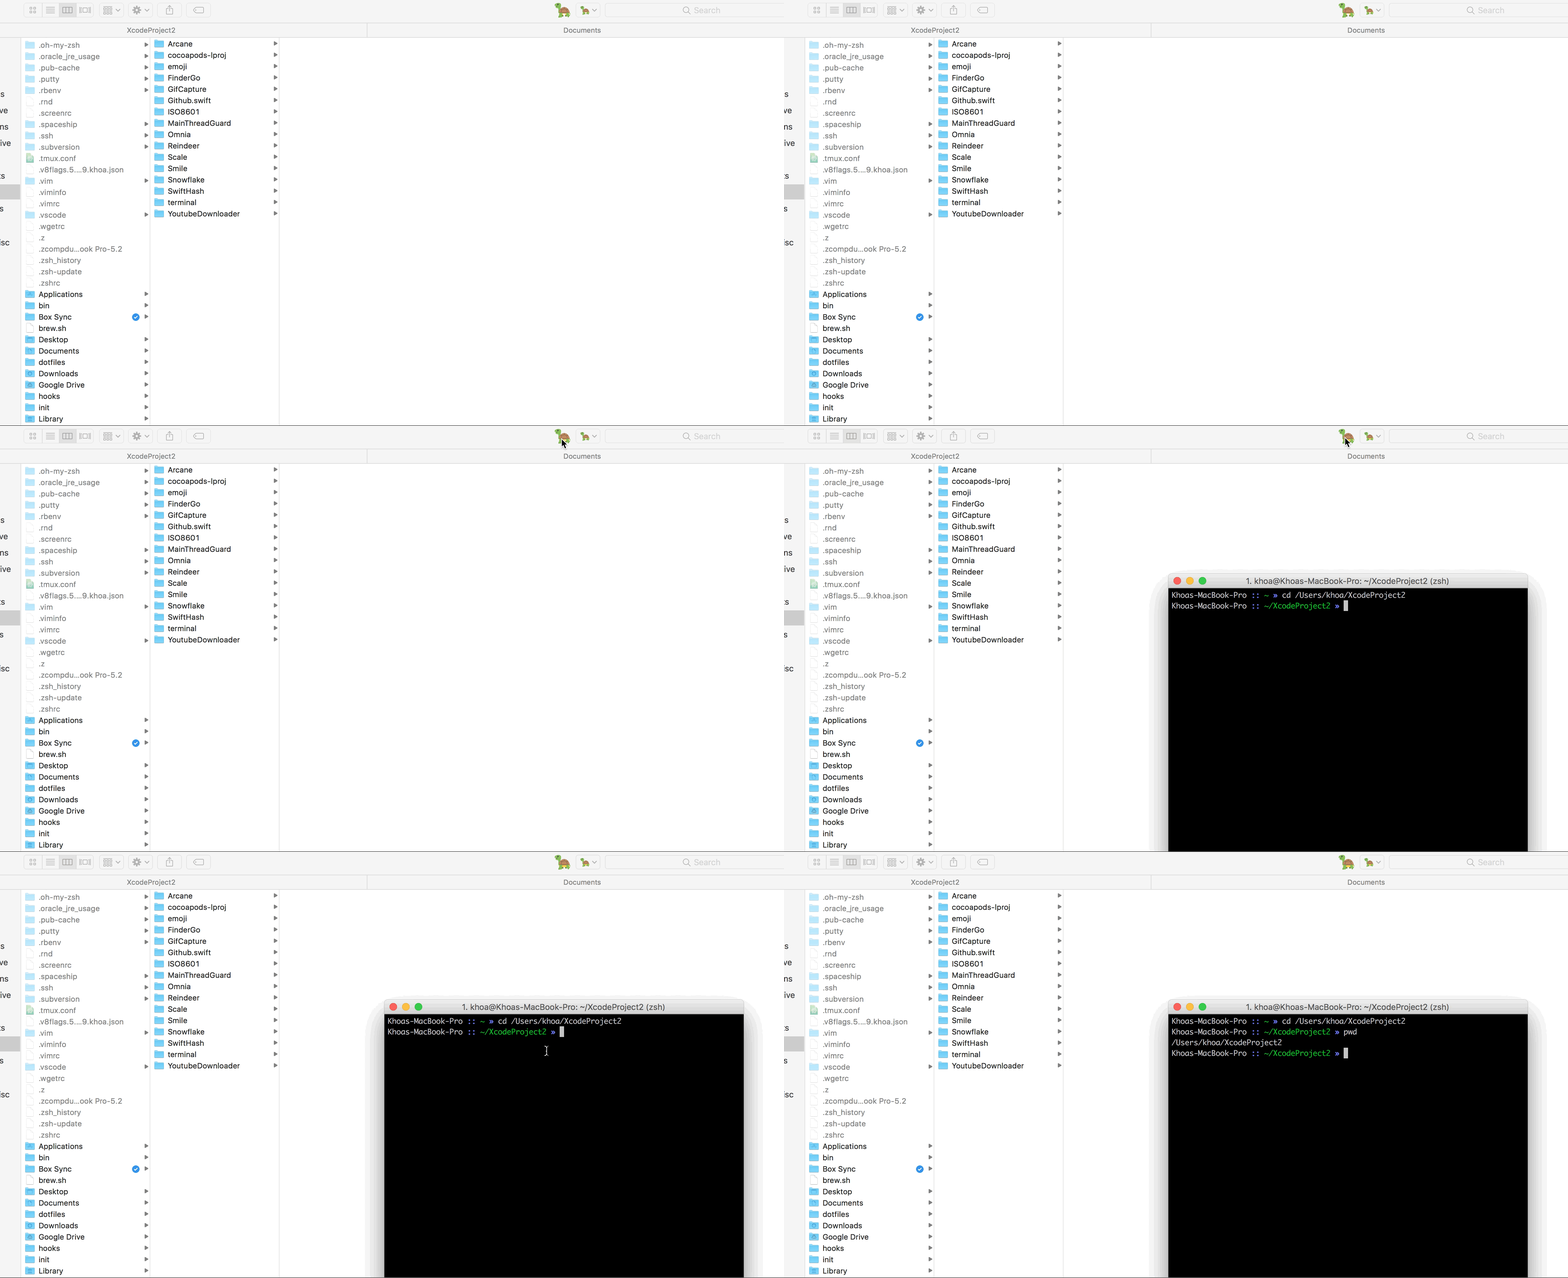
FinderGo is both a native macOS app and a Finder extension. It has toolbar button that opens terminal right within Finder in the current directory. You can configure it to open either Terminal, iTerm2 or Hyper
This is about theme. There is the very popular dracular themes, but I find it too strong for the eyes. I don’t use Atom, but I love its one dark UI. I used to maintain my own theme for Xcode called DarkSide but now I use xcode-one-dark for Xcode and Atom One Dark Theme for Visual Studio Code.
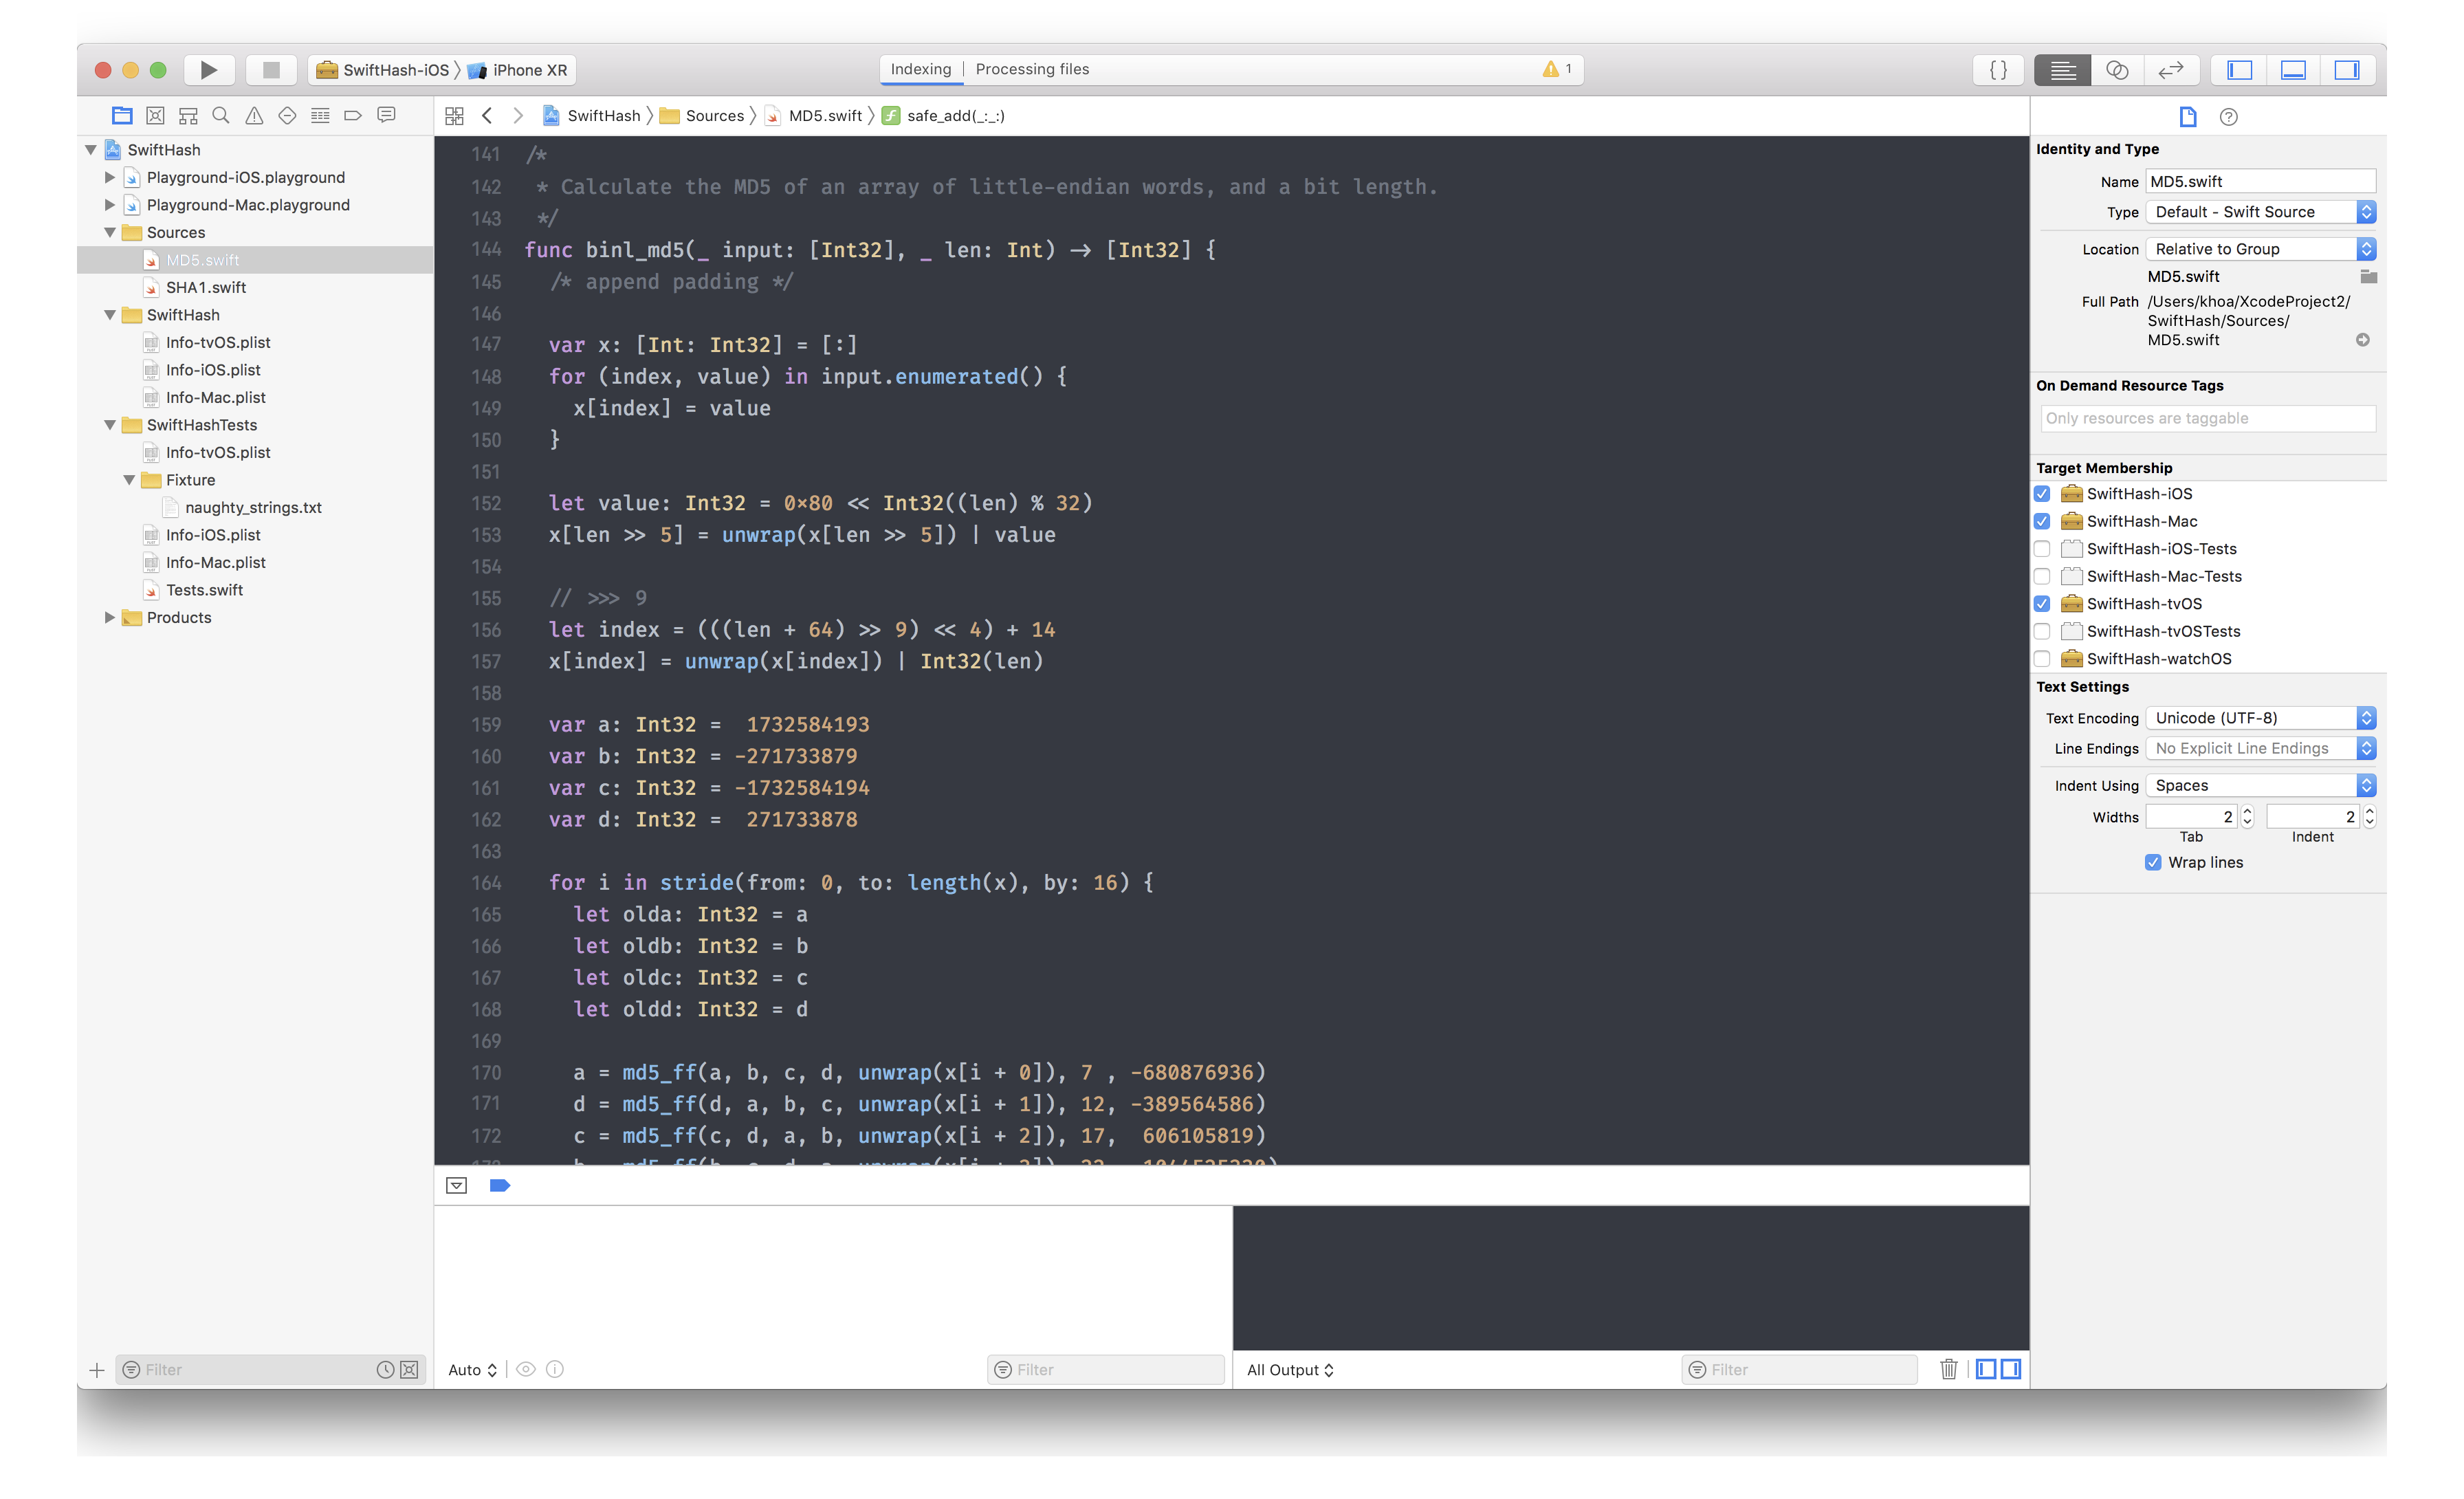
I also use Fira Code font in Xcode, Visual Studio Code and Android Studio, which has beautiful ligatures.
I use Chrome for its speed and wonderful support for extensions. The extensions I made are github-chat to enable chat within GitHub and github-extended to see more pinned repositories.
There are also refined github, github-repo-size and octotree that are indispensable for me.
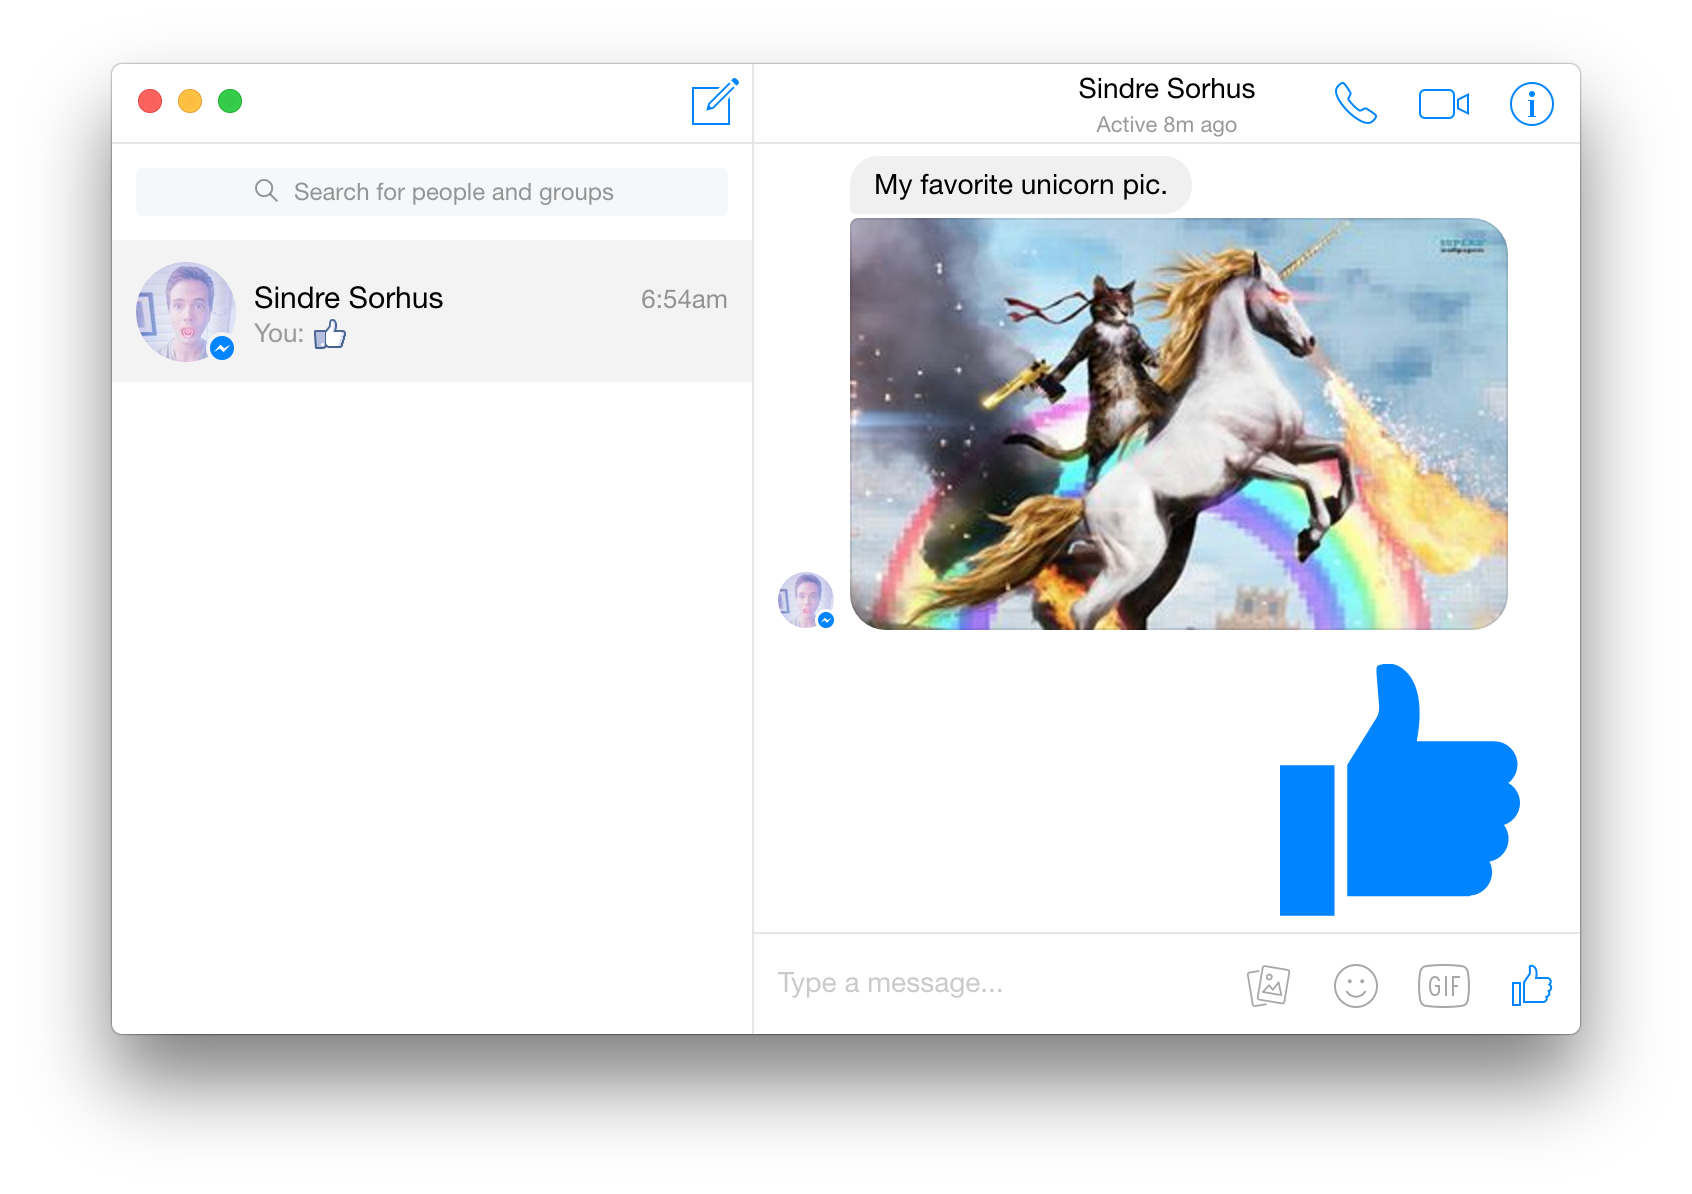
Caprine is an unofficial and privacy focused Facebook Messenger app with many useful features.
Sublime Text is a sophisticated text editor for code, markup and prose. You’ll love the slick user interface, extraordinary features and amazing performance.
Sublime Text is simply fast and the editing experience is very good. I’ve used Atom but it is too slow.
Meet a new Git client, from the makers of Sublime Text
Sublime Merge never lets me down. The source control app is simply very quick. I used SourceTree in the past, but it is very slow and had problem with authentication to Bitbucket and GitHub, and it halts very often for React Native apps, which has lots of node modules committed.
1Password remembers them all for you. Save your passwords and log in to sites with a single click. It’s that simple.
Everyone need strong and unique passwords these day. This tool is indispensable
Make screenshots. Draw on it. Shoot video and share your files. It’s fast, easy and free.
I haven’t found a good open source alternative, this is good in capturing screen or portion of the screen.

iTunes or Quick Time has problem with some video codecs. This app VLC can play all kinds of video types.
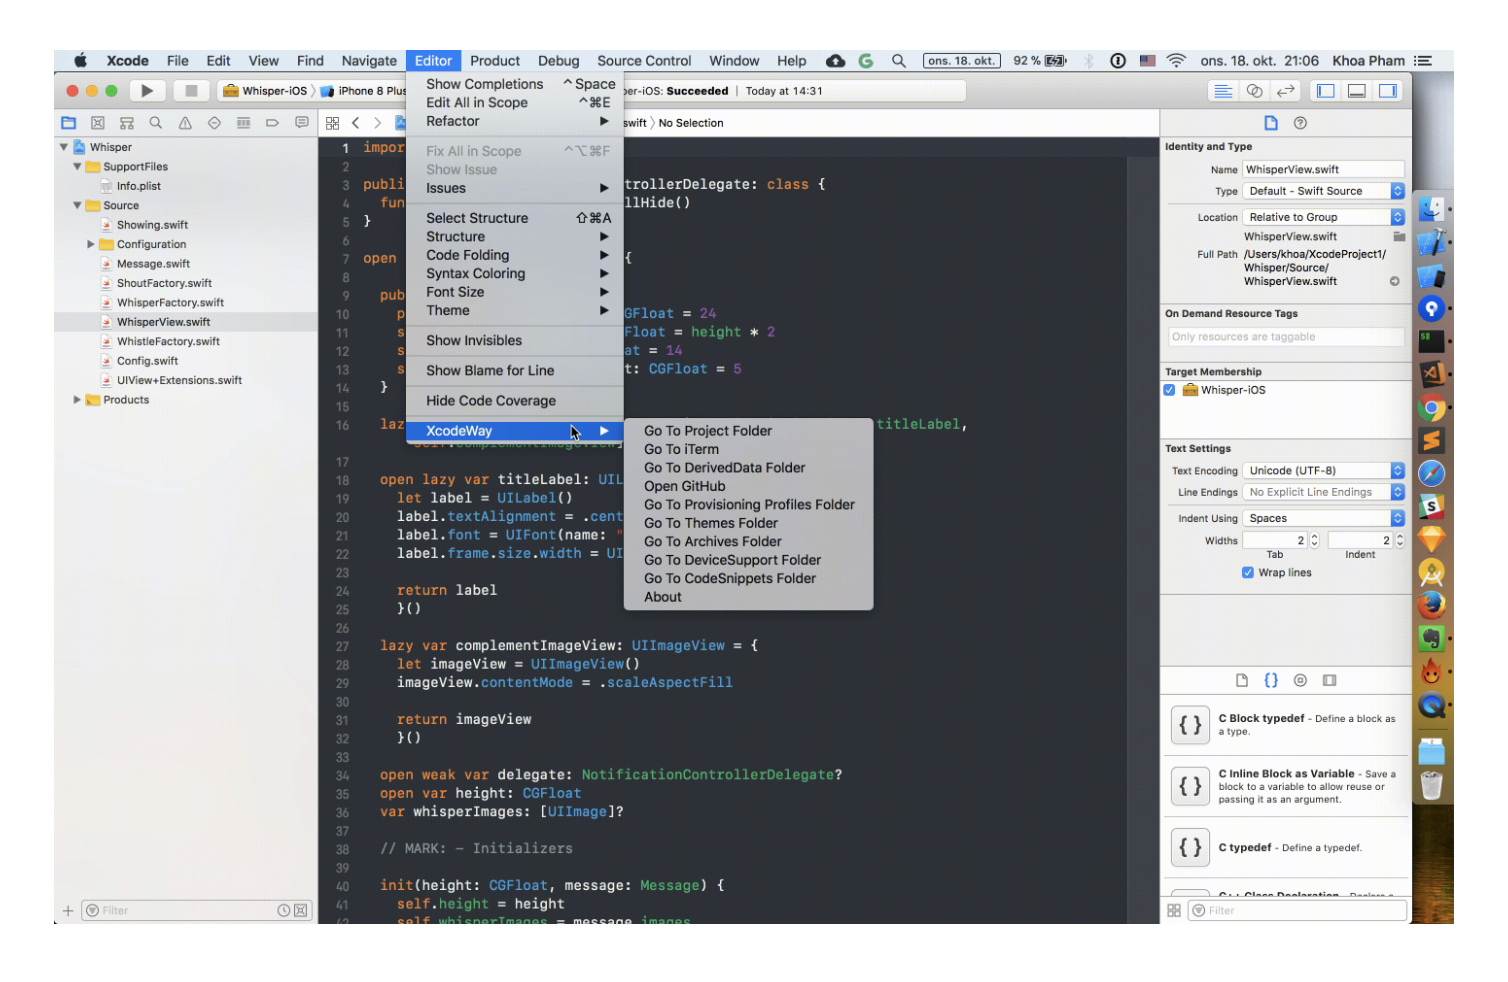
Xcode is the go to editor for iOS developer. The current version is Xcode 10. From Xcode 8, plugins are not supported. The way to go is Xcode extensions.
I have developed XcodeColorSense2 to easily recognise hex colors, and XcodeWay to easily navigate to many places right from Xcode

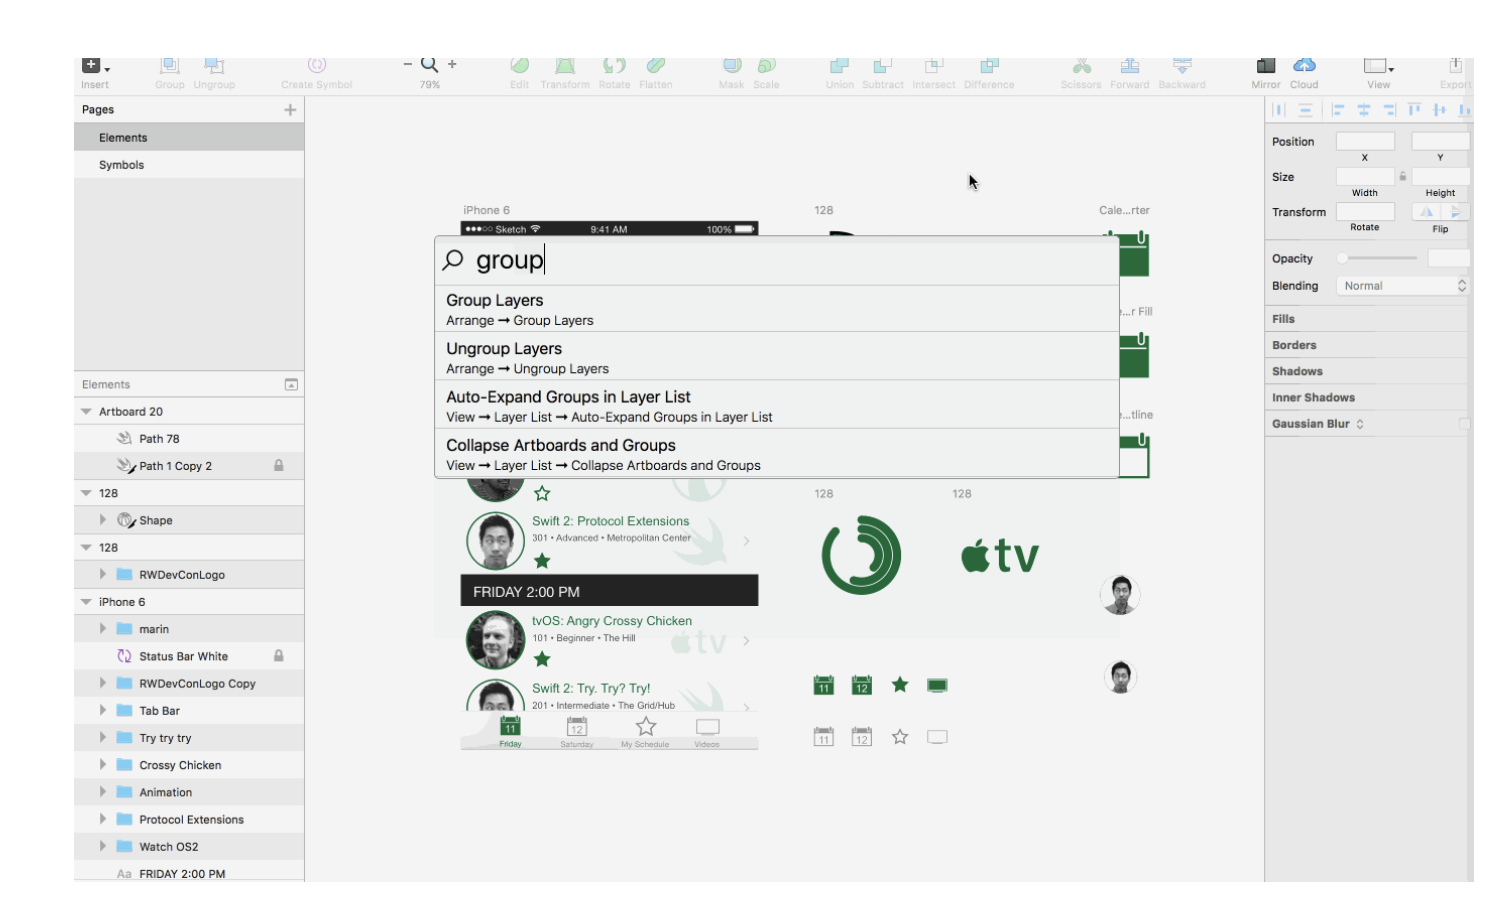
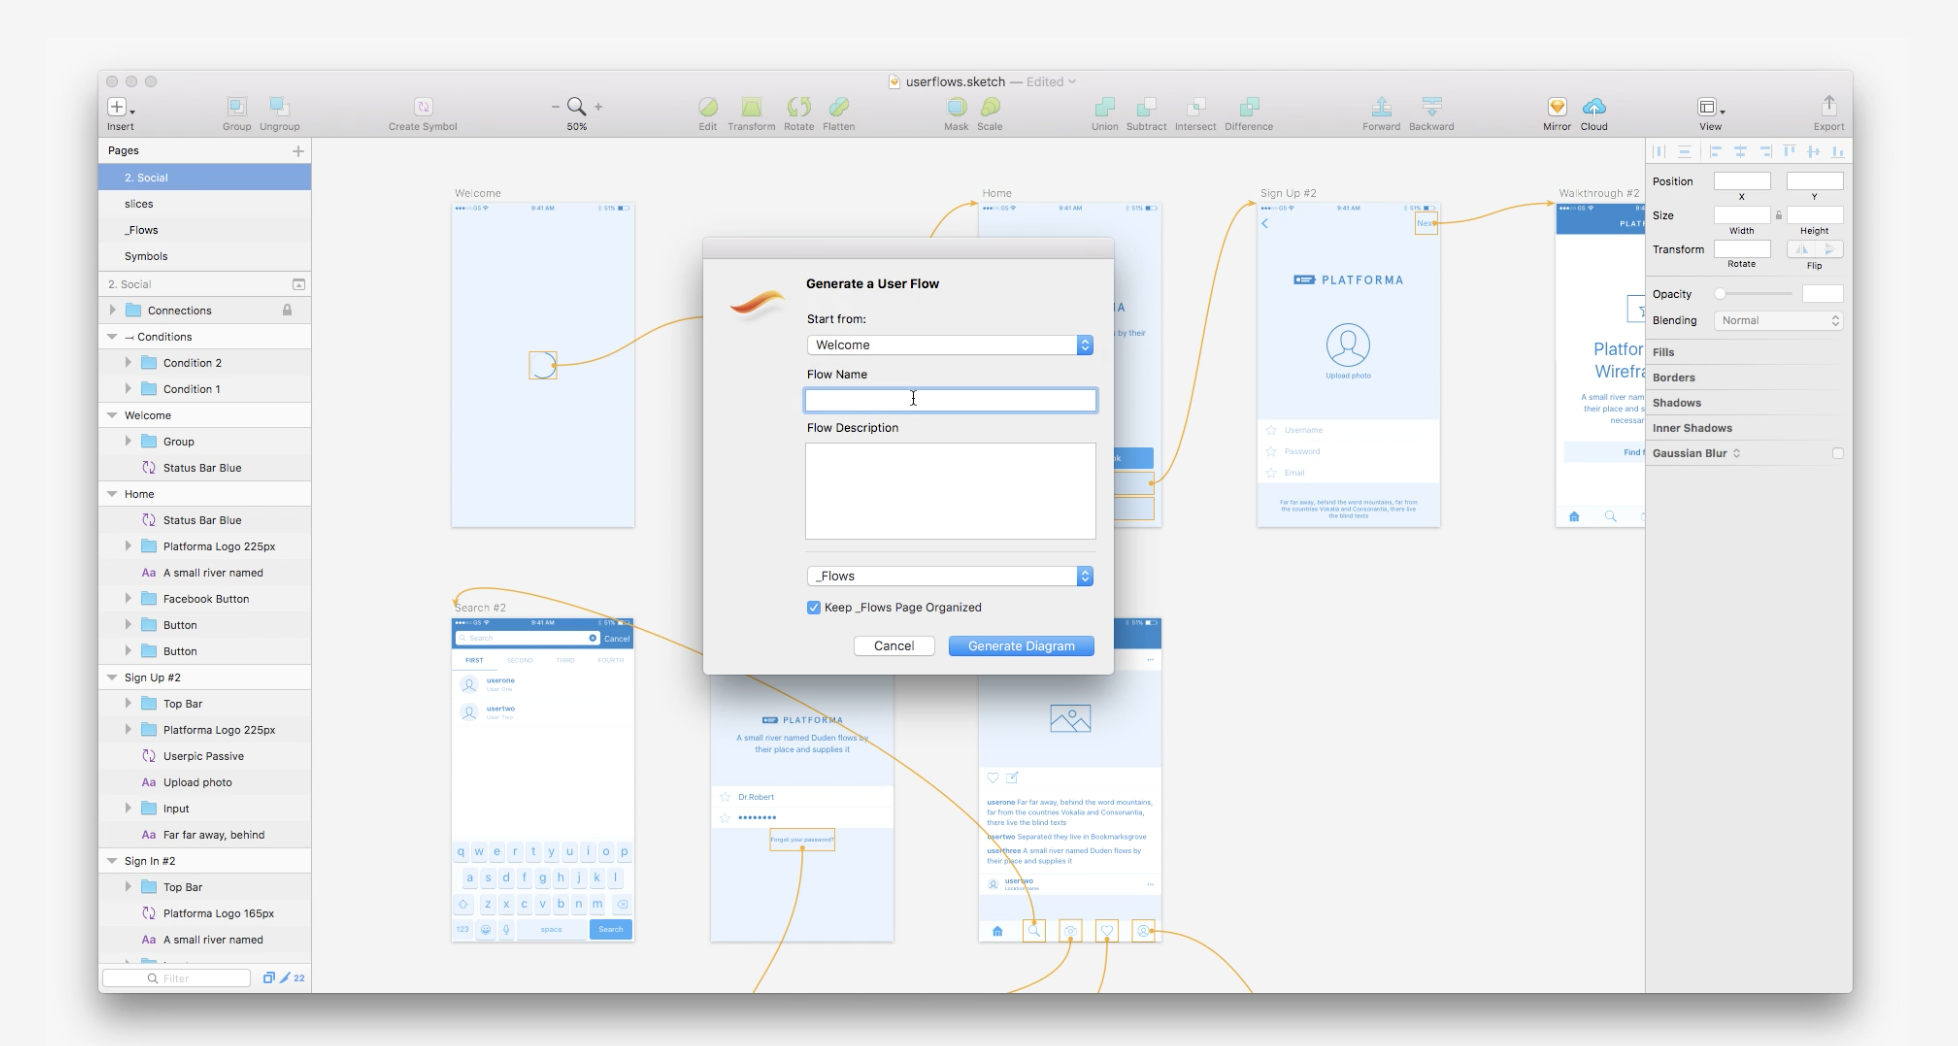
Sketch is a design toolkit built to help you create your best work — from your earliest ideas, through to final artwork.
Sketch is the most favorite design tool these days. There are many cool plugins for it. I use Sketch-Action and User Flows
I hope you find some new tools to try. If you know other awesome tools, feel free to make a comment. Here are some more links to discover further
Issue #245
Original post https://medium.com/fantageek/my-favourite-wwdc-2018-sessions-363d3fc9c9d5
This year I failed the lottery ticket to WWDC, and I also missed the keynote live stream because I was sailing on the Christian Radich outside Oslo fjord that day. Luckily all the videos are available on Apple Developer site very shortly, and we can watch them now on Chrome or the unofficial WWDC app on macOS. I recommend the WWDC macOS app as it allows to mark favourites and filter, also offers the ability to adjust play speed to 1.25 or 1.5 saves me some time watching.
This year WWDC focuses a lot on privacy, stability, and speed, which are all I wish, so many thanks to Apple engineers who made that happen, and the resit to install the so called more stable iOS 12 is real. As an iOS engineers, I like to focus more about the necessary things to me, that is about the Swift programming language, new changes in Cocoa Touch, enhancements in Xcode and testing tricks. I also like to explore more about machine learning so I’m very glad that Apple is investing more into this technology with the introduction of Turi Create and Create ML.
To me, APIs come and get deprecated very often and it’s good to know them, but the most important thing is to invest in your programming, debugging and testing skill which you can apply in many other platforms.
Continued from last year favourites list, below are my favourite sessions with personal notes. Things are listed in no particular order. Hope you find it useful.
If you don’t have time, you should watch only this session. Platform State of the Union is like keynote for developers as it highlights important changes.
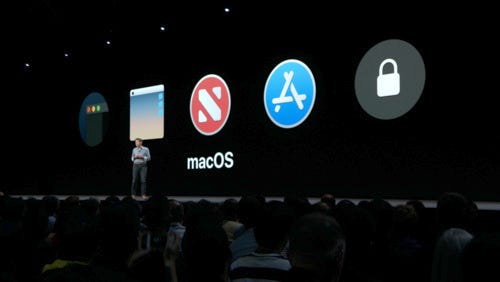
Privacy: Apple confirms on its commitment in privacy and security, also introduces password management feature and auto fill on iOS 12. Generating strong password, integrating with 3rd password management and quickly populating OTP field from SMS message have never been easier. GateKeeper gets some improvements as well and begins to require app to be notarised.
iOS 12: huge improvement in performance, Siri gets smarter with Shortcut support, group calling in FaceTime and grouped notification. Also for emoji fan, Memoji was introduced.
macOS 10.14 Mojave: more with Dark Mode. They demo mostly with Xcode in dark mode, which looks so cool. This year WWDC banner give hints about iOS and macOS cross-platform apps, which is partially true with Marzipan, a way to allow iOS apps to run on the mac.
Xcode 10: with improvements in code editing and source control changes bar indicator. Debugging with memory debug tool, LLDB performance enhancement and particular the new build system completely rewritten in Swift with parallel tasks are exciting news.
Swift 4.2: if you follow swift repo then Swift 4.2 may not be very surprising. There are also announcements for Swift 5 plan.
Machine Learning: is never hotter than this. This year we see huge investments in machine learning with Create ML, Turi Create, Natural Language frameworks, CoreML 2, new detection capabilities in Vision.
ARKit 2, watchOS 5, tvOS 12, AppStore Connect and AppStore Connect APIs are some other important news you don’t want to miss.
Together with this session, I recommend you to read What’s new in Swift 4.2 summary which is very succinct. Besides improvement in complication and runtime, Swift 4.2 offers some new features: iterable enum case, synthesised Equatable and Hashable, handy functions for shuffling, random generating. To me, the need to explicitly handle Implicitly unwrapped optional is also a reasonable change.

This is a brief introduction to all changes coming to iOS 12, together with tips on how to be a good iOS citizen. Learn what can affect scrolling experience and prefetching technique, memory consumption and automatic backing stores, how to get the best from UIImage and UIImageView . AutoLayout engine got a lot of performance improvement so it won’t bother you any more. To me the most satisfying is to get all the UIKit notifications and classes reorganised under nested types, which makes code reasoning very easy.
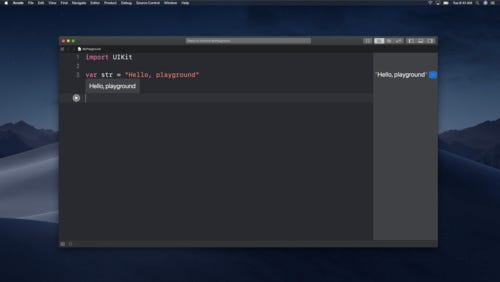
I’ve written about Playground before and I’m very glad that Apple also invests a lot in it. The way people can interact and train model [Create ML](http://Introducing Create ML) in Playground is mesmerising. People may question how Playground works so well in session’s demos, but we can’t resist the new changes coming to Playground like Step by Step execution, markup rendering improvements and also how easy it is to consume custom frameworks. We can also now publish our own Playground through subscription.

Apple starts the machine learning trend last year with the introduction of Core ML. We might be excited and frustrated at the same time as Core ML is powerful but there’s no way we can customise it. Now the 2 parts tell us how to implement custom layer and model, techniques to reduce model size like quantisation and flexible model. This makes the foundation for improvement in Vision in object tracking and the debut of Natural Language framework. Machine learning has never been easier.
I can’t miss any testing sessions as it is part of every day’s work. How can your program avoids regression bugs and ready for refactoring without any tests?
This session shows improvement in coverage and the introduction of xccov tool to help us build automation on top of coverage report. Parallel distributed testing in Xcode 10 can save us some time to have coffee. Another wonderful news is that tests have multiple order execution mode to avoid bugs due to implicit dependencies.
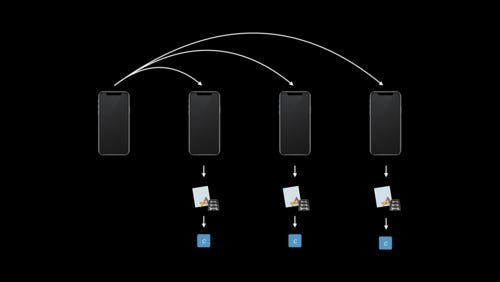

This is my most favourite. The session starts with a pyramid of tests with unit integration and end-to-end test analogy explanation, then to some very cool tips and tricks.
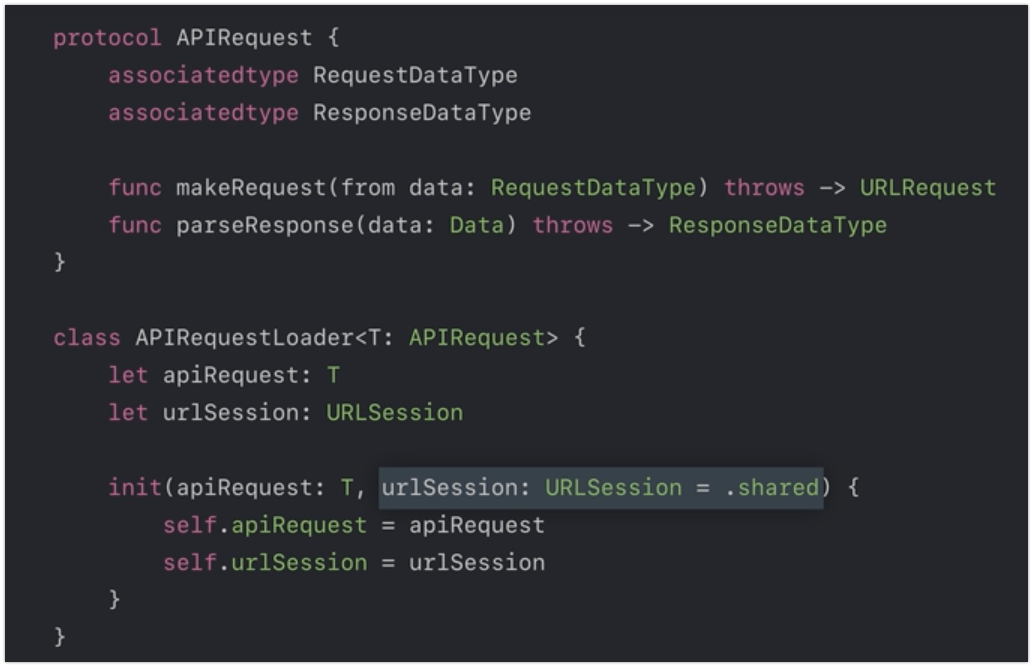
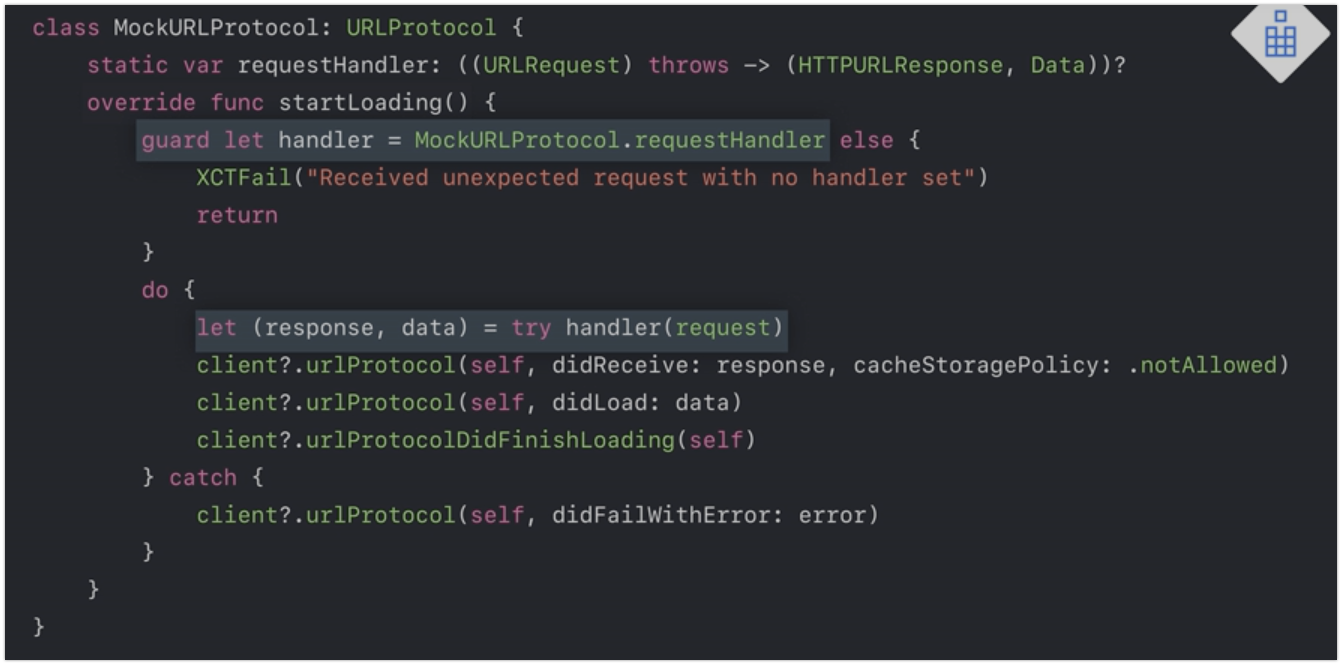
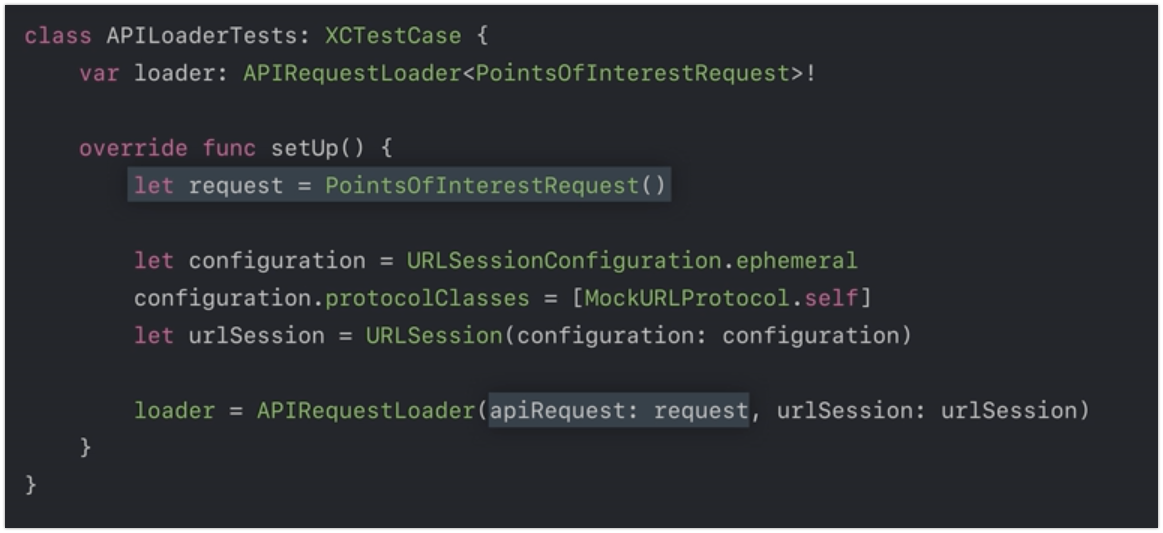
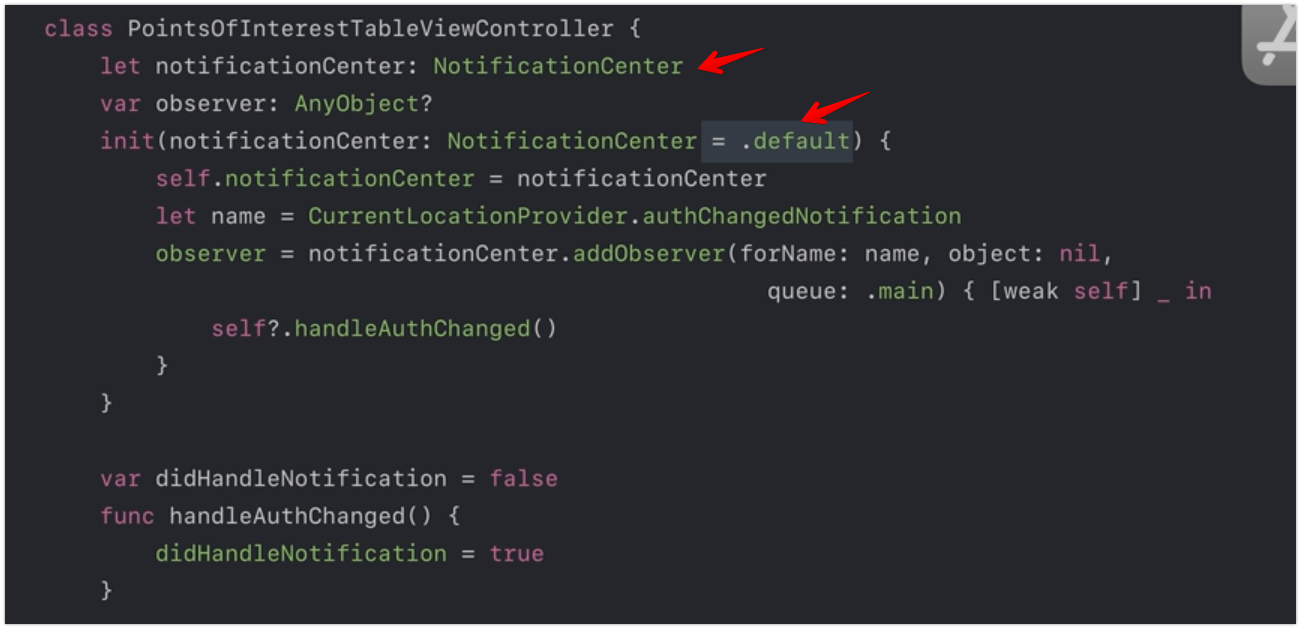
Testing location: build abstraction with LocationProvider and LocationFetcher . How to use custom protocol and protocol for delegate to mock during test
Testing timer: how to use and mock RunLoop behaviour with Timer
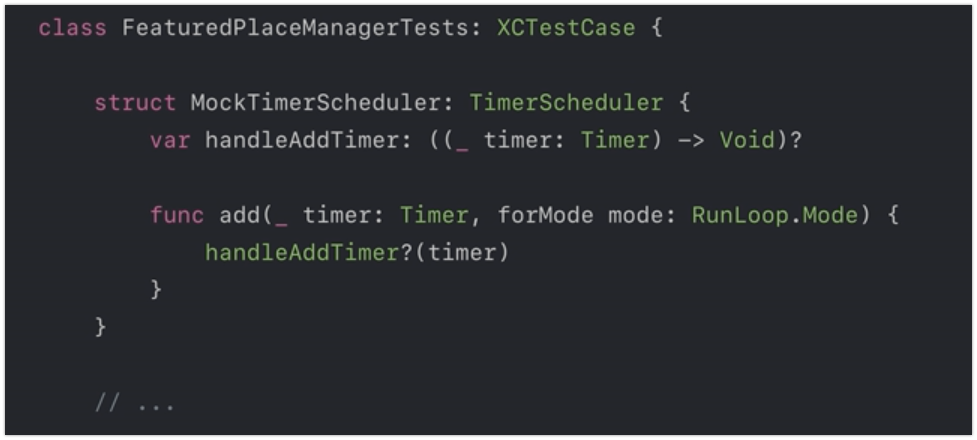
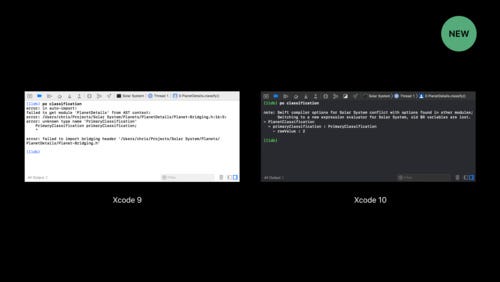
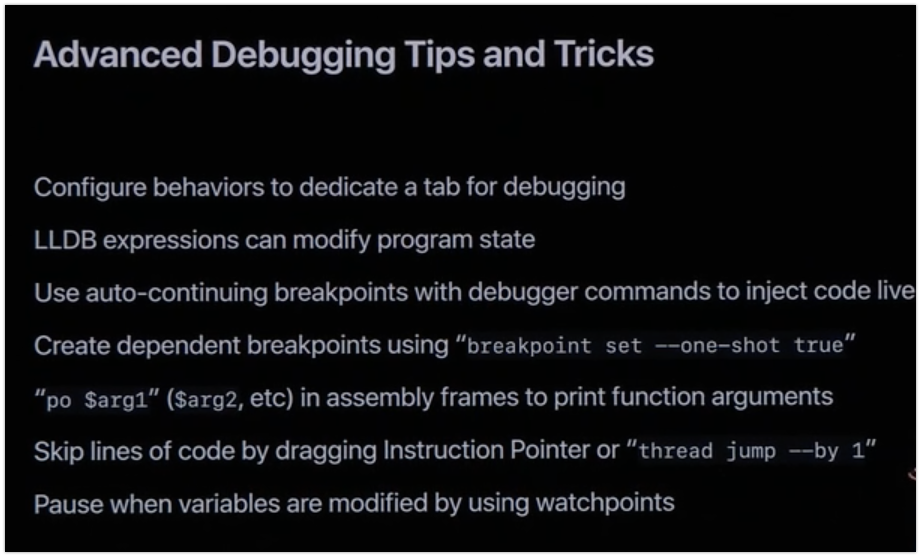
LLDB has been improved to enable to debugging reliability experience, issues with AST context corruption, Swift type resolution are now things in the past. We can review how to use some common LLDB commands with handy arguments, and how to use Xcode breakpoint to its best.

I begin to use UICollectionView more than UITableView , and it also has same code as NSCollectionView,which is more comfortable solution than the horrible NSTableView .

Mosaic layout: This is not new, but good to watch again. You learn how to implement custom layout using cached layout attributes
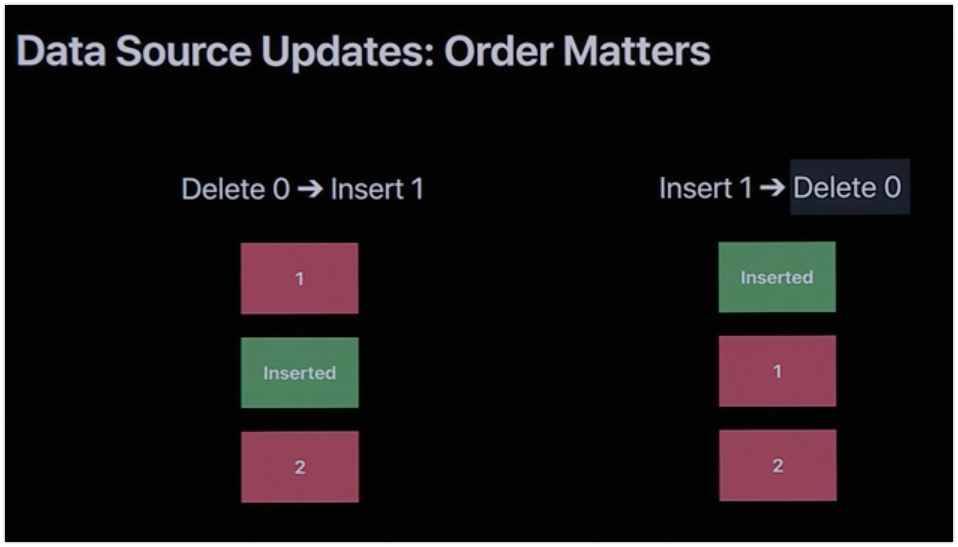
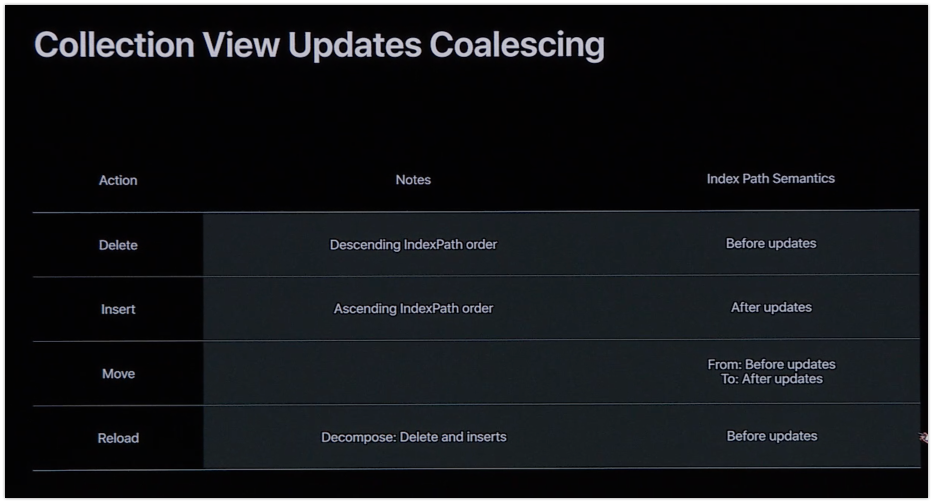
Data Source update: I didn’t expect Apple mentions this, but it is a good lesson on how UICollectionView handles batch update. I ‘ve written about this before in my A better way to update UICollectionView data in Swift with diff framework and that post gets a lot of attractions. In this session we need to remember that *ordering matters in data source update, but not in collection view update *❗️❗️❗️
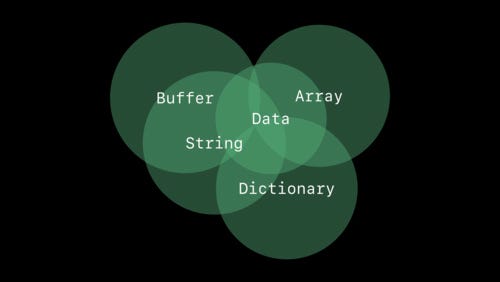
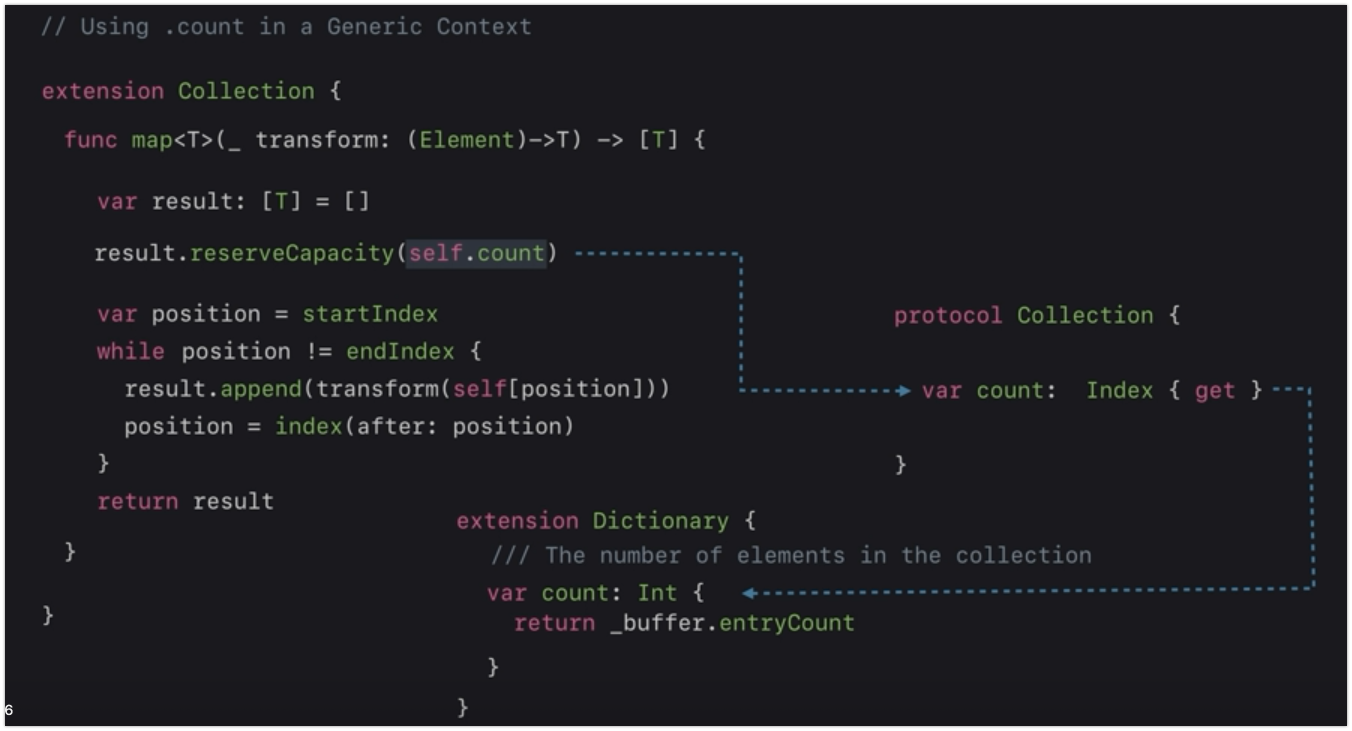
Generic was a core feature of Swift since the beginning, we all know that it helps us to implement generic code that can work with many types in a type safe manner. This session reminds that I ‘ve never learned enough, especially the reasonable design behind it.
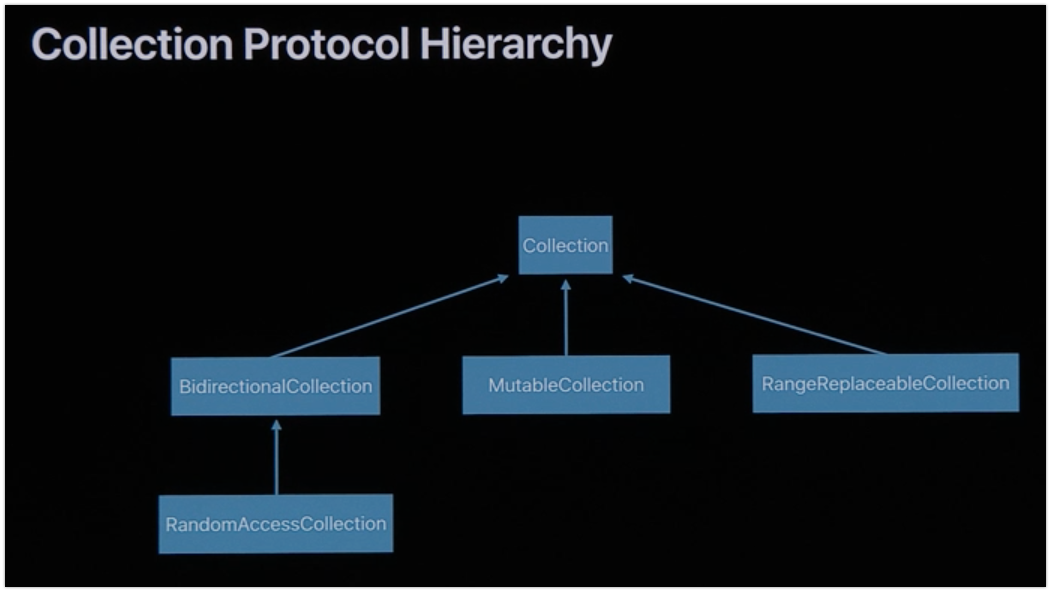
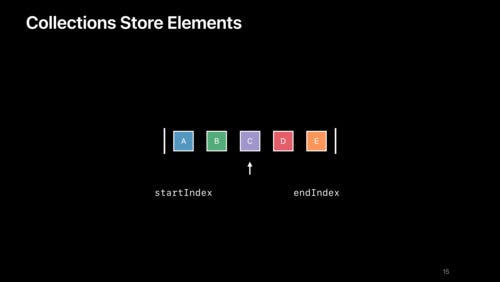
The sessions showcases Collection protocol and its protocol inheritances: MutableCollection , BidirectionalCollection , RandomAccessCollection and how they can be combined to provide generic functionalities for conformers. The associatedtype requirement in each protocol, especially Index and Element, is very minimal and has enough constraints for the protocol to implement lots of necessary functionalities in its protocol extension, which is eye opening for me. I very like to read open source, so looking at the source code for such protocols helps me understand more.
The part about Fisher Yates shuffle algorithm details how we can come up with necessary protocol while still make them generic
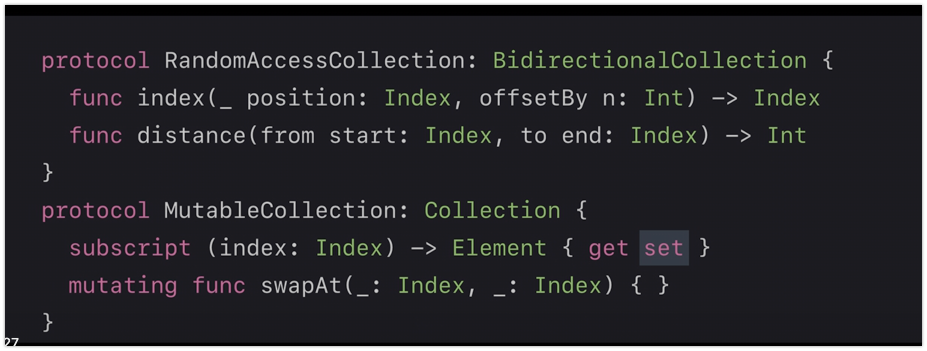
Pay attention to when they mention count and map , you can learn more how each concrete type can hook into the customisation point in protocol extension
Finally learn the Liskov substitution principle with protocol in class inheritance. You should also Using Collections Effectively for how to utilise handy functions in Collection.
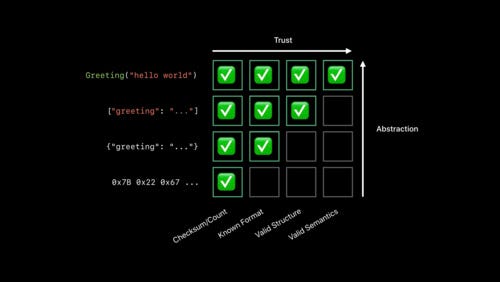
Although Codable has a lot to offers in term of data integrity, this is good to know about to make sure the data you receive is actually the right data in correct format and structure. CommonCrypto is also part of new iOS SDK so you don’t need my Arcane library to handle encryption and hashing in your apps.
This is the most pleasant to watch as it is like a conversation between the speaker and the imaginary manager Crusty. Here I learn how to be aware of algorithm complexity and also how to utilise built in Foundation functions which are already optimised for performance.
After this session I can’t help myself but going to Swift repo to read the Algorithms.swift file immediately.

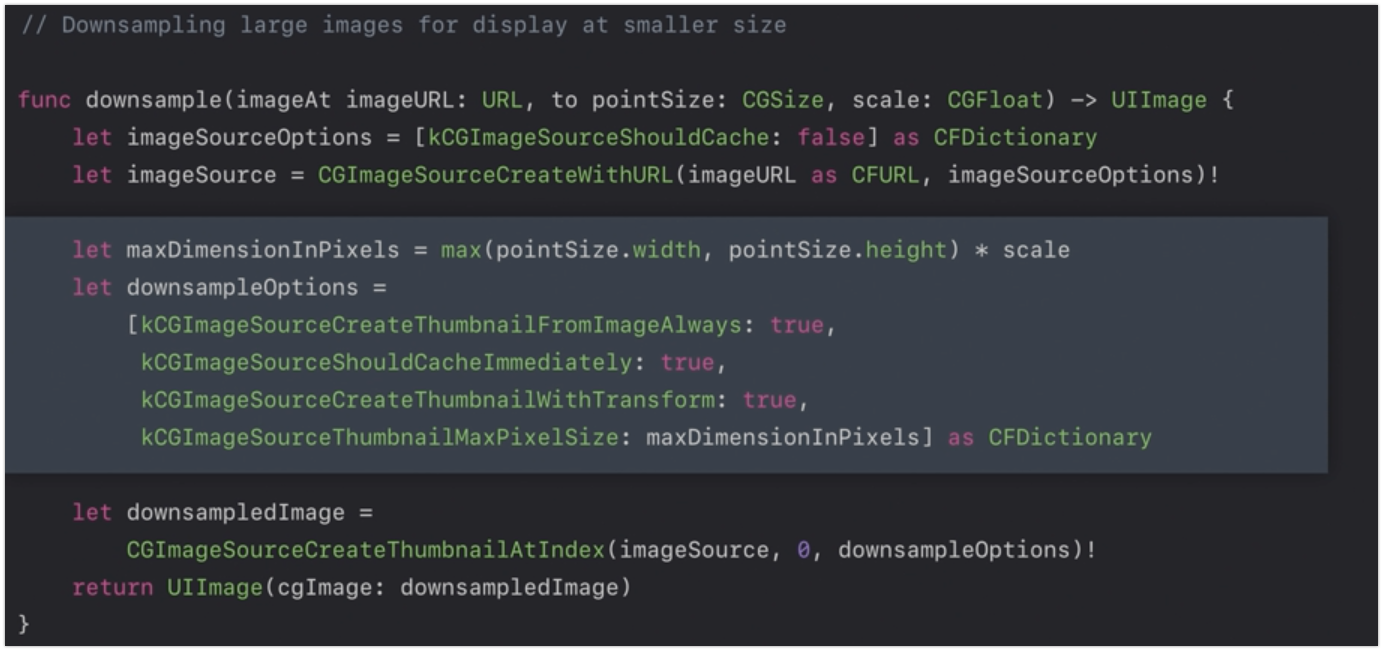
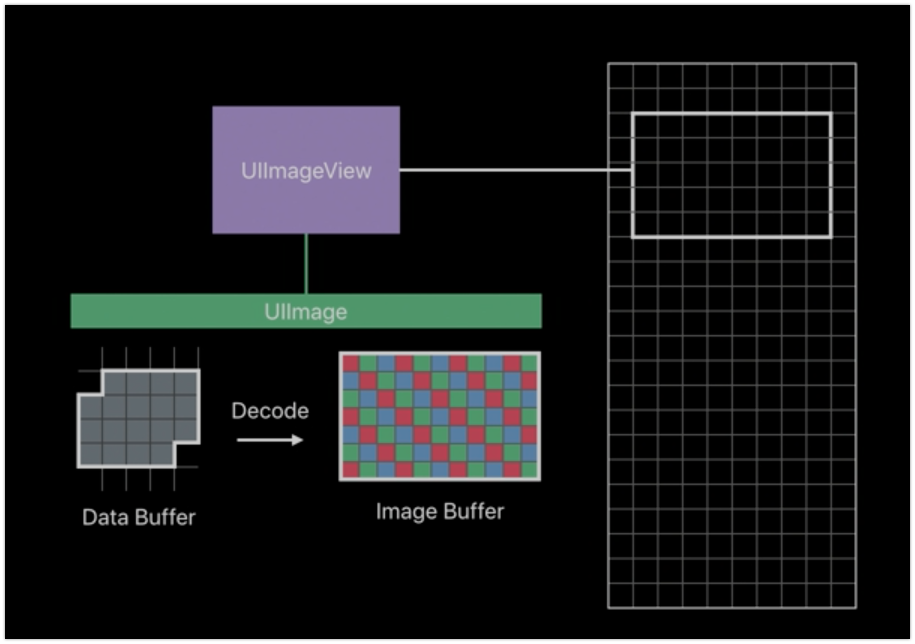
Learn how image encoding and decoding works through data and image buffer and how that affects memory and performance. There are techniques like downsampling that can tackle this problem. This also recommends against using backing store, and instead, use UIImageView

I’ve written about Turi Create before, but it is just scratching the surface of the many tasks offered by Turi. This year Apple releases Turi Create 5 with style transfer task, Vision Feature Print, GPU acceleration and recommender model improvements. I can’t wait to explore. And if you take a look at MLDataTable in Create ML framework, it looks like this has Turi ‘s SFrame under the hood.
That’s it. Thanks for reading. What are your favourite sessions this year? Please share in the comment section below
Issue #243
From https://developer.apple.com/documentation/coregraphics/1455137-cgwindowlistcopywindowinfo
Generates and returns information about the selected windows in the current user session.
1 | struct MyWindowInfo { |
Issue #242
1 | let window = NSWindow(contentRect: mainScreen.frame, styleMask: .borderless, backing: .buffered, defer: false) |
and then later hide it
1 | window.orderOut(NSApp) |
Issue #238
“App” is damaged and can’t be opened. You should move it to the Trash.
👉 Disable gate keeper
1 | sudo spctl --master-disable |
Current workaround is to remove Launch At Login handling code.
Issue #233
Shake
1 | let midX = box.layer?.position.x ?? 0 |
Wiggle
1 | NSAnimationContext.runAnimationGroup({ context in |
1 | extension UIView { |
Issue #223
1 | let script = |
In terminal, we can
1 | cd ~/Library |
In code, we use with administrator privileges, this when run will ask for password or fingerprint
1 | do shell script "mkdir MyNewFolder" with administrator privileges |
Issue #217
https://developer.apple.com/documentation/xcode_release_notes/xcode_10_release_notes
The command line tools will search the SDK for system headers by default. However, some software may fail to build correctly against the SDK and require macOS headers to be installed in the base system under /usr/include. If you are the maintainer of such software, we encourage you to update your project to work with the SDK or file a bug report for issues that are preventing you from doing so. As a workaround, an extra package is provided which will install the headers to the base system. In a future release, this package will no longer be provided. You can find this package at:
/Library/Developer/CommandLineTools/Packages/macOS_SDK_headers_for_macOS_10.14.pkg
To make sure that you’re using the intended version of the command line tools, run xcode-select -s
or xcode select -s /Library/Developer/CommandLineTools after installing.
Run
1 | open /Library/Developer/CommandLineTools/Packages/macOS_SDK_headers_for_macOS_10.14.pkg |
Issue #213
Use Runloop
1 | timer = Timer.scheduledTimer(withTimeInterval: 1, repeats: true, block: { [weak self] _ in |
Use Dispatch
1 | timer = Timer.scheduledTimer(withTimeInterval: 1, repeats: true, block: { [weak self] _ in |
Updated at 2020-09-08 07:54:36
Issue #205
https://developer.apple.com/documentation/servicemanagement/1501557-smloginitemsetenabled
SMLoginItemSetEnabled
Enable a helper application located in the main application bundle’s “Contents/Library/LoginItems” directory.
macOS Sierra: Open items automatically when you log in
You can have apps, documents, folders, or server connections open automatically whenever you log in to your Mac.
Add or remove automatic items
Choose Apple menu > System Preferences, then click Users & Groups.
Issue #203
https://developer.apple.com/news/?id=04102019a
With the public release of macOS 10.14.5, we require that all developers creating a Developer ID certificate for the first time notarize their apps, and that all new and updated kernel extensions be notarized as well
https://developer.apple.com/developer-id/
Unpublished Software. It’s easy to get unpublished software notarized with the Export process or xcodebuild. Custom build workflows are supported by the xcrun altool command line tool for uploading, and you can use xcrun stapler to attach the ticket to the package.
Published Software. To submit software you’ve already published, upload it using the xcrun altool command line tool. Several file types are supported, including .zip, .pkg, and .dmg, so you can upload the same package you already distribute to users.
https://developer.apple.com/documentation/security/notarizing_your_app_before_distribution
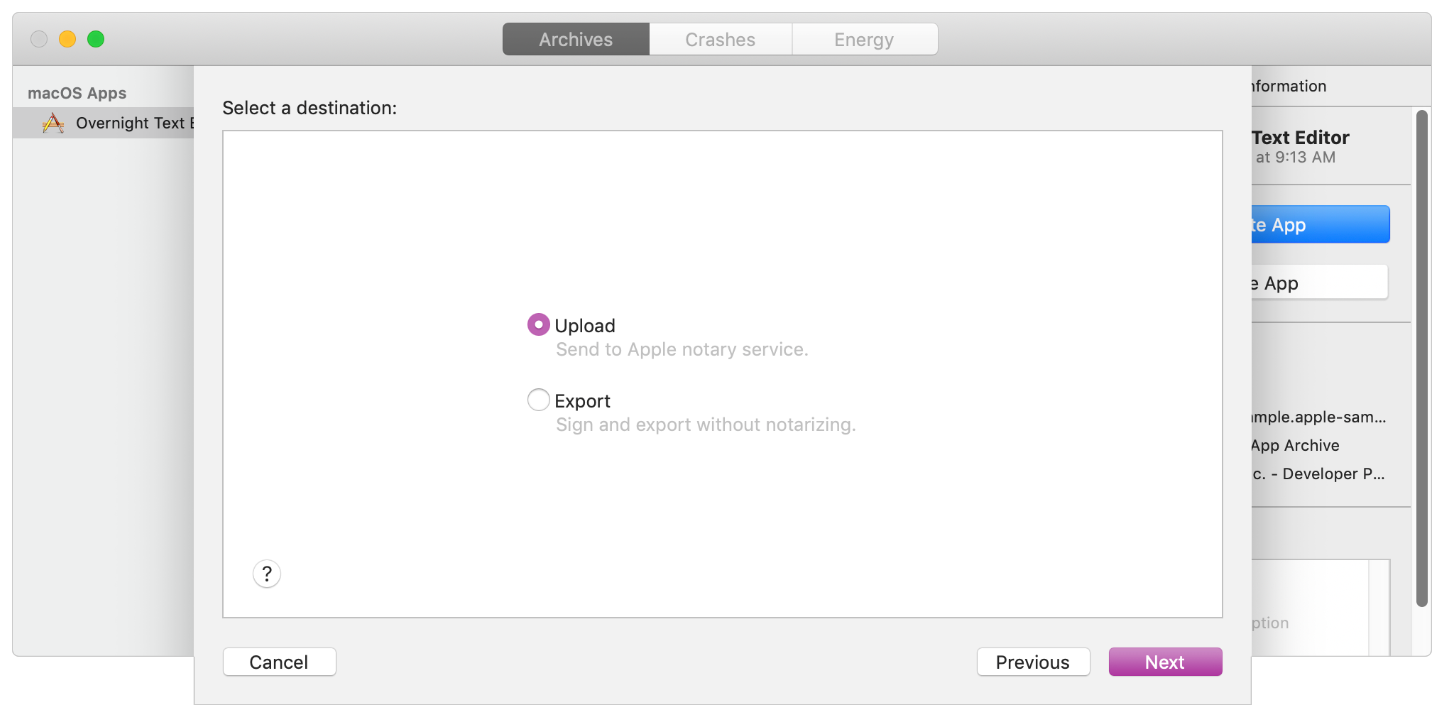
When you click Next, Xcode uploads your archive to the notary service. When the upload is complete, the notary service begins the scanning process, which usually takes less than an hour. While the notary service scans your software, you can continue to prepare your archive for distribution. For example, you can export the archive and perform any final testing that you require prior to making your software available to customers.
When the notarization process finishes, Xcode downloads the ticket and staples it to your archive. At that point, export your archive again to receive a distributable version of your software that includes the notary ticket.
https://help.apple.com/xcode/mac/current/#/dev88332a81e
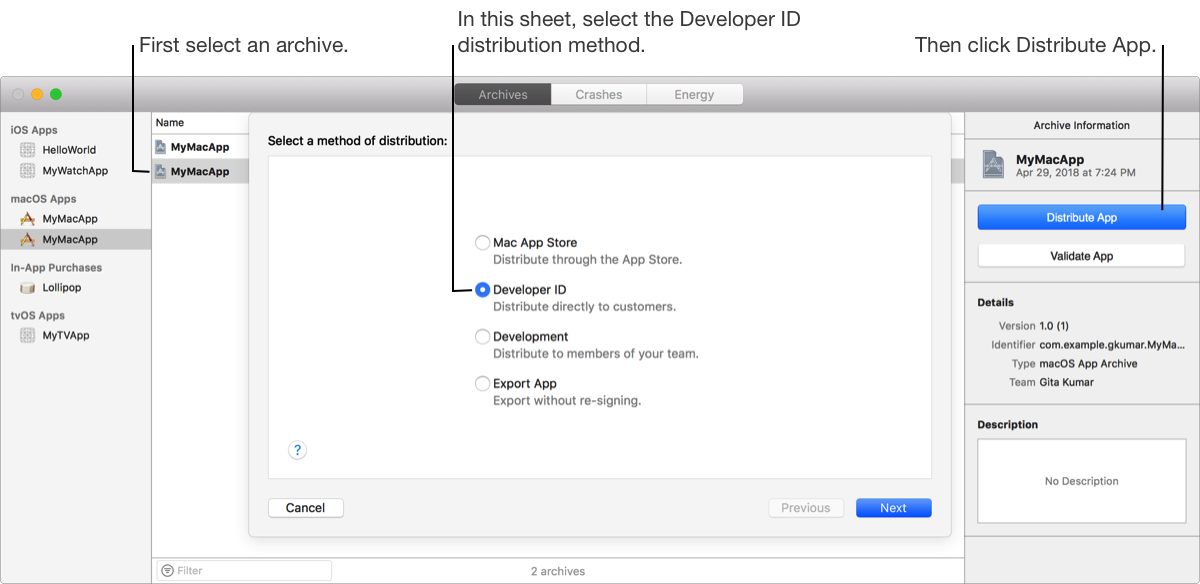
First, upload your macOS app to Apple to be notarized. If the upload fails, view the upload logs to find the problem. For example, you must enable hardened runtime (macOS) before you upload the app. Otherwise, check the notarization status and when the status is “Ready for distribution”, export the app for distribution.
https://help.apple.com/xcode/mac/current/#/dev033e997ca
In some cases, you may want to distribute an app outside of the Mac App Store. Because the app won’t be distributed by Apple, assure users that you are a trusted developer by signing your app with a Developer ID certificate. Users gain additional assurance if your Developer ID-signed app is also notarized by Apple.
On macOS, if your app isn’t downloaded from the Mac App Store or signed with a Developer ID certificate, it won’t launch unless the user completely disables Gatekeeper. Users have the option of enabling or disabling identified developers in System Preferences.
Issue #201
Go to both app and extension target, under Capabilities, enable AppGroup
Specify $(TeamIdentifierPrefix)group.com.onmyway133.MyApp
$(TeamIdentifierPrefix) will expand to something like T78DK947F3., with .
Then using is like a normal UserDefaults
1 | let defaults = UserDefaults(suiteName: "T78DK947F3 .group.com.onmyway133.MyApp") |
Updated at 2020-11-12 19:57:33