How to check file under Library in macOS

Issue #200

1
2
3
let home = NSSearchPathForDirectoriesInDomains(.applicationScriptsDirectory, .userDomainMask, true).first!
let path = home.appending(".XcodeWayExtensions/XcodeWayScript.scpt")
let exists = FileManager.default.fileExists(atPath: path)

How to run ffmpeg in macOS app

Issue #178

Install ffmpeg, which installs ffprobe

1
brew install ffmpeg

Find location of installed ffmpeg

1
which ffmpeg

Add all executables to project

Get error

unable to obtain file audio codec with ffprobe

Run in verbose mode

1
ffmpeg -v

Get

[debug] Encodings: locale US-ASCII, fs utf-8, out None, pref US-ASCII
[debug] Python version 2.7.10 (CPython) - Darwin-18.2.0-x86_64-i386-64bit
[debug] exe versions: ffmpeg present, ffprobe present

Run version of ffprobe

1
ffprobe --version

Get dylb not found

dyld: Library not loaded: /usr/local/Cellar/ffmpeg/4.1.1/lib/libavdevice.58.dylib

Similar issue https://techglimpse.com/ffprobe-command-error-linux-solution/
Read dylib path https://stackoverflow.com/questions/23777191/dyld-library-not-loaded-when-trying-to-run-fortran-executable-from-objective-c

How to run executable in macOS

Issue #176

Enable executable

1
chmod +x executable

Add executable file to target
Use Process with correct launchPad

1
2
3
4
5
6
7
8
9
10
11
12
13
14
15
16
17
18
19
20
21
22
23
24
25
26
27
28
29
30
31
32
33
34
35
36
37
38
39
40
41
42
43
44
45
46
47
48
49
50
51
52
53
54
55
56
57
58
59
60
61
62
63
64
65
66
67
68
69
70
71
72
73
74
75
import Foundation

protocol TaskDelegate: class {
func task(task: Task, didOutput string: String)
func taskDidComplete(task: Task)
}

class Task {

weak var delegate: TaskDelegate?
let process = Process()

func run(arguments: [String]) {
DispatchQueue.background.async {
let launchPath = Bundle.main.path(forResource: "executable", ofType: "")!
self.run(launchPath: launchPath, arguments: arguments)
}
}

func stop() {
DispatchQueue.background.async {
if self.process.isRunning {
self.process.terminate()
}
}
}

// MARK: - Helper

private func run(launchPath: String, arguments: [String]) {
let process = Process()
process.launchPath = launchPath
process.arguments = arguments

let stdOut = Pipe()
process.standardOutput = stdOut
let stdErr = Pipe()
process.standardError = stdErr

let handler = { [weak self] (file: FileHandle!) -> Void in
let data = file.availableData
guard let output = NSString(data: data, encoding: String.Encoding.utf8.rawValue) else {
return
}

guard let strongSelf = self,
let string = output.components(separatedBy: "\n").first else {
return
}

DispatchQueue.main.async {
strongSelf.delegate?.task(task: strongSelf, didOutput: string)
}
}

stdErr.fileHandleForReading.readabilityHandler = handler
stdOut.fileHandleForReading.readabilityHandler = handler

process.terminationHandler = { [weak self] (task: Process?) -> () in
stdErr.fileHandleForReading.readabilityHandler = nil
stdOut.fileHandleForReading.readabilityHandler = nil

guard let strongSelf = self else {
return
}

DispatchQueue.main.async {
strongSelf.delegate?.taskDidComplete(task: strongSelf)
}
}

process.launch()
process.waitUntilExit()
}
}

How to make scrollable vertical NSStackView

Issue #173

You might need to flip NSClipView

1
2
3
4
5
6
7
8
9
10
11
12
13
14
15
16
17
18
19
20
21
22
23
24
25
26
27
28
29
30
31
32
33
34
35
36
37
38
39
40
41
42
43
44
45
46
47
48
49
50
51
52
import AppKit
import Anchors
import Omnia

final class ScrollableStackView: NSView {
final class FlippedClipView: NSClipView {
override var isFlipped: Bool {
return true
}
}

override init(frame frameRect: NSRect) {
super.init(frame: frameRect)
setup()
}

required init?(coder decoder: NSCoder) {
fatalError()
}

let stackView: NSStackView = withObject(NSStackView()) {
$0.orientation = .vertical
}

private let scrollView: NSScrollView = NSScrollView()

private func setup() {
addSubview(scrollView)
scrollView.hasVerticalScroller = true
scrollView.drawsBackground = false

activate(
scrollView.anchor.edges
)

let clipView = FlippedClipView()
clipView.translatesAutoresizingMaskIntoConstraints = false

clipView.drawsBackground = false
scrollView.contentView = clipView

activate(
clipView.anchor.edges.equal.to(scrollView.anchor)
)

scrollView.documentView = stackView
stackView.translatesAutoresizingMaskIntoConstraints = false
activate(
clipView.anchor.left.top.right.equal.to(stackView.anchor)
)
}
}

Read more

How to load top level view from xib in macOS

Issue #171

1
2
3
var views: NSArray?
NSNib(nibNamed: NSNib.Name("ProfileView"), bundle: nil)?.instantiate(withOwner: nil, topLevelObjects: &views)
let profileView = views!.compactMap({ $0 as? ProfileView }).first!

How to generate QR code in AppKit

Issue #140

I need to generate QR code in https://github.com/onmyway133/AddressGenerator. Fortunately with CoreImage filter, it is very easy. Code is in Swift 4

1
2
3
4
5
6
7
8
9
10
11
12
13
14
15
16
17
18
19
20
21
22
23
24
25
26
27
28
29
30
31
32
33
34
35
36
import AppKit

final class QRCodeGenerator {
func generate(string: String, size: CGSize) -> NSImage? {
guard let data = string.data(using: .utf8) else {
return nil
}

// Filter
guard let filter = CIFilter(name: "CIQRCodeGenerator") else {
return nil
}

filter.setValue(data, forKey: "inputMessage")
filter.setValue("Q", forKey: "inputCorrectionLevel")

// CIImage
guard let ciImage = filter.outputImage else {
return nil
}

// NSImage
let rep = NSCIImageRep(ciImage: ciImage)
let image = NSImage(size: rep.size)
image.addRepresentation(rep)

// Scale
let finalImage = NSImage(size: size)
finalImage.lockFocus()
NSGraphicsContext.current?.imageInterpolation = .none
image.draw(in: NSRect(origin: .zero, size: size))
finalImage.unlockFocus()

return finalImage
}
}

How to make NSCollectionView programatically in Swift

Issue #131

Here’s how to create NSCollectionView programatically. We need to embed it inside NScrollView for scrolling to work. Code is in Swift 4

NSCollectionView

1
2
3
4
5
6
7
8
9
10
11
12
13
14
let layout = NSCollectionViewFlowLayout()
layout.minimumLineSpacing = 4

collectionView = NSCollectionView()
collectionView.dataSource = self
collectionView.delegate = self
collectionView.collectionViewLayout = layout
collectionView.allowsMultipleSelection = false
collectionView.backgroundColors = [.clear]
collectionView.isSelectable = true
collectionView.register(
Cell.self,
forItemWithIdentifier: NSUserInterfaceItemIdentifier(rawValue: "Cell")
)

NScrollView

1
2
3
scrollView = NSScrollView()
scrollView.documentView = collectionView
view.addSubview(scrollView)

NSCollectionViewItem

1
2
3
4
5
6
7
8
9
final class Cell: NSCollectionViewItem {
let label = Label()
let myImageView = NSImageView()

override func loadView() {
self.view = NSView()
self.view.wantsLayer = true
}
}

NSCollectionViewDataSource

1
2
3
4
5
6
7
8
9
10
11
12
13
14
15
16
17
18
19
func collectionView(_ collectionView: NSCollectionView, numberOfItemsInSection section: Int) -> Int {
return coins.count
}

func collectionView(_ collectionView: NSCollectionView, itemForRepresentedObjectAt indexPath: IndexPath) -> NSCollectionViewItem {
let cell = collectionView.makeItem(
withIdentifier: NSUserInterfaceItemIdentifier(rawValue: "Cell"),
for: indexPath
) as! Cell

let coin = coins[indexPath.item]

cell.label.stringValue = coin.name
cell.coinImageView.image =
NSImage(named: NSImage.Name(rawValue: "USD"))
?? NSImage(named: NSImage.Name(rawValue: "Others"))

return cell
}

NSCollectionViewDelegateFlowLayout

1
2
3
4
5
6
7
8
9
10
11
12
13
14
15
16
17
18
19
20
21
func collectionView(_ collectionView: NSCollectionView, didSelectItemsAt indexPaths: Set<IndexPath>) {
guard let indexPath = indexPaths.first,
let cell = collectionView.item(at: indexPath) as? Cell else {
return
}
}

func collectionView(_ collectionView: NSCollectionView, didDeselectItemsAt indexPaths: Set<IndexPath>) {
guard let indexPath = indexPaths.first,
let cell = collectionView.item(at: indexPath) as? Cell else {
return
}
}

func collectionView(_ collectionView: NSCollectionView, layout collectionViewLayout: NSCollectionViewLayout, sizeForItemAt indexPath: IndexPath) -> NSSize {

return NSSize(
width: collectionView.frame.size.width,
height: 40
)
}

Updated at 2020-05-22 11:48:15

Learning from Open Source Using Playground

Issue #94

One thing I like about kickstarter-ios is how they use Playground to quickly protoyping views.

We use Swift Playgrounds for iterative development and styling. Most major screens in the app get a corresponding playground where we can see a wide variety of devices, languages and data in real time.

This way we don’t need Injection or using React Native anymore. Take a look at all the pages https://github.com/kickstarter/ios-oss/tree/master/Kickstarter-iOS.playground/Pages

Read more

Learning from Open Source Making macOS app in code

Issue #91

I’m familiar with the whole app structure that Xcode gives me when I’m creating new macOS project, together with Storyboard. The other day I was reading touch-bar-simulator and see how it declares app using only code. See this main.swift

1
2
3
4
5
6
7
8
9
let app = NSApplication.shared
let delegate = AppDelegate()
app.delegate = delegate
app.run()

final class AppDelegate: NSObject, NSApplicationDelegate, NSWindowDelegate {
let controller = IDETouchBarSimulatorHostWindowController.simulatorHostWindowController()!
lazy var window: NSWindow = self.controller.window!
}

Fixing login hanging in macOS High Sierra

Issue #86

Today I met a strange problem. After I enter my password, the progress bar runs to the end, and it is stuck there forever. No matter how many times I try to restart.

I finally need to go to Recovery mode by pressing Cmd+R at start up. I then select Get Help Online to open Safari. Strangely enough I wasn’t connected to Internet
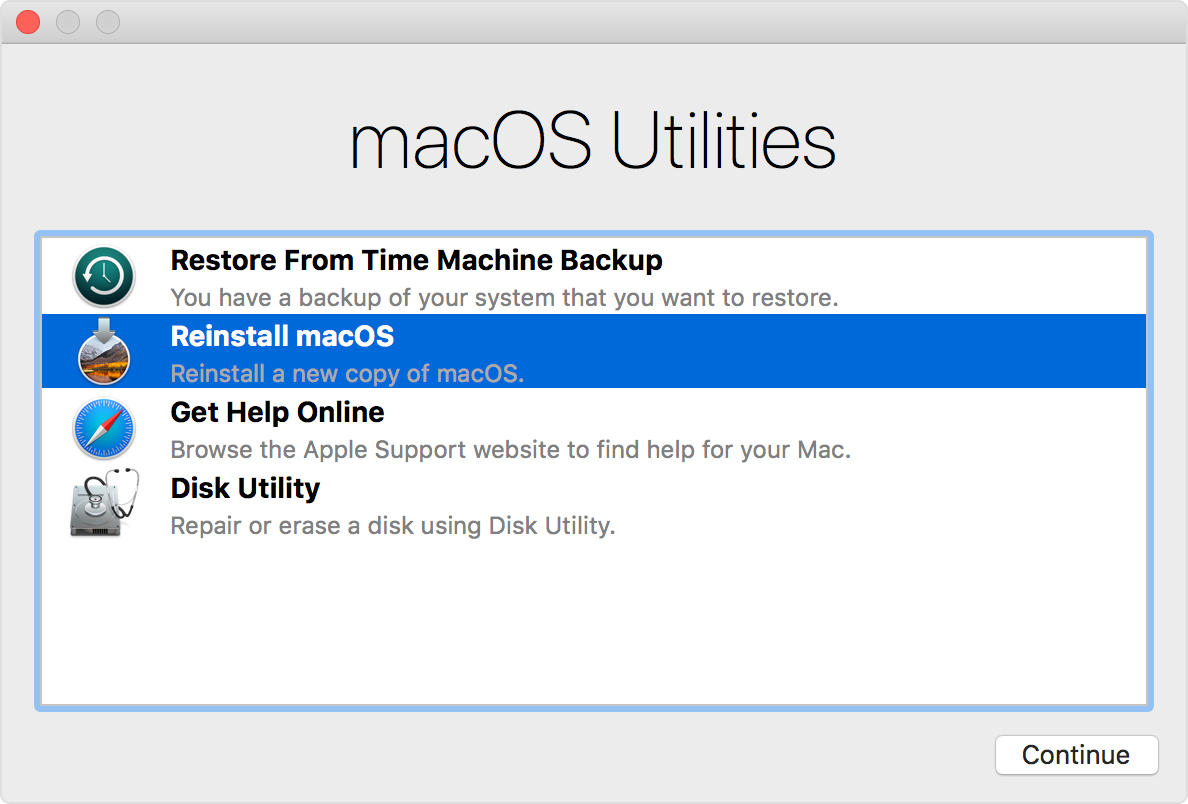
After select the wifi icon on the status bar to connect internet, I then restart and can login again. It seems that macOS is checking for something before allowing user to login

NSApplicationDelegate and notification

Issue #34

In an iOS project, we often see this in AppDelegate

1
2
3
4
5
6
7
8
9
10
@UIApplicationMain
class AppDelegate: UIResponder, UIApplicationDelegate {

var window: UIWindow?

func application(application: UIApplication, didFinishLaunchingWithOptions launchOptions: [NSObject: AnyObject]?) -> Bool {

return true
}
}

But in a Cocoa project, we see this instead

1
2
3
4
5
6
7
8
9
10
11
12
13
@NSApplicationMain
class AppDelegate: NSObject, NSApplicationDelegate {


func applicationDidFinishLaunching(aNotification: NSNotification) {
// Insert code here to initialize your application
}

func applicationWillTerminate(aNotification: NSNotification) {
// Insert code here to tear down your application
}
}

In this case the param is of type NSNotification

Delegate and notification

Reading Cocoa Core Competencies - Delegation

The delegate of most Cocoa framework classes is automatically registered as an observer of notifications posted by the delegating object. The delegate need only implement a notification method declared by the framework class to receive a particular notification message. Following the example above, a window object posts an NSWindowWillCloseNotification to observers but sends a windowShouldClose: message to its delegate.

So the pattern is that the delegate should strip the NS and Notification, like NSWindowWillCloseNotification to windowShouldClose:

How to debug Auto Layout

Issue #23

hasAmbiguousLayout

Returns whether the constraints impacting the layout of the view incompletely specify the location of the view.

exerciseAmbiguityInLayout

This method randomly changes the frame of a view with an ambiguous layout between its different valid values, causing the view to move in the interface. This makes it easy to visually identify what the valid frames are and may enable the developer to discern what constraints need to be added to the layout to fully specify a location for the view.

_autolayoutTrace

This returns a string describing the whole view tree which tells you when a view has an ambiguous layout.

NSLayoutConstraint identifier

The name that identifies the constraint.

UIViewAlertForUnsatisfiableConstraints

DETECTED_MISSING_CONSTRAINTS

https://forums.developer.apple.com/thread/63811

View Debugger search by address

Read more

Markdown editor

Issue #6

I like writing with markdown, it gives me comfortable experience with complete control over what I want to write.

I recommend vmd which renders exactly as GitHub. vmd is for rendering only, you need an editor to write, I use Sublime Text because it opens very fast

I also recommend using spectacle to easily split and organize windows

vmd