How to use relative file module with Create React app

Issue #751

Declare data/package.json to make it into node module

1
2
3
4
5
6
7
{
"name": "data",
"version": "0.1.0",
"private": true,
"homepage": ".",
"main": "main.js"
}

Then in landing/package.json, use file

1
2
3
4
5
6
7
8
9
10
11
12
13
{
"name": "landing",
"version": "0.1.0",
"private": true,
"homepage": ".",
"dependencies": {
"@emotion/core": "^10.0.28",
"react": "^16.13.1",
"react-dom": "^16.13.1",
"react-image": "^2.4.0",
"react-scripts": "3.4.1",
"data": "file:../data"
},

How to use default system fonts in React apps

Issue #700

In index.css

1
2
3
4
5
6
7
8
9
10
body {
margin: 0;
font-family: -apple-system, BlinkMacSystemFont, 'Segoe UI', 'Roboto', 'Oxygen', 'Ubuntu', 'Cantarell', 'Fira Sans', 'Droid Sans', 'Helvetica Neue', sans-serif;
-webkit-font-smoothing: antialiased;
-moz-osx-font-smoothing: grayscale;
}

code {
font-family: source-code-pro, Menlo, Monaco, Consolas, 'Courier New', monospace;
}

Updated at 2020-11-18 06:29:29

How to make simple overlay container in React

Issue #699

Use term ZStack like in SwiftUI, we declare container as relative position. For now it uses only 2 items from props.children but can be tweaked to support mutiple

1
2
3
4
5
6
7
8
9
10
11
12
13
14
15
class App extends React.Component {
render() {
return (
<ZStack>
<Header />
<div css={css`
padding-top: 50px;
`}>
<Showcase factory={factory} />
<Footer />
</div>
</ZStack>
)
}
}
1
2
3
4
5
6
7
8
9
10
11
12
13
14
15
16
17
18
19
20
21
22
23
24
25
26
/** @jsx jsx */
import React from 'react';
import { css, jsx } from '@emotion/core'

export default function ZStack(props) {
return (
<div css={css`
position: relative;
border: 1px solid red;
`}>
<div css={css`
position: absolute;
top: 0;
left: 0;
width: 100%;
z-index: -1;
`}>
{props.children[0]}
</div>
<div >
{props.children[1]}
</div>

</div>
)
}

Updated at 2021-01-15 22:03:49

How to use useEffect in React hook

Issue #669

Specify params as array [year, id], not object {year, id}

1
2
3
4
5
6
7
8
9
10
11
12
13
const { year, id } = props
useEffect(() => {
const loadData = async () => {
try {

} catch (error) {
console.log(error)
}
}

listenChats()
}, [year, id])
}

Hooks effect

By default, it runs both after the first render and after every update.

This requirement is common enough that it is built into the useEffect Hook API. You can tell React to skip applying an effect if certain values haven’t changed between re-renders. To do so, pass an array as an optional second argument to useEffect:

1
2
3
useEffect(() => {
document.title = `You clicked ${count} times`;
}, [count]); // Only re-run the effect if count changes

Updated at 2020-06-17 06:21:08

How to go back to home in React

Issue #665

Usually in header we have logo that takes user back to the home page

1
2
3
4
5
6
7
8
9
10
11
12
13
14
// index.js
import {
BrowserRouter as Router,
Switch,
Route,
Link
} from 'react-router-dom'

<Router>
<Switch>
<Route exact path="/">
<Home />
</Route>
</Router>
1
2
3
4
5
6
7
8
// Header.js

import { useHistory } from 'react-router-dom'
const history = useHistory()

<a class="navbar-item" onClick={() => {
history.push('/')
}}>

How to style video js

Issue #663

1
2
3
4
5
6
7
8
9
10
11
12
13
14
15
16
17
18
19
20
21
22
23
24
25
26
27
28
29
30
31
32
33
34
35
36
37
38
39
40
41
42
43
44
/** @jsx jsx */
import { css, jsx } from '@emotion/core'
import React from 'react';
import videojs from 'video.js'

export default class VideoPlayer extends React.Component {
componentDidMount() {
// instantiate Video.js
this.player = videojs(this.videoNode, this.props, function onPlayerReady() {
console.log('onPlayerReady', this)
});
}

// destroy player on unmount
componentWillUnmount() {
if (this.player) {
this.player.dispose()
}
}

// wrap the player in a div with a `data-vjs-player` attribute
// so videojs won't create additional wrapper in the DOM
// see https://github.com/videojs/video.js/pull/3856
render() {
return (
<div>
<div data-vjs-player css={css`

`}>
<video
ref={node => this.videoNode = node}
className="video-js vjs-big-play-centered"
data-setup='{ "playbackRates": [0.5, 1, 1.5, 2] }'
css={css`
width: auto;
height: 400px;
`}>

</video>
</div>
</div>
)
}
}

Updated at 2020-06-17 05:38:30

How to use setState in React

Issue #662

Use spread operator

1
2
3
4
5
6
7
8
9
10
11
12
13
import React, { Component, useState, useEffect } from 'react';

const [state, setState] = useState({
message: '',
chats: [],
sending: false
})

setState(prevState => ({
...prevState,
message: '',
sending: false
}))

Updated at 2020-06-12 21:23:42

How to handle events for input with React

Issue #661

Use Bulma css

1
2
3
4
5
6
7
8
9
10
11
12
<input
class="input is-rounded"
type="text"
placeholder="Say something"
value={value}
onChange={(e) => { onValueChange(e.target.value) }}
onKeyDown={(e) => {
if (e.key === 'Enter') {
onSend(e)
}
}}
/>

Updated at 2020-06-16 07:30:52

How to handle evens in put with React

Issue #661

Use Bulma css

1
2
3
4
5
6
7
8
9
10
11
12
<input
class="input is-rounded"
type="text"
placeholder="Say something"
value={value}
onChange={(e) => { onValueChange(e.target.value) }}
onKeyDown={(e) => {
if (e.key === 'Enter') {
onSend(e)
}
}}
/>

How to auto scroll to top in react router 5

Issue #659

Use useLocation https://reacttraining.com/react-router/web/guides/scroll-restoration

1
2
3
4
5
6
7
8
9
10
11
12
13
14
15
16
17
18
19
20
21
22
23
24
25
26
27
28
29
30
31
32
33
34
35
import React, { useEffect } from 'react';
import {
BrowserRouter as Router,
Switch,
Route,
Link,
useLocation,
withRouter
} from 'react-router-dom'

function _ScrollToTop(props) {
const { pathname } = useLocation();

useEffect(() => {
window.scrollTo(0, 0);
}, [pathname]);

return props.children
}

const ScrollToTop = withRouter(_ScrollToTop)

function App() {
return (
<div>
<Router>
<ScrollToTop>
<Header />
<Content />
<Footer />
</ScrollToTop>
</Router>
</div>
)
}

Updated at 2020-06-04 05:58:47

How to use dynamic route in react router 5

Issue #658

Declare routes, use exact to match exact path as finding route is from top to bottom. For dynamic route, I find that we need to use render and pass the props manually.

Declare Router as the rooter with Header, Content and Footer. Inside Content there is the Switch, so header and footer stay the same across pages

1
2
3
4
5
6
7
8
9
10
11
12
13
14
15
16
17
18
19
20
21
22
23
24
25
26
27
28
29
30
31
32
33
34
35
36
37
import {
BrowserRouter as Router,
Switch,
Route,
Link
} from 'react-router-dom'

function Content() {
return (
<Switch>
<Route exact path="/about">
<About />
</Route>
<Route exact path="/">
<Home />
</Route>
<Route path='/book/:id' render={(props) => {
return ( <BookDetail {...props } /> )
}} />
<Route>
<NotFound />
</Route>
</Switch>
)
}

function App() {
return (
<div>
<Router>
<Header />
<Content />
<Footer />
</Router>
</div>
)
}

To trigger route request, use useHistory hook. Note that we need to declare variable, and not use useHistory().push directly

1
2
3
4
5
6
7
import { useHistory } from 'react-router-dom'

const history = useHistory()

<a onClick={() => {
history.push(`/book/${uuid}`)
}} >

To get parameters, use match

1
2
3
4
5
6
7
8
export default function BookDetail(props) {
const [ state, setState ] = useState({
book: null
})

const { match } = props
// match.params.id
}

Updated at 2020-06-03 05:07:00

How to use folder as local npm package

Issue #657

Add library folder src/library

1
2
3
4
5
6
7
src
library
res.js
screens
Home
index.js
package.json

Declare package.json in library folder

1
2
3
4
{
"name": "library",
"version": "0.0.1"
}

Declare library as dependency in root package.json

1
2
3
"dependencies": {
"library": "file:src/library"
},

Now import like normal, for example in src/screens/Home/index.js

1
import res from 'library/res'

How to update multiple state properties with React hooks

Issue #655

Declare state and setState

1
2
3
4
5
6
7
8
9
10
11
12
13
14
15
16
17
18
19
20
21
22
23
24
25
26
27
28
29
30
31
32
33
34
35
36
37
38
39
40
41
export default function Showcase(props) {
const factory = props.factory
const [state, setState] = useState(
{
factory,
selectedFilter: { name: '' }
}
)

const onFilterClick = (filter) => {
setState({
selectedFilter: filter,
factory: factory.filter((app) => {
return app.showcase.platforms.includes(filter.name)
})
})
}

let cards = state.factory.map((app, index) => {
return (
<Card app={app} key={app.slug} />
)
})

return (
<div>
<FilterBar onClick={onFilterClick} />
<div css={css`
display: flex;
flex-direction: row;
flex-wrap: wrap;
justify-content: flex-start;
margin: 0 auto;
padding: 0 8vw;
`}>
{cards}
</div>
</div>

)
}

How to make white label React app for landing pages

Issue #654

A good landing page is one of the most crucial part of a successful launch. Recently I started creating landing pages for my apps, I was lazy that I ended creating a white label React app as a landing template and then write a script to build multiple similar pages.

Here are a few examples, at first the pages share same look and feel, but we can add more configuration parameters later on. The cool thing with this approach is fixing bugs and adding features become easier, as they will all be deployed with the generator script.

Here are how it looks in my apps PastePal and PushHero, look at how the footer parts are so consistent.
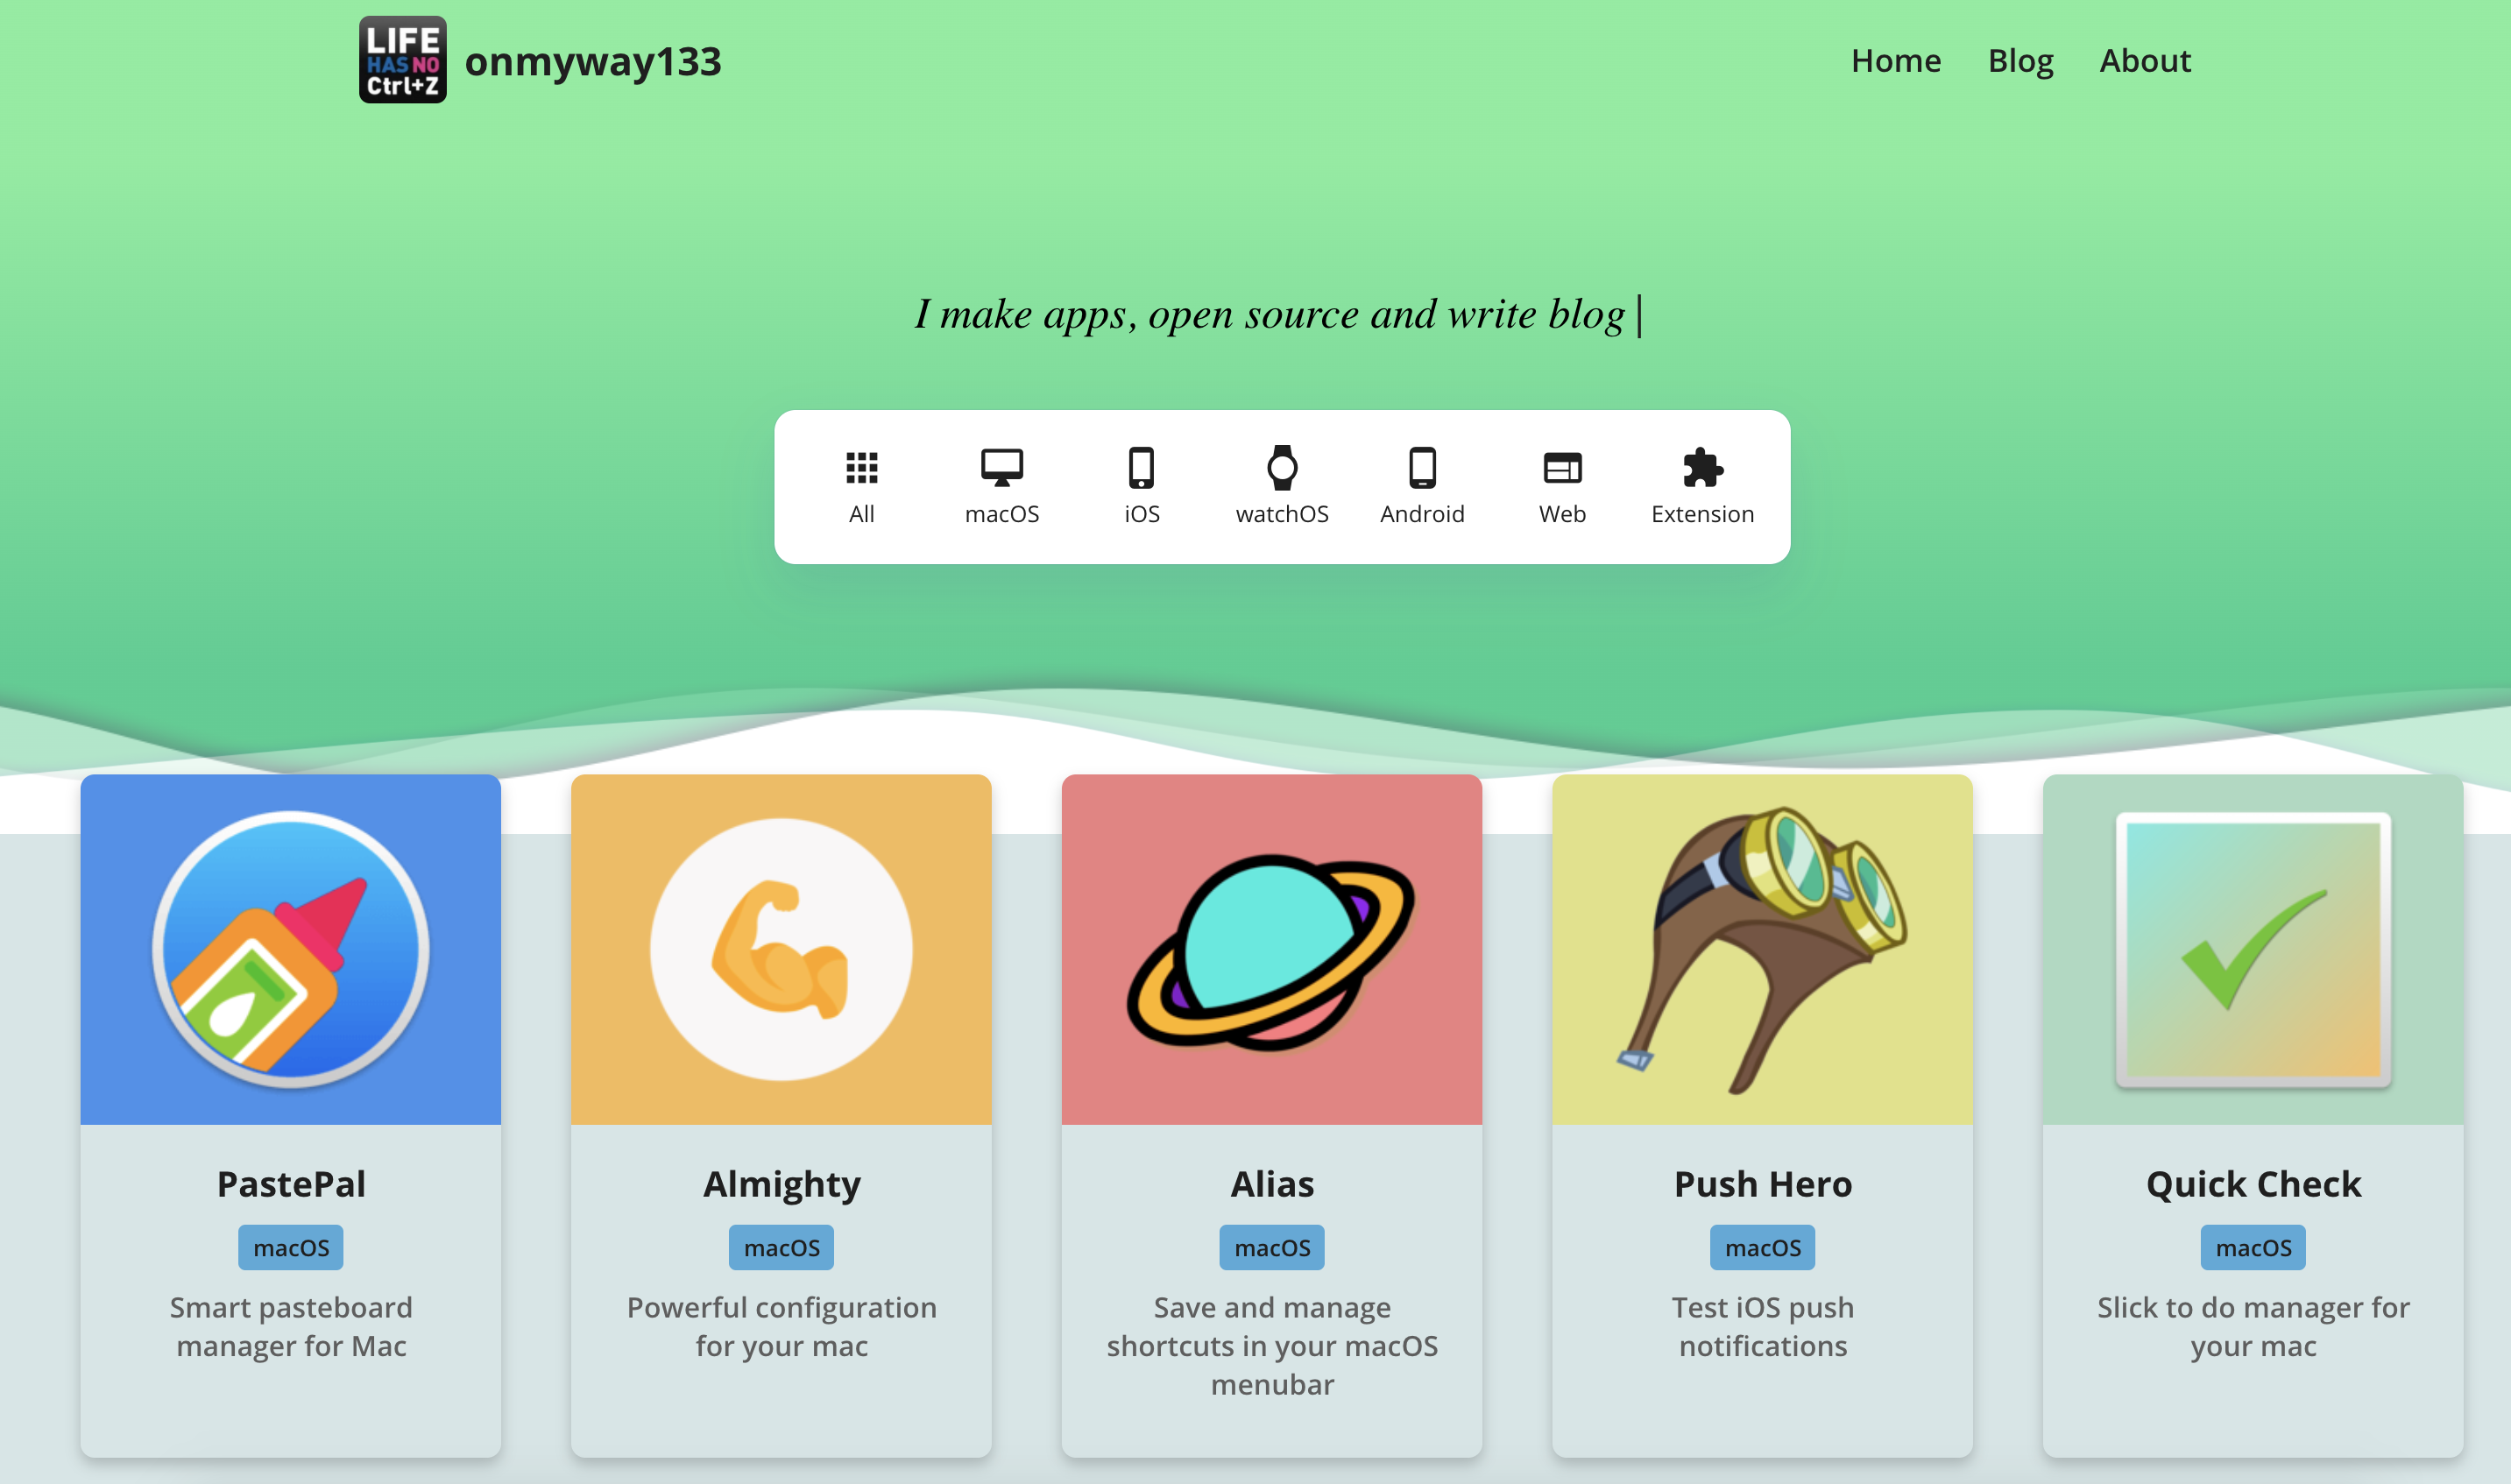
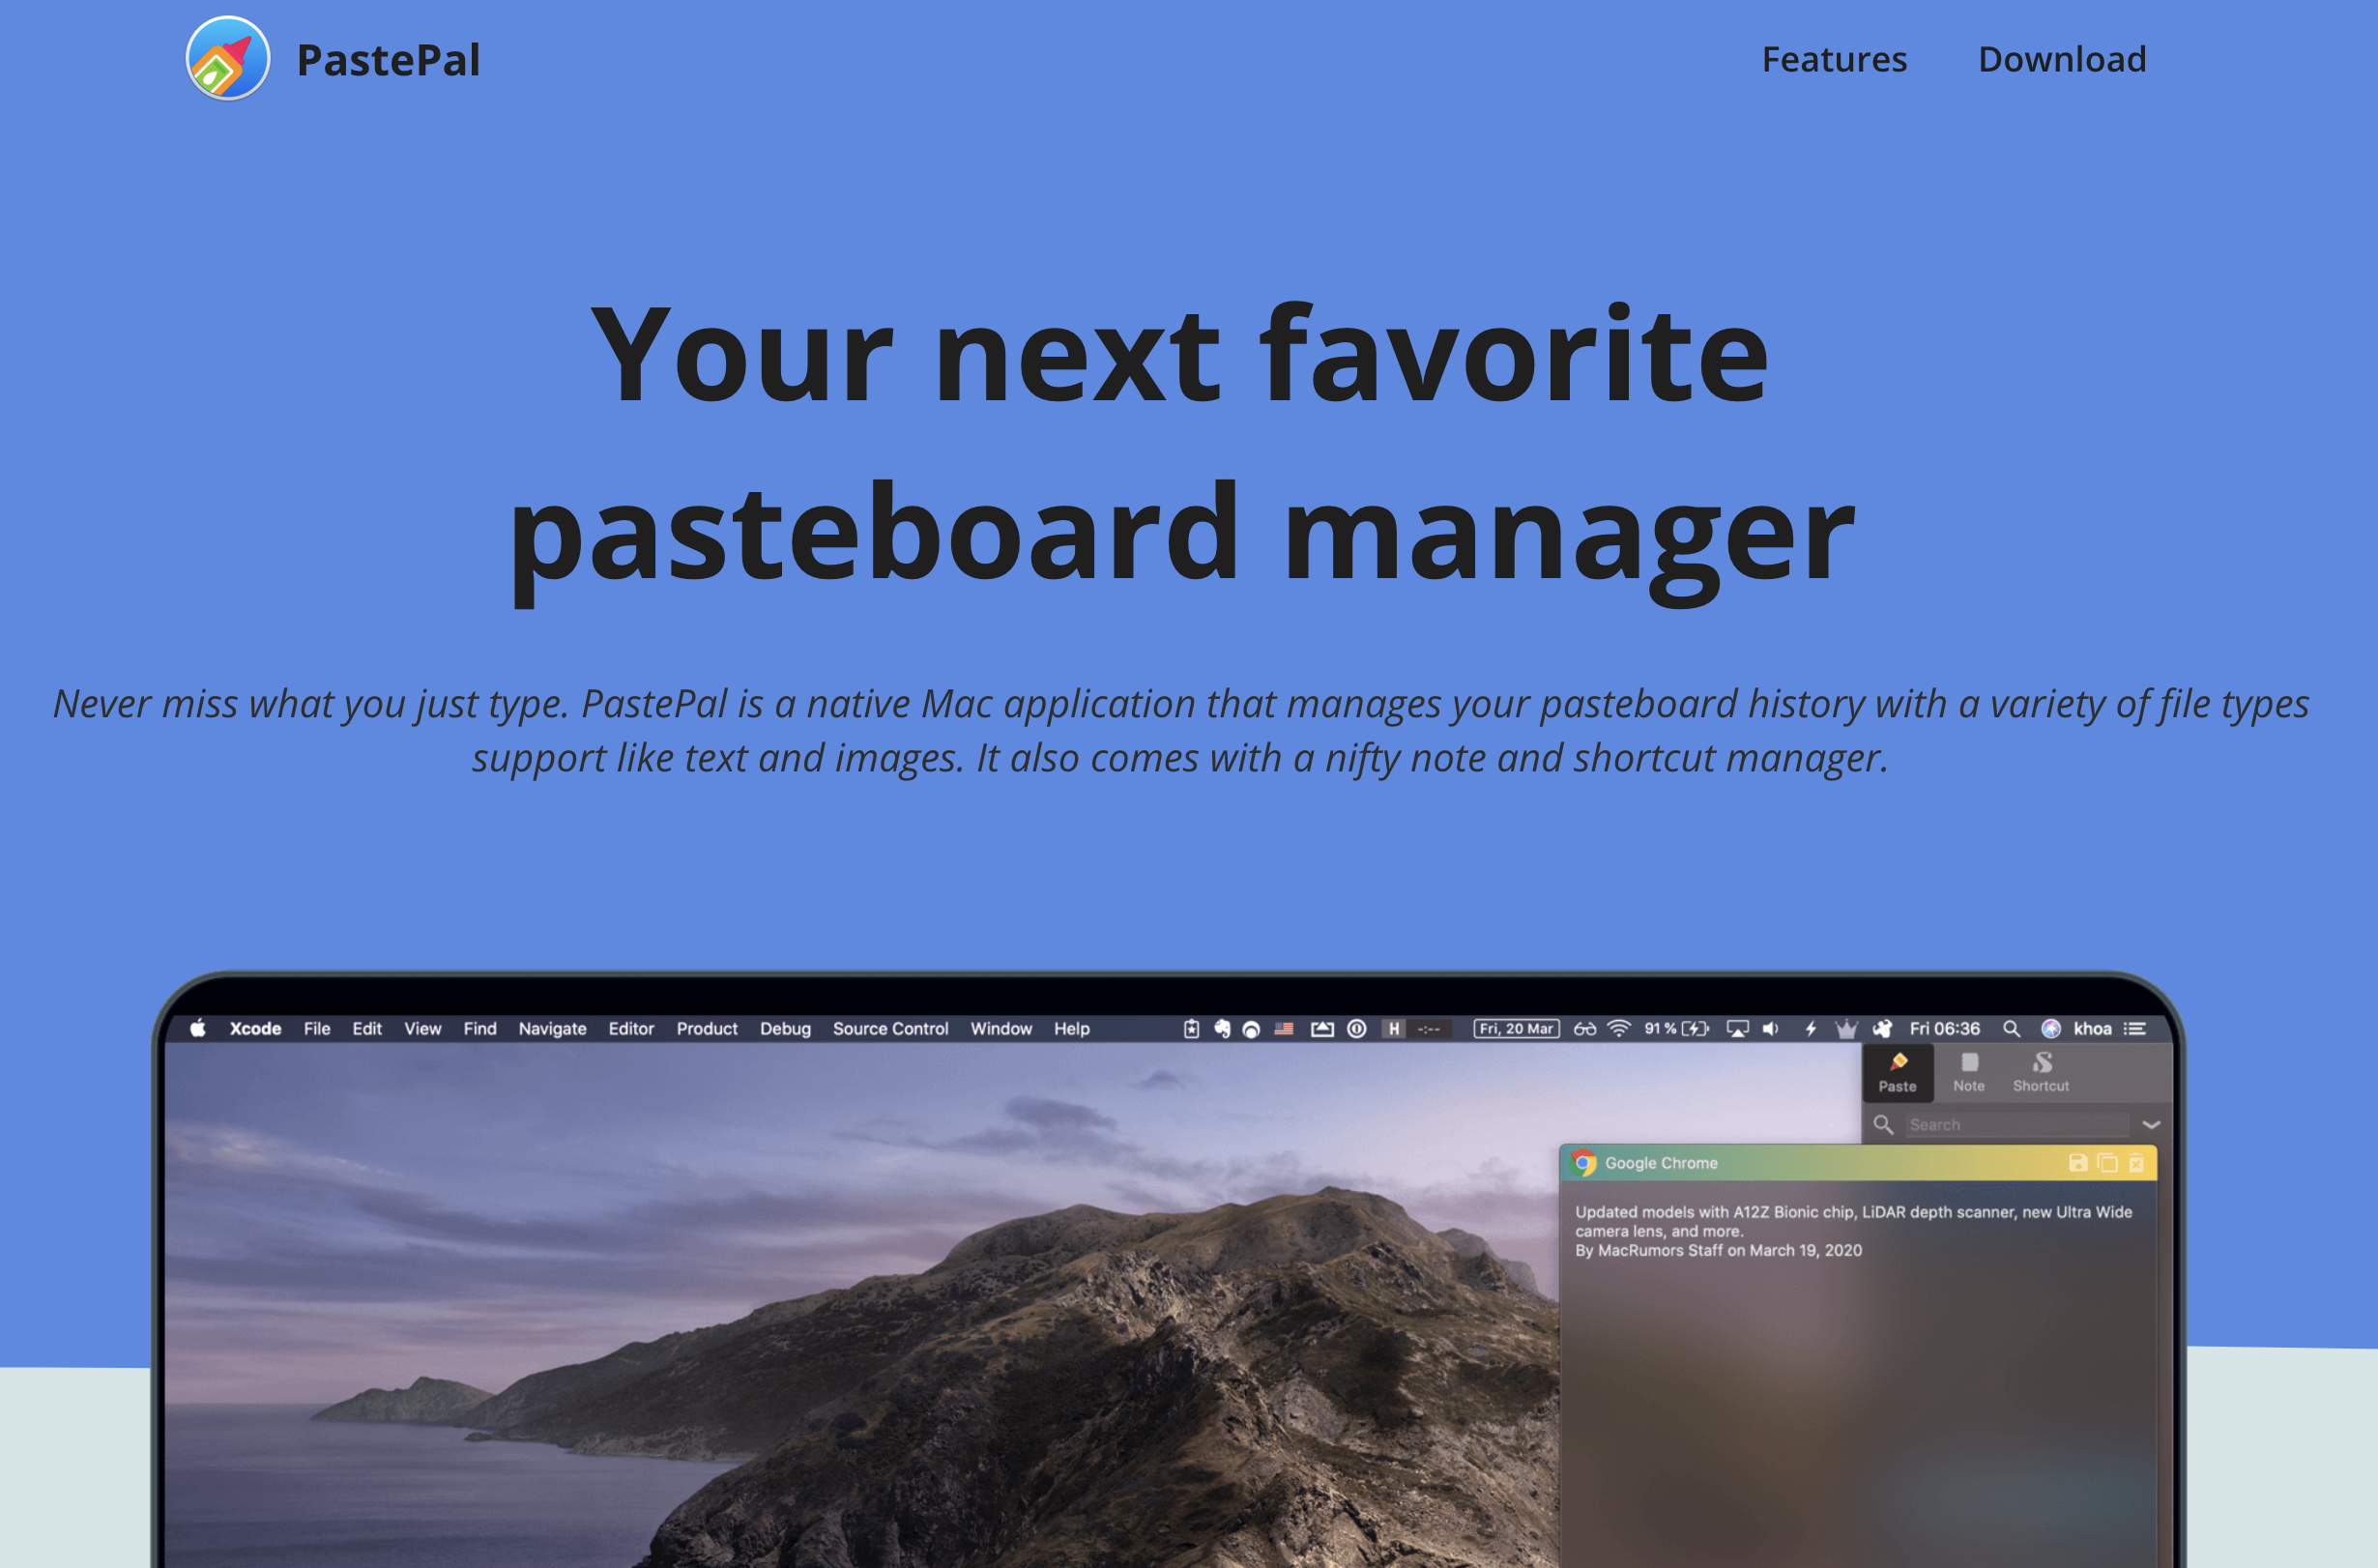
Screenshot 2020-05-14 at 05 47 28 Screenshot 2020-05-14 at 05 48 01 Screenshot 2020-05-14 at 05 47 45

Create a landing page in pure html and javascript

The first version that I built is with pure html and javascript. It has a lot of boilerplate and I need to deal with Webpack eventually to obfuscate my code.

1
2
3
4
5
6
7
8
9
10
11
12
13
14
15
16
17
18
19
20
21
const cards = Array.from(apps).map((app) => {
const a = document.createElement('a')
container.appendChild(a)

const card = document.createElement('div')
card.className = 'card'
a.appendChild(card)

// top
const imageContainer = document.createElement('div')
imageContainer.className = 'image-container'
card.appendChild(imageContainer)
if (app.background !== undefined) {
imageContainer.style.backgroundColor = app.background
} else {
imageContainer.style.backgroundColor = 'rgba(200, 200, 200, 1.0)'
}

const image = document.createElement('img')
image.src = `../${app.slug}/icon.png`
imageContainer.appendChild(image)

Since they are in pure html and javascript, everyone can just open browser and view source code, which is not ideal, so I need to fiddle with Webpack and other uglify and minimize tools to obfuscate the code, like How to use webpack to bundle html css js

1
2
3
4
5
6
7
8
9
10
11
12
13
14
15
16
17
18
19
20
21
22
23
24
25
npm init
npm install webpack webpack-cli --save-dev
npm install babel-minify-webpack-plugin --save-dev
npm install html-webpack-plugin --save-dev

const MinifyPlugin = require('babel-minify-webpack-plugin');
const HtmlWebpackPlugin = require('html-webpack-plugin')

module.exports = {
entry: "./index.js",
mode: 'production',
output: {
filename: "./index.js"
},
plugins: [
new MinifyPlugin(),
new HtmlWebpackPlugin({
template: 'index.html',
filename: 'index.html',
minify: {
collapseWhitespace: true
}
})
]
}

And with external css sheets, finding and renaming class list names take some time.

Create a landing page in React

I use create-react-app to generate my React app as it sets up JSX, Babel, Webpack, hot reloading and development server for me.

Inline css

I like js, css and html be part of the same component file, so I prefer inline css. I tried styled-components before but then I found emotion to be much easier to use and close to css. I also don’t like declaring unnecessary local variables style in styled-components.

Here is a good comparison between the 2 styled-components-vs-emotion

1
2
3
4
5
6
7
8
9
10
11
12
13
14
15
// styled-components
// CSS syntax in tagged template literal
const Title = styled.h1`
font-size: 1.5em;
text-align: center;
color: palevioletred;
`
render(<Title>Hiya!</Title>)

// Object syntax
const button = styled.button({
fontSize: '1.5em',
textAlign: 'center',
color: 'palevioletred'
});
1
2
3
4
5
6
7
8
9
10
11
12
13
14
15
16
17
18
19
20
21
22
// emotion
// CSS syntax in tagged template literal
render(
<h1
className={css`
font-size: 1.5em;
text-align: center;
color: palevioletred;
`}
>
Hiya!
</h1>
)

// Object syntax
const titleStyles = css({
fontSize: '1.5em',
textAlign: 'center',
color: 'palevioletred'
})

render(<h1 className={titleStyles}>Hiya!</h1>)

Use emotion for inline css

I detail here How to use emotion for inline css in React

Emotion has core and styled styles. I usually use the css inline syntax, so I can just install the core

1
npm i @emotion/core

Note that we have to declare jsx directive at the top of every file.

1
2
3
4
5
6
7
8
9
10
11
12
13
14
15
16
17
18
19
20
21
// this comment tells babel to convert jsx to calls to a function called jsx instead of React.createElement
/** @jsx jsx */
import { css, jsx } from '@emotion/core'

const color = 'white'

render(
<div
css={css`
padding: 32px;
background-color: hotpink;
font-size: 24px;
border-radius: 4px;
&:hover {
color: ${color};
}
`}
>
Hover to change color.
</div>
)

One cool thing with inline css is they are just javascript code so it’s pretty easy to apply logic code, like in How to conditionally apply css in emotion js

1
2
3
4
const shadowCss = feature.shadow ? css`
border-radius: 5px;
box-shadow: 0 4px 8px 0 rgba(0, 0, 0, 0.2), 0 6px 20px 0 rgba(0, 0, 0, 0.19);
` : css``

Components based

When a component gets too big, I extract it to small components, in the end I have a bunch of them

1
2
3
4
5
6
import Footer from './components/Footer'
import Download from './components/Download'
import ProductHunt from './components/ProductHunt'
import Header from './components/Header'
import Headline from './components/Headline'
import Features from './components/Features

and I stack them vertically, using flexbox and css grid

Responsiveness with flexbox and css grid

I used flexbox mostly at first, but then I gradually convert some of them to css grid when I see fit. To stack vertically with flexbox, I use flex-direction

1
2
display: flex;
flex-direction: column

where as in css grid items are stacked vertically by default, if we want multiple columns, specify grid-template-columns

1
2
display: grid;
grid-template-columns: 1fr 1fr;

I use flex-wrap: wrap in some places to wrap content, but in some places I see specifying media query and changing columns in css grid is more easier and predictable

1
2
3
4
5
6
7
8
display: grid;
grid-template-columns: 1fr 1fr;
grid-gap: 8vw;
align-items: center;

@media (max-width: 500px) {
grid-template-columns: 1fr;
}

Audit with Lighthouse

Google Lighthouse is the most popular tool to audit website for performance and SEO. I use it to reduce image size, add correct html attributes and make it more SEO friendly.

Prepare a list of app

I have my list of apps in 1 javascript file, called factory.js, for example here with PastePal

1
2
3
4
5
6
7
8
9
10
11
12
const factory = [
{
name: 'PastePal',
slug: 'pastepal',
header: {
background: '#5488E5'
},
headline: {
title: 'Your next favorite pasteboard manager',
text: 'Never miss what you just type. PastePal is a native Mac application that manages your pasteboard history with a variety of file types support like text and images. It also comes with a nifty note and shortcut manager.',
image: 'banner.png',
},

In my package.json for my landing page, I declare a property called currentApp. This is to specify which app I’m currently work on. Later in the generator script, we can just update this for every app that we build.

1
2
3
4
5
6
{
"name": "landing",
"version": "0.1.0",
"private": true,
"homepage": ".",
"currentApp": "pastepal",

Here is how to read that value from my landing app

1
2
3
4
5
6
7
8
9
10
11
12
13
14
15
16
17
18
19
20
21
22
23
24
25
26
27
import factory from './apps/factory'
import pkg from '../package.json'

class App extends React.Component {
constructor(props) {
super(props)
this.state = {}
}

componentWillMount() {
let key = pkg.currentApp
if (key === undefined) {
key = 'pastepal'
}

const app = factory.filter((app) => { return app.slug === key })[0]
this.setState(app)
}

render() {
return (
<div>
<Page app={this.state} />
</div>
)
}
}

Deployment

One thing with create-react-app is that built assets are relative to the root, not your index.html

npm run build creates a build directory with a production build of your app. Set up your favorite HTTP server so that a visitor to your site is served index.html, and requests to static paths like /static/js/main..js are served with the contents of the /static/js/main..js file. For more information see the production build section.

If you are not using the HTML5 pushState history API or not using client-side routing at all, it is unnecessary to specify the URL from which your app will be served. Instead, you can put this in your package.json:

1
"homepage": ".",

This will make sure that all the asset paths are relative to index.html. You will then be able to move your app from http://mywebsite.com to http://mywebsite.com/relativepath or even http://mywebsite.com/relative/path without having to rebuild it.

Build a generator script to generate many landing pages

I make another nodejs project called generator, it will use my landing project as template, changes a few parameters and build each app defined in factory.js.

My factory use export default syntax, so I need to use Babel in my node app to import that, see How to use babel 7 in node project

1
2
3
4
npm init generator
npm install @babel/core
npm install @babel/cli
npm install @babel/preset-env
1
2
3
{
"presets": ["@babel/preset-env"]
}

Update currentApp

I use sync methods of fs to not have to deal with asynchrony.

1
2
3
4
const pkPath = `/Users/khoa/projects/anding/package.json`
const json = JSON.parse(fs.readFileSync(pkPath, 'utf8'))
json.currentApp = app.slug
fs.writeFileSync(pkPath, JSON.stringify(json, null, 2))

Execute shell command

I use shelljs to execute shell commands, and fs to read and write. In public/index.html specify some placeholder and we will replace those in our script.

In landing app, the public/index.html acts as the shell when building the app, so I have a few placeholder called CONSTANTS, these will be replaced at generation time in my node app.

1
2
3
4
5
6
7
8
9
10
11
12
13
14
15
16
const fs = require('fs');
const shell = require('shelljs')

let indexHtml = fs.readFileSync(publicIndexHtmlPath, 'utf8')
indexHtml = indexHtml
.replace('CONSTANT_HTML_TITLE', `${app.name} - ${app.headline.title}`)
.replace('CONSTANT_HTML_META_DESCRIPTION', app.headline.text)

fs.writeFileSync(publicIndexHtmlPath, indexHtml)

// build
shell.cd('projects/my_react_app')
shell.exec('npm run build')

// copy
shell.exec(`cp -a projects/my_react_app web_server/public`)

Updated at 2020-05-14 04:25:39

How to make white label React app

Issue #654

Use shelljs to execute shell commands, and fs to read and write. In public/index.html specify some placeholder and we will replace those in our script

1
2
3
4
5
6
7
8
9
10
11
12
13
14
15
16
const fs = require('fs');
const shell = require('shelljs')

let indexHtml = fs.readFileSync(publicIndexHtmlPath, 'utf8')
indexHtml = indexHtml
.replace('CONSTANT_HTML_TITLE', `${app.name} - ${app.headline.title}`)
.replace('CONSTANT_HTML_META_DESCRIPTION', app.headline.text)

fs.writeFileSync(publicIndexHtmlPath, indexHtml)

// build
shell.cd('projects/my_react_app')
shell.exec('npm run build')

// copy
shell.exec(`cp -a projects/my_react_app web_server/public`)

How to show lightbox in React

Issue #653

Use https://github.com/biati-digital/glightbox

Configure css. Specify class='glightbox for html elements

1
<link rel="stylesheet" href="css/blueimp-gallery.min.css" />

Install package

1
2
npm install glightbox
import GLightbox from 'glightbox'
1
2
3
4
5
6
7
8
9
10
11
12
13
14
15
16
17
18
19
20
21
22
23
24
const lbElements = features.map((feature) => {
return {
'href': require(`../apps/${app.slug}/${feature.image}`),
'type': 'image',
'title': feature.title,
'description': feature.texts[0],
}
})

const openLb = () => {
const lightbox = GLightbox({
touchNavigation: true,
loop: true,
autoplayVideos: true,
onOpen: () => {},
beforeSlideLoad: (slide, data) => {}
});

const myGallery = GLightbox({
elements: lbElements,
autoplayVideos: false,
});
myGallery.open()
}}

How to animate on scroll in React

Issue #652

Use https://github.com/michalsnik/aos

Add link to head

1
2
3
<head>
<link rel="stylesheet" href="https://unpkg.com/aos@next/dist/aos.css" />
</head>

Jus before closing body tag

1
2
3
4
<script src="https://unpkg.com/aos@next/dist/aos.js"></script>
<script>
AOS.init();
</script>

Specify data-aos

1
2
3
<div data-aos="fade-up">

</div>

How to conditionally apply css in emotion js

Issue #649

Check flag then define css

1
2
3
4
5
6
7
8
9
10
11
12
13
14
15
16
17
18
19
20
21
22
23
24
const Picture = (feature) => {
const shadowCss = feature.shadow ? css`
border-radius: 5px;
box-shadow: 0 4px 8px 0 rgba(0, 0, 0, 0.2), 0 6px 20px 0 rgba(0, 0, 0, 0.19);
` : css``

return (
<div css={css`
width: 40vw;
@media (max-width: 420px) {
width: 98vw;
}
`}>
<div css={shadowCss}>
<img css={css`
max-width: 100%;
height: auto;
`}
src={require(`../apps/${feature.image}`)}
/>
</div>
</div>
)
}

How to scroll to element in React

Issue #648

In a similar fashion to plain old javascript, note that href needs to have valid hash tag, like #features

1
2
3
4
5
6
7
8
9
10
11
<a
href='#features'
onClick={() => {
const options = {
behavior: 'smooth'
}
document.getElementById('features-section').scrollIntoView(options)
}}
>
Features
</a>

Updated at 2020-05-06 08:36:21

How to use emotion for inline css in React

Issue #647

emotion can be used in framework agnostic or with React. To use with React, follow https://emotion.sh/docs/introduction#react

1
npm i @emotion/core

Note that you must have /** @jsx jsx */ at the top of the file, and the unused jsx in import is a directive for JSX to work properly

1
2
3
4
5
6
7
8
9
10
11
12
13
14
15
16
17
18
19
20
21
// this comment tells babel to convert jsx to calls to a function called jsx instead of React.createElement
/** @jsx jsx */
import { css, jsx } from '@emotion/core'

const color = 'white'

render(
<div
css={css`
padding: 32px;
background-color: hotpink;
font-size: 24px;
border-radius: 4px;
&:hover {
color: ${color};
}
`}
>
Hover to change color.
</div>
)

How to use React JSX with Babel in Electron

Issue #352

For a normal electron app created with npm init, we can use all features of ES6, but not the JSX syntax for React. We can use just Babel to transpile JSX, as used in IconGenerator

.babelrc

1
2
3
4
5
6
{
"plugins": [
"transform-react-jsx-source"
],
"presets": ["env", "react"]
}

And in package.json, call babel to transpile src to dist

1
2
3
4
5
"main": "dist/main.js",
"scripts": {
"start": "npm run babel && electron .",
"babel": "babel ./src --out-dir ./dist --copy-files"
},

Remember to use dist/main.js as our starting point, and in index.html, specify ./dist/renderer.js

1
2
3
4
5
6
<body>
<div id="root" />
<script type="text/javascript">
require('./dist/renderer.js')
</script>
</body>

How to catch error in ApolloClient

Issue #192

Read https://www.apollographql.com/docs/react/features/error-handling
How to catch actual error https://github.com/apollographql/apollo-client/issues/4016 🤔

1
2
3
4
5
6
7
8
9
10
11
12
13
14
15
16
17
18
19
20
21
22
23
24
25
26
27
28
29
30
31
32
33
34
35
36
37
38
39
40
41
42
43
44
45
46
47
48
49
50
51
52
53
54
55
56
57
58
59
60
61
62
63
64
65
66
67
68
69
70
71
72
73
74
75
import { Observable } from 'apollo-link'
import ApolloClient from 'apollo-boost'
import Token from 'library/models/Token'
import TokenService from './TokenService'
import { TokenRefreshException } from 'library/utils/Exception'

const client = new ApolloClient({
uri: 'https://www.myapp.no/api/',
request: async (operation) => {
const token = await TokenService.loadToken()
updateOperation(operation, token)
},
onError: (error) => {
console.log('ApolloClient error', error)
if (isAuthError(error)) {
return handleAuthError(error)
} else {
return error.forward(error.operation)
}
},
fetchOptions: {
mode: 'no-cors',
}
})

const isValidErrorCode = (statusCode) => {
if (typeof (statusCode) === 'undefined' || statusCode === null) {
return false
} else {
return true
}
}

const isAuthError = (error) => {
console.log('client error', error)
if (error.networkError) {
return error.networkError.statusCode === 401
} else {
return false
}
}

const handleAuthError = (error) => {
return new Observable((observer) => {
TokenService.refreshToken()
.then((token) => {
updateOperation(error.operation, token)
})
.then(() => {
const subscriber = {
next: observer.next.bind(observer),
error: observer.error.bind(observer),
complete: observer.complete.bind(observer)
}

error.forward(error.operation).subscribe(subscriber)
})
.catch((e) => {
observer.error(e)
})
})
}

const updateOperation = (operation, token: Token) => {
const tokenHeader = `${token.token_type} ${token.access_token}`

operation.setContext((context) => {
return {
headers: {
authorization: tokenHeader,
'Content-Type': 'application/json'
}
}
})
}

How to handle file picker in React

Issue #190

1
2
3
4
5
6
7
8
9
10
11
12
13
14
render() {
<Button color="inherit" onClick={this.onImagePress} >Image</Button>
<input ref="fileInput" type="file" id="myFile" multiple accept="image/*" style={{display: 'none'}} onChange={this.handleFiles}></input>
}

onImagePress = () => {
const fileInput = this.refs.fileInput
fileInput.click()
}

handleFiles = (e) => {
e.persist()
const file = e.target.files[0]
}